Quick Answer
How to Season a Pan is easiest to handle when you make one clear kitchen decision at a time. Use the table and steps below to identify the likely cause, choose the safest next move, and avoid changing several variables at once.
CookBuddy Kitchen Note
For How to Season a Pan, the practical test is to change one pan variable at a time. Pan temperature, surface moisture, oil timing, and when you move the food are easier to judge separately than all at once.
Decision table
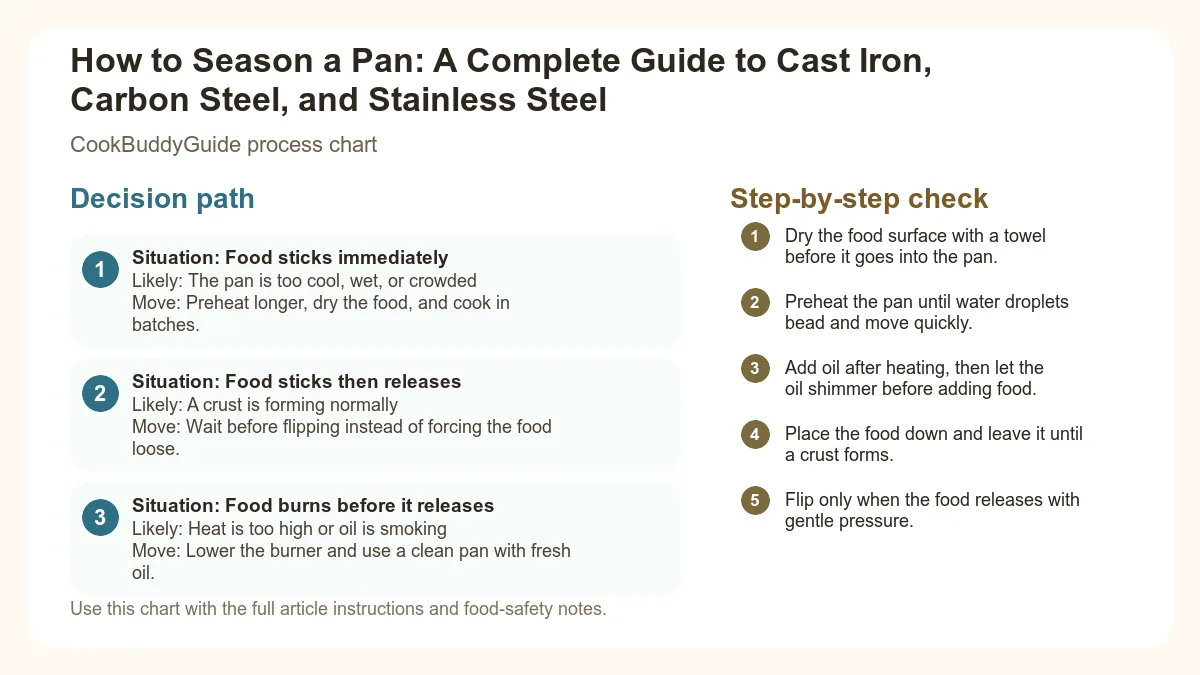
| Situation | Likely cause or meaning | Best move |
|---|---|---|
| Food sticks immediately | The pan is too cool, wet, or crowded | Preheat longer, dry the food, and cook in batches. |
| Food sticks then releases | A crust is forming normally | Wait before flipping instead of forcing the food loose. |
| Food burns before it releases | Heat is too high or oil is smoking | Lower the burner and use a clean pan with fresh oil. |
Step-by-step fix
- Dry the food surface with a towel before it goes into the pan.
- Preheat the pan until water droplets bead and move quickly.
- Add oil after heating, then let the oil shimmer before adding food.
- Place the food down and leave it until a crust forms.
- Flip only when the food releases with gentle pressure.
Common mistakes
- Adding food before the pan is fully preheated.
- Putting wet protein or vegetables straight into hot oil.
- Moving food before a crust has time to form.
- Crowding the pan until food steams instead of browns.
Useful next reads
Helpful tools for this guide
- stainless steel spatula
- instant-read thermometer
- neutral cooking oil
- splatter screen
Related topic hubs
How to Season a Pan: A Complete Guide to Cast Iron, Carbon Steel, and Stainless Steel
You’ve finally treated yourself to that heavy-duty skillet you’ve seen in every professional kitchen, but the first time you try to fry an egg, it ends up looking like a shredded mess bonded to the metal. It’s 7:00 AM, you’re hungry, and you’re currently scrubbing a pan with more frustration than success. We’ve all been there. In my 15 years of testing recipes and cookware for CookBuddyGuide.com, I’ve learned that the secret to a kitchen that runs smoothly isn't just the quality of your ingredients—it’s knowing how to season a pan properly.
Whether you are dealing with a rugged cast iron skillet, a sleek carbon steel wok, or a shimmering stainless steel pan, the way you prepare the surface dictates your entire cooking experience. Understanding seasoning different pan types is the difference between a steak that releases with a perfect crust and one that leaves half its flavor stuck to the bottom of the pan. Today, we are going to dive deep into the science, the methods, and the maintenance of your cookware to ensure you never fear a "sticky" situation again.
Table of Contents
- Why Seasoning Matters: The Science of the Non-Stick Surface
- Seasoning vs. Preheating: Clearing the Confusion
- Choosing the Best Oils for Seasoning Different Pan Types
- How to Season a Cast Iron Pan: The Definitive Method
- Seasoning Carbon Steel: Achieving the Perfect Blue Patina
- The Stainless Steel Secret: Preheating for Success
- How Proper Pan Preparation Prevents Sticking
- Troubleshooting: Sticky, Flaking, or Rusting?
- Daily Care and Maintenance
Why Seasoning Matters: The Science of the Non-Stick Surface
When we talk about "seasoning," we aren't talking about salt and pepper. In the world of metallurgy and cooking, seasoning refers to a hard, protective coating formed by the chemical reaction of fat and heat. To understand how to season a pan, you first have to understand the canvas you’re working on: ferrous metal.
What is Polymerization?
At a microscopic level, the surface of a cast iron or carbon steel pan is not smooth; it’s full of tiny peaks and valleys. If you cook on this raw surface, proteins in your food will seep into those pores and create a physical bond—this is why food sticks. Polymerization is the process where liquid fats are heated to their smoke point, causing them to break down and link into long-chain polymers. This transforms the oil into a hard, plastic-like solid that is chemically bonded to the metal. This science of seasoning cast iron is what creates that coveted non-stick performance without the need for synthetic coatings like Teflon.
The Role of Fat and Heat in Creating a Patina
Every time you cook with fat in your skillet, you are adding seasoning layers. Over time, these layers build up to create a patina—a dark, slick surface that becomes more durable with age. A "clean" pan in the eyes of a novice might look shiny and silver, but a "seasoned" pan is deep black and matte. In my testing, I’ve found that a well-earned patina is tougher than any factory-applied coating. It’s not just about aesthetics; it’s about creating a hydrophobic barrier that repels water and prevents rust while allowing food to slide across the surface.
Seasoning vs. Preheating: Clearing the Confusion
One of the biggest mistakes I see home cooks make is confusing long-term maintenance seasoning with the act of preheating. These are two distinct processes, and using the wrong one for the wrong pan is a recipe for disaster.
Long-term Maintenance Seasoning
This is the "permanent" base layer. You do this with cast iron and carbon steel. It involves baking oil into the metal in an oven to create a semi-permanent bond. You don't do this every time you cook; you do it when the pan is new, or if the seasoning has been stripped. This is what we call cast iron maintenance.
Preheating Before Each Use (The Flash Seasoning)
Stainless steel is a different beast. You do not "season" stainless steel in the oven. Because the metal is less porous and contains chromium, it doesn't hold onto polymerized oil the same way. Instead, stainless steel requires "temporary seasoning" through temperature control. This is often achieved via the Leidenfrost effect, which we will discuss later. If you try to bake layers of oil onto stainless steel like you do with cast iron, you’ll just end up with a sticky, brown mess that is incredibly difficult to clean.
Choosing the Best Oils for Seasoning Different Pan Types
Not all fats are created equal. If you use the wrong oil, your seasoning will either be too soft, smell rancid, or flake off into your food. The most critical factor here is the seasoning oil smoke point.
High Smoke Point vs. Low Smoke Point Oils
To achieve polymerization, you must heat the oil past its smoke point. If you use an oil with a very low smoke point, like extra virgin olive oil or butter, it will burn and turn acrid before it can properly polymerize. Conversely, if you use an oil with an incredibly high smoke point like avocado oil (520°F), you have to get your oven dangerously hot to achieve the desired effect.
The Flaxseed Oil Controversy
A few years ago, flaxseed oil became the "gold standard" for seasoning because it is a drying oil that hardens very quickly. However, after using it on three of my own skillets, I discovered a major flaw: it is too hard. It becomes brittle and tends to flake off in large scales after a few months of use. I now advise my readers to avoid it for initial seasoning.
Top Recommendations: Grapeseed, Canola, and Avocado Oil
In my kitchen, grapeseed oil for seasoning is the winner. It has a moderately high smoke point (around 420°F), it’s affordable, and it creates a very tough, smooth bond. Canola oil is a great, budget-friendly second choice. According to the best oils for seasoning pans guide by Lodge, highly unsaturated fats are better at polymerizing than saturated fats like lard.
Oil Smoke Point Comparison Chart
- Grapeseed Oil: 420°F (Best all-around)
- Canola Oil: 400°F (Great budget option)
- Avocado Oil (Refined): 520°F (Good for high-heat cooking)
- Lard/Shortening: 370°F (Traditional, but softer seasoning)
- Flaxseed Oil: 225°F (Not recommended due to flaking)
How to Season a Cast Iron Pan: The Definitive Method
If you’ve just bought a raw cast iron pan, or if you’ve found a rusty one at a garage sale and performed the task of stripping a pan, you need to build the foundation. The oven seasoning method is the most reliable way to get an even, durable coat.
The Master Oven Seasoning Method
- Clean: Wash the pan with warm, soapy water. Yes, soap is fine for this step! Dry it thoroughly with a lint-free cloth.
- Warm: Place the pan in a 200°F oven for 10 minutes. This opens the pores of the metal and ensures it is bone-dry.
- Oil: Remove the pan (use mitts!) and apply a half-teaspoon of grapeseed or canola oil. Rub it all over the inside, outside, and handle.
- Buff: This is the most important step. Take a clean paper towel and wipe all the oil off. You want the pan to look dry, as if there is no oil left. If the layer is too thick, it will become sticky.
- Bake: Place the pan upside down in a 450°F oven. Place a sheet pan on the rack below to catch any stray drips. Bake for 60 minutes.
- Cool: Turn off the oven and let the pan cool completely inside. Repeat this process 2-3 times for a brand-new pan.
Stovetop Touch-ups for Daily Maintenance
You don't need to do the full oven method every week. After cooking, I usually do a "stovetop touch-up." Clean the pan, dry it on a burner over medium heat, apply a tiny drop of oil, wipe it until it’s gone, and heat it until it just starts to smoke. Turn off the heat and let it cool. This keeps the non-stick performance at its peak.
Seasoning Carbon Steel: Achieving the Perfect Blue Patina
Carbon steel is the darling of professional chefs. It’s lighter than cast iron but holds seasoning just as well. However, the initial process is slightly different. Most carbon steel pans come with a factory wax coating to prevent rust during shipping. You must remove this before you start.
The 'Blueing' Process for New Carbon Steel
Before you even add oil, you can "blue" the steel. By heating a clean, dry carbon steel pan over high heat, the metal will change colors—from silver to straw, to purple, and finally to a deep blue. This oxidation layer helps the seasoning bond more deeply. It’s a technique often used for seasoning your carbon steel pan effectively.
The Potato Skin and Salt Method
A classic French technique for carbon steel seasoning involves potato skins. The starch and salt help scrub away factory residue while the oil starts the seasoning process.
- Fill the pan with 1/3 cup oil, 2/3 cup salt, and the skins of two potatoes.
- Cook over medium heat, moving the skins around the sides of the pan for about 15 minutes.
- Discard the skins, rinse with hot water, and dry.
When your carbon steel pan is properly seasoned, it shouldn't look "clean." It should look mottled, dark, and almost "dirty." That is the sign of a pan patina that is ready for a high-heat sear. If you're looking for dinner inspiration to test out your newly seasoned pan, check out these versatile sheet pan dinner ideas.
The Stainless Steel Secret: Preheating for Success
I hear it all the time: "I hate stainless steel; everything sticks!" The truth is, you aren't using the pan correctly. Stainless steel doesn't need a permanent seasoning; it needs physics. Specifically, it needs the Leidenfrost effect.
The Water Drop Test
When a pan is cold or only moderately warm, food (especially protein) will bond to the metal. If the pan is hot enough, a physical phenomenon occurs where a liquid creates a protective vapor layer that suspends it above the surface. You can test this with a drop of water.
- Heat your dry stainless steel pan over medium heat for 2-3 minutes.
- Drop a bit of water into the pan. If it sizzles and evaporates, the pan is too cold.
- If the water forms a single bead that glides around the pan like a marble, you have reached the Leidenfrost point.
The 'Faux-Seasoning' Method
If you want to cook something delicate like an omelet in stainless steel, you can do a "flash seasoning." Heat the pan until hot, add a tablespoon of high-smoke point oil, swirl it until it smokes, then pour out the excess oil and wipe the pan with a paper towel. Add a fresh pat of butter or oil and drop your eggs. They will slide around just like they would in a non-stick pan.
How Proper Pan Preparation Prevents Sticking
Even a perfectly seasoned pan can fail if your technique is off. How to season a pan is only half the battle; the other half is how you use it.
The Importance of Dry Food
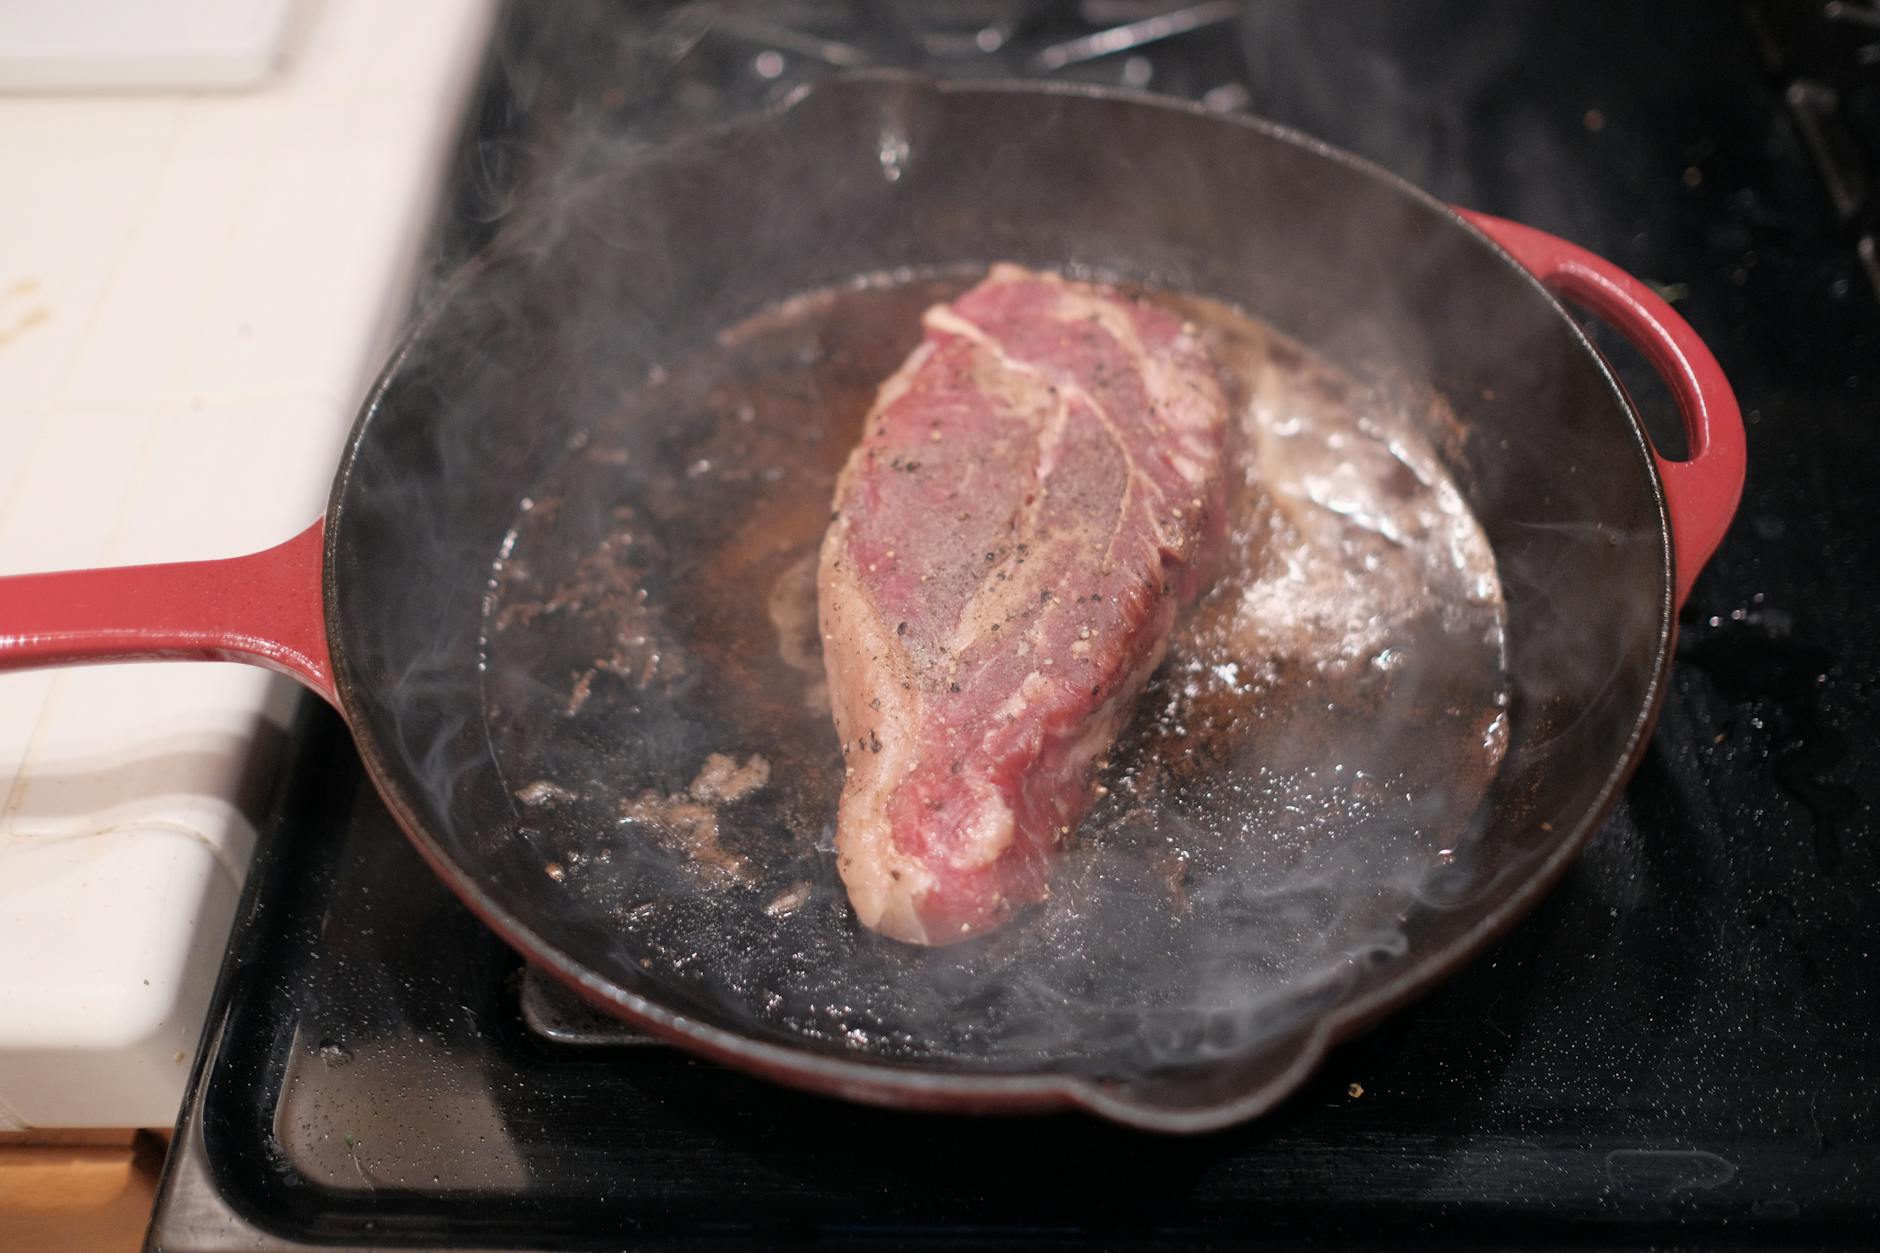
Moisture is the enemy of the Maillard reaction. If your steak or scallops are wet when they hit the pan, the energy of the heat goes into evaporating that water rather than searing the protein. This creates steam, which causes the food to "glue" itself to the metal. Always pat your food dry with paper towels before cooking.
Temperature Equilibrium
Don't cook cold meat. If you drop a fridge-cold chicken breast into a hot pan, the temperature of the pan drops instantly, and the metal "contracts" around the food. Let your proteins sit at room temperature for 20-30 minutes before they hit the heat. This ensures a more even non-stick performance.
The Role of Patience: The Tug Test
In my early days of cooking, I used to panic and try to flip meat too early. If you try to pull a piece of meat and it resists, leave it alone. When the Maillard reaction has sufficiently browned the surface, the food will naturally "release" from the pan. This is nature's way of telling you the sear is perfect.
Troubleshooting: Sticky, Flaking, or Rusting?
Even the most experienced cooks run into trouble. Here is how to fix common seasoning issues.
This is the "too much oil" syndrome. If you apply a thick layer of oil and don't wipe it off before heating, it won't polymerize correctly. Instead, it turns into a gummy resin. The fix: Scrub the pan with coarse salt and oil, or a chainmail scrubber, to remove the stickiness. If it's really bad, you may need to strip the pan and start over.
This usually happens if you used flaxseed oil or if you built up layers too quickly without letting them cure. Flaking can also happen if you cook highly acidic foods (like tomato sauce) for long periods in a young pan. Scrub away the loose flakes and apply a few fresh seasoning layers using the oven method.
Rust happens when moisture sits on ferrous metal. Don't panic. Use a bit of steel wool or a stiff brush to remove the rust spots. Once the metal is clean, you must immediately re-season it to seal the surface from oxygen.
Daily Care and Maintenance
Once you’ve achieved that perfect patina, you want to keep it. There are a lot of myths about cast iron maintenance, so let’s set the record straight.
The Truth About Soap
The "never use soap on cast iron" rule is a relic from the days when soap contained lye. Modern dish soap is gentle and will not strip a chemically bonded polymer layer. I use a drop of soap on my pans every single day. Just avoid the dishwasher at all costs—the harsh detergents and long cycles will ruin your seasoning. For more tips, check out this guide on how to maintain your pan's seasoning.
The 'Stovetop Dry' Method
Towel drying is never enough. After washing your pan, place it back on a burner over medium-low heat for 2-3 minutes. This ensures every microscopic drop of water evaporates, preventing rust. Once dry, apply a tiny drop of oil, wipe it until the pan looks matte, and store it. If you're looking for a quick meal to make in your well-maintained pan, try one of our favorite one-pot pasta recipes.
Storage Tips
If you stack your pans, place a paper towel or a felt protector between them. This prevents the bottom of one pan from scratching the seasoning off the one below it. It also helps absorb any residual moisture in the air.
Conclusion: The Reward of a Well-Seasoned Pan
Learning how to season a pan is a rite of passage for any serious home cook. It moves you away from the world of disposable, chemically-coated cookware and into a world of heirloom tools that actually get better the more you use them. It takes a little bit of patience and a lot of heat, but the first time you see a fried egg slide across a cast iron surface like it’s on ice, you’ll know it was worth the effort.
Remember: Seasoning is a journey, not a destination. Your pans will change over time. They will get scratched, they might get a little dull after a heavy searing session, but they are nearly indestructible. Keep cooking, keep oiling, and enjoy the incredible flavors that only a well-seasoned pan can provide. Happy cooking!