Quick Answer
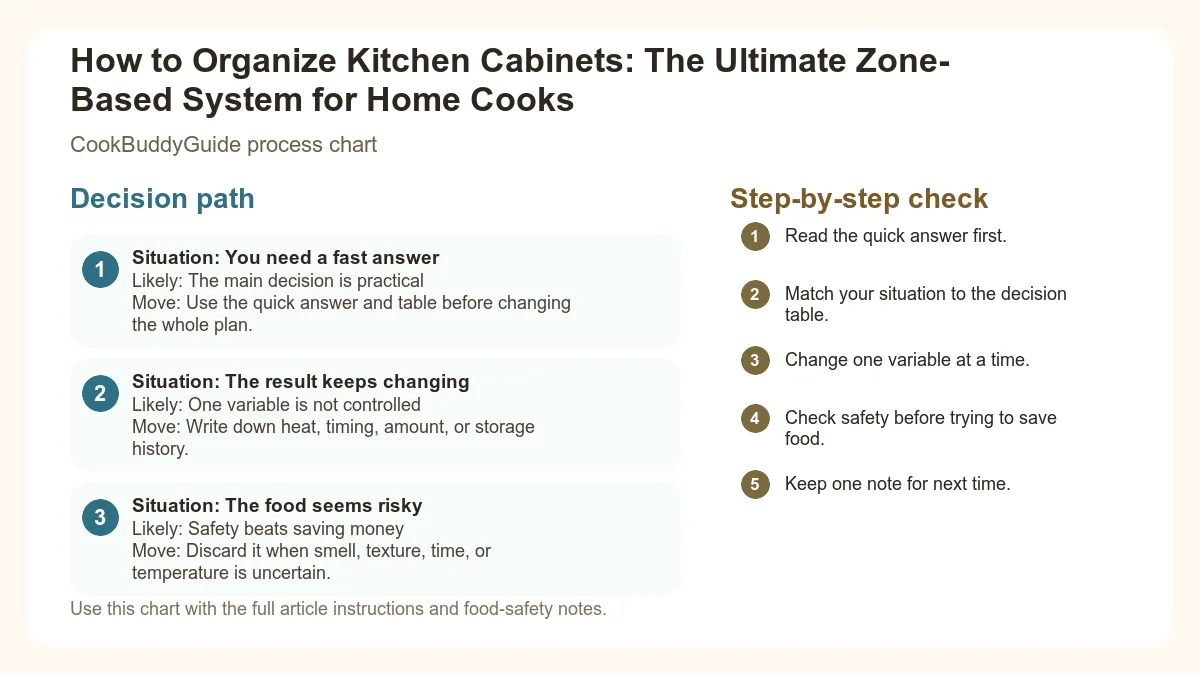
How to Organize Kitchen Cabinets is easiest to handle when you make one clear kitchen decision at a time. Use the table and steps below to identify the likely cause, choose the safest next move, and avoid changing several variables at once.
CookBuddy Kitchen Note
For How to Organize Kitchen Cabinets, this guide centers on The Full Empty-Out, Categorize Your Gear, The "Unitasker" Audit. Those are the checkpoints we would use first in a normal home kitchen before making a bigger change.
Decision table
| Situation | Likely cause or meaning | Best move |
|---|---|---|
| You need a fast answer | The main decision is practical | Use the quick answer and table before changing the whole plan. |
| The result keeps changing | One variable is not controlled | Write down heat, timing, amount, or storage history. |
| The food seems risky | Safety beats saving money | Discard it when smell, texture, time, or temperature is uncertain. |
Step-by-step fix
- Read the quick answer first.
- Match your situation to the decision table.
- Change one variable at a time.
- Check safety before trying to save food.
- Keep one note for next time.
Common mistakes
- Skipping the quick answer and changing too much at once.
- Treating quality problems and safety problems the same way.
- Not writing down the detail that caused the repeat problem.
Useful next reads
Helpful tools for this guide
- instant-read thermometer
- digital kitchen scale
- cutting board
- airtight storage containers
Related topic hubs
How to Organize Kitchen Cabinets: The Ultimate Zone-Based System for Home Cooks
It’s 6:15 PM on a Tuesday. You’re trying to get a twenty-minute pasta on the table, but you’re currently on your hands and knees, digging through a dark lower cabinet to find the colander. You move a heavy cast-iron skillet, trip over a stray lid, and realize the garlic powder is nowhere to be found. This isn't just a messy kitchen; it’s a breakdown in your kitchen workflow. After 15 years of testing recipes and managing high-volume home kitchens, I’ve learned that knowing how to organize kitchen cabinets isn't about having a "Pinterest-perfect" pantry—it’s about ergonomics and efficiency.
When your kitchen cabinet organization is aligned with how you actually move, cooking stops being a chore and starts being a craft. In this guide, I’m sharing the exact zone-based system I use to keep my kitchen running like a professional line, ensuring every tool is exactly where your hand expects it to be.
Table of Contents
- Why Kitchen Cabinet Organization Matters
- The 5-Step Decluttering Process
- The Zone-Based System: Organizing by Function
- Upper Cabinet Strategies: Everyday Essentials
- Lower Cabinet Solutions: Heavy Lifting
- Mastering the 'Problem' Areas (Lazy Susans & Spices)
- Drawer Organization Methods
- Choosing the Right Organizers: A Buyer’s Guide
- Maintaining Your System for the Long Haul
Why Kitchen Cabinet Organization Matters for the Home Cook
The Connection Between Organization and Cooking Flow
In professional kitchens, we live by the philosophy of mise en place—everything in its place. This doesn't just apply to your chopped onions; it applies to your cabinet hardware and layout. When you understand how to organize kitchen cabinets effectively, you reduce "decision fatigue." You no longer have to think about where the vegetable peeler is; your muscle memory takes over. In my own kitchen testing, I found that a logical layout streamlines your meal prep so significantly that it can shave 15 minutes off a standard dinner routine simply by eliminating the "search and rescue" missions for equipment.
Common Mistakes That Slow Down Your Meal Prep
The biggest mistake I see home cooks make is organizing by object type rather than function. For example, keeping all "plastic items" together might seem logical, but if your plastic mixing bowls are in a different cabinet than your whisks and measuring cups, you’re adding unnecessary steps to your workflow. Another common pitfall is ignoring the "prime real estate"—the area between your shoulders and knees. Storing a heavy stand mixer on a high shelf or daily cereal bowls in a deep, dark corner cabinet creates physical friction that discourages cooking.
The 5-Step Decluttering Process: Starting with a Clean Slate
Before you buy a single spice rack or lazy susan, you must declutter. You cannot organize clutter; you can only move it around. In my experience, the only way to truly reset a kitchen is the "Full Empty-Out Method."
- The Full Empty-Out: Clear every single item out of your cabinets. Yes, even the stuff in the back you haven't touched since 2019. Seeing the empty space helps you visualize the potential of your storage solutions.
- Categorize Your Gear: Create three piles: Keep, Donate, and Toss. Be ruthless. If you haven't used that specialty avocado slicer in two years, it’s a "unitasker" that is stealing valuable real estate.
- The "Unitasker" Audit: Professional kitchens rely on versatile tools. If an item only does one thing (and you don't do that thing often), donate it. Your lower cabinets will thank you.
- Deep Cleaning: With the cabinets empty, scrub the interiors. Use a vacuum attachment for crumbs and a damp microfiber cloth for dust. This is the perfect time to install fresh non-slip liners.
- Check Expiration Dates: You’d be surprised how many 2014-era spice jars are lurking in the back. Spices lose their potency after 6-12 months; if it doesn't have a strong aroma, toss it.
Pro Tip: The "Triage" Box
If you're unsure about an item, put it in a "Triage Box" in the garage or a closet. If you don't go looking for it within three months, you don't need it. This is how I finally convinced myself to get rid of a bulky, third-string food processor that was hogging my deep cabinets.
The Zone-Based System: Organizing by Cooking Function
To master kitchen cabinet organization, you must think in zones. According to the five essential kitchen work zones, a kitchen should be divided into specific areas: Consumables, Non-consumables, Cleaning, Preparation, and Cooking.
Zone 1: The Prep Station (Near the Sink/Counter)
This is where the magic happens. Your prep station should house your food storage containers, mixing bowls, cutting boards, and knives. I discovered that keeping my colander and salad spinner in the cabinet directly above or below the sink saved me dozens of trips across the kitchen floor during meal preparation.
Zone 2: The Cooking Zone (Near the Range)
Everything you need while standing at the stove goes here. This includes your pot and pan organizer, frequently used oils, salts, and wooden spoons. I recommend using vertical dividers in a lower cabinet next to the oven for baking sheets and frying pans to prevent the dreaded "pan avalanche."
Zone 3: The Baking Station
If you bake often, group items by function. Keep flour, sugar, baking soda, and rolling pins in one dedicated area. Use airtight food storage containers to keep ingredients fresh and prevent pests.
Zone 4: The Cleaning and Waste Zone
Typically located under the sink, this zone handles dish soap, sponges, and trash bags. We'll dive into specific hacks for this "problem area" later, but the goal is visibility and accessibility.
Zone 5: The Coffee and Beverage Bar
Keep mugs, coffee beans, tea, and sweeteners near your coffee maker or kettle. This prevents "morning traffic jams" when multiple people are trying to get their caffeine fix while someone else is making breakfast.
Upper Cabinet Strategies: Everyday Essentials
Upper cabinets are often shallower than lower ones, making them ideal for dishes and glassware. However, their height can be a challenge for shorter cooks or children.
The Eye-Level Rule for Daily Dishes
The shelves directly at eye level and one step above/below are your "Prime Real Estate." This is where your daily dinner plates, bowls, and drinking glasses belong. When you sort items by frequency, you ensure that the things you touch 3-5 times a day are the easiest to reach.
Using Shelf Risers for Mugs and Small Plates
One of the biggest wastes of space in upper cabinets is the "air" above short items. To utilize full vertical height, I always install shelf risers. This allows you to stack plates on the bottom and bowls on the riser, or mugs on two levels, without having to lift a heavy stack of bowls to get to a plate.
Organizing Glassware by Frequency of Use
Store your daily water glasses at the front. Wine glasses and specialty cocktail tumblers can go on higher shelves. If you have expensive crystal, store it with the rim up to prevent chipping, but for daily glasses, rim down is fine to keep dust out.
Lower Cabinet Solutions: Heavy Lifting and Deep Storage
Lower cabinets are deeper and harder to see into, which is why they often become "black holes" for lost Tupperware lids. The key here is accessibility.
Managing Pots, Pans, and Lids
Stop nesting your pans! It scratches the surfaces and makes a racket. Instead, use a pot and pan organizer that allows pans to stand vertically or on individual wire racks. For lids, I’ve found that a simple over-the-door rack or a dedicated vertical divider in the drawer works wonders. In my testing, I found that storing cast iron on heavy-duty sliders is the only way to save your back and your cabinet hardware.
The Magic of Pull-Out Bins and Drawers
If your budget allows, retrofitting deep cabinets with pull-out bins is a game-changer. It turns a 24-inch deep cave into an accessible drawer. If you can't do a full retrofit, use long, clear plastic bins that you can pull out like a drawer to see what’s in the back.
Storing Small Appliances
Small appliances like the Air Fryer or Instant Pot should be stored based on how often you use them. If you use the Air Fryer daily, it stays on the counter. If it’s a weekly tool, it goes in a lower cabinet with a pull-out shelf. Pro tip: Store the cords inside the appliances or use adhesive cord wraps to prevent a tangled mess.
The "Heavy Item" Safety Rule
Always store your heaviest items—Dutch ovens, stand mixers, and cast iron—on the lowest possible shelves. This isn't just about organization; it's about safety. Lifting a 15-pound Le Creuset from above your head is a recipe for a kitchen disaster.
Mastering the 'Problem' Areas
Lazy Susan Tips for Corner Cabinets
The lazy susan is a blessing and a curse. Items often fly off the edges and get stuck in the "void." To prevent this, use "wedged" bins designed specifically for lazy susans. These bins act like slices of a pie, keeping oils and vinegars contained so they don't tip over when you spin the rack.
Under-the-Sink Organization Hacks
This area is plagued by pipes and garbage disposals. I use a tension rod across the top of the cabinet to hang spray bottles by their triggers. This frees up the floor space for pull-out bins that hold sponges and dishwasher pods. Ensure you use waterproof liners here in case of minor leaks.
The Spice Rack Debate: Drawer, Wall, or Cabinet?
Light and heat are the enemies of spices. Never store your spice rack directly above the stove. In my kitchen, I prefer a dedicated spice drawer with tiered inserts. This keeps labels visible and the spices in a cool, dark place. If you must use a cabinet, a tiered "stadium seating" insert is better than a lazy susan for seeing small jars.
Drawer Organization Methods for Utensils and Tools
Drawers are "Prime Real Estate." If you find yourself digging through a "junk drawer" to find a whisk, it’s time for an intervention.
- The Prime Real Estate Drawer: The drawer closest to your prep area should only hold tools you use every single time you cook: chef’s knife, paring knife, peeler, tongs, and a silicone spatula.
- Adjustable Dividers: Avoid the "one size fits all" plastic inserts. Use adjustable bamboo dividers to create custom slots for your specific tools.
- The Diagonal Method: For long tools like rolling pins or extra-long offset spatulas that don't fit straight, place a divider diagonally across a large drawer. This creates a long channel that accommodates oversized items perfectly.
- Non-Slip Liners: This is a non-negotiable. Liners keep your dividers from sliding around every time you slam the drawer shut.
Choosing the Right Organizers: A Buyer’s Guide
When shopping for kitchen cabinet organization tools, it's easy to get overwhelmed. Here is how I choose the best materials for the job.
When to Use Clear Acrylic vs. Bamboo
I recommend clear acrylic for food storage containers and pantry bins because visibility is key to inventory management. If you can see that you’re low on quinoa, you’ll add it to the list. Bamboo is better for drawer dividers and shelf risers because it’s durable, sustainable, and aesthetically warm.
Measuring Your Cabinets Correctly
The most common mistake is forgetting to account for cabinet hardware. When measuring for pull-out bins, measure the "clearance"—the narrowest point between the hinges. If your bin is 12 inches wide but the hinge reduces the opening to 11.5 inches, it won't slide out.
Budget-Friendly DIY Organization Ideas
You don't need to spend a fortune. Empty glass jars (like those from pasta sauce) make excellent food storage containers for bulk grains. Magazine holders can be turned on their sides to create DIY vertical dividers for foil and plastic wrap boxes.
My Top 3 Organization Brands
- The Container Store (Custom): Best for high-end drawer inserts.
- YouCopia: My favorite for adjustable spice racks and lid organizers.
- iDesign: The gold standard for clear acrylic bins.
Maintaining Your System for the Long Haul
Setting up the system is only half the battle. Maintenance is what keeps your kitchen workflow smooth. According to professional kitchen organization methods, labeling is the single most important factor in maintaining a system.
The 5-Minute Nightly Reset
Before you turn off the lights, do a quick sweep. Are the oils back in their lazy susan? Are the cutting boards in their vertical dividers? This small habit prevents the "clutter creep" that leads back to chaos.
The Seasonal Audit
Every three months, check your systems. As you evolve as a cook, your needs change. Maybe you've started making more sourdough and need your Dutch oven more accessible. Or perhaps you've moved away from slow cooking and can move that appliance to a higher shelf. Stay flexible and check out the latest kitchen design trends for new storage inspiration.
Teaching the Family
A system only works if everyone uses it. Label your shelves and bins. It might feel "extra," but it prevents your spouse or kids from asking "Where does this go?" every five minutes. If a bin is labeled "Snacks," that’s where the snacks go—no excuses!
Frequently Asked Questions
A: Focus on vertical space. Use wall-mounted magnetic knife strips, pegboards for pots and pans, and over-the-door organizers for spices and pantry staples. When cabinet space is at a premium, every wall is a potential storage zone.
A: Only if you buy in bulk. Decanting looks great, but it’s a chore. I only decant items I use frequently (flour, sugar, rice, pasta) because it keeps them fresher than the original paper bags and makes them easier to scoop.
A: Use a heavy-duty pot and pan organizer that supports the weight of each pan individually, or store them on a sturdy pull-out shelf in a lower cabinet. Never stack them directly on top of each other without a protector, or they will scratch.
The Bottom Line for Busy Cooks
Learning how to organize kitchen cabinets isn't a weekend project you do once and forget. It is an investment in your daily sanity. By implementing a zone-based system, utilizing shelf risers and pull-out bins, and respecting the "prime real estate" of your upper cabinets, you transform your kitchen from a storage locker into a high-performance workshop. Start with one cabinet today—perhaps the one that frustrates you the most—and feel the immediate difference in your kitchen workflow. Happy cooking!