Quick Answer
Cast Iron vs Stainless Steel is easiest to handle when you make one clear kitchen decision at a time. Use the table and steps below to identify the likely cause, choose the safest next move, and avoid changing several variables at once.
CookBuddy Kitchen Note
For Cast Iron vs Stainless Steel, the practical test is to change one pan variable at a time. Pan temperature, surface moisture, oil timing, and when you move the food are easier to judge separately than all at once.
Decision table
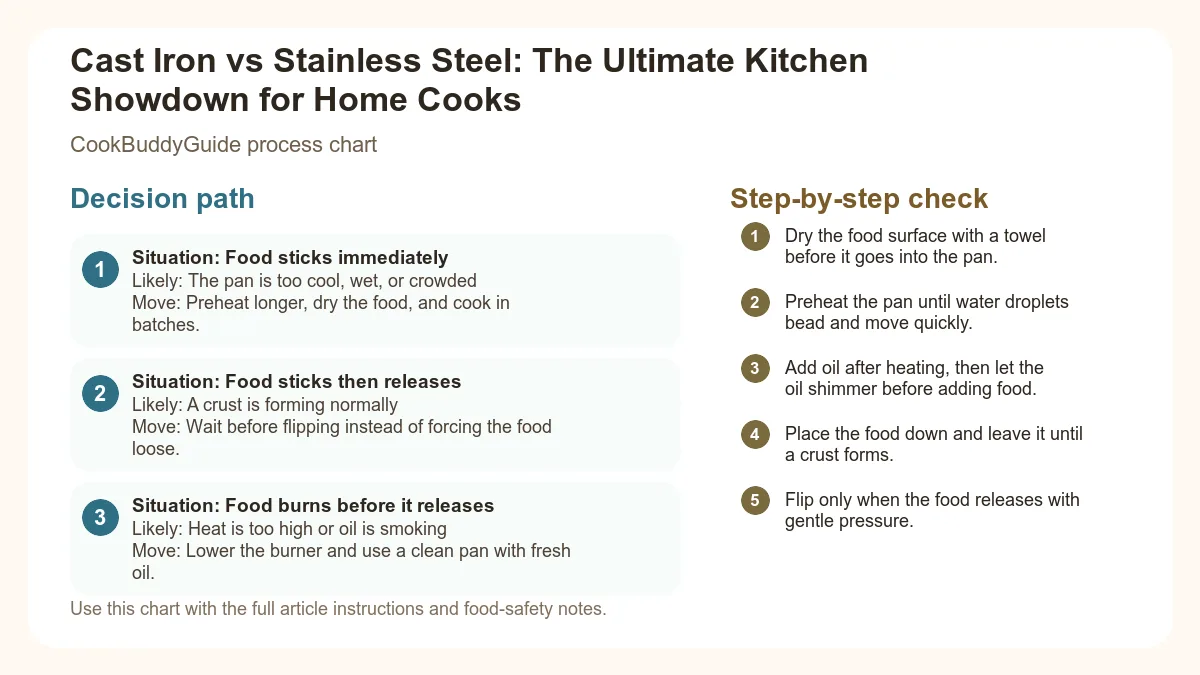
| Situation | Likely cause or meaning | Best move |
|---|---|---|
| Food sticks immediately | The pan is too cool, wet, or crowded | Preheat longer, dry the food, and cook in batches. |
| Food sticks then releases | A crust is forming normally | Wait before flipping instead of forcing the food loose. |
| Food burns before it releases | Heat is too high or oil is smoking | Lower the burner and use a clean pan with fresh oil. |
Step-by-step fix
- Dry the food surface with a towel before it goes into the pan.
- Preheat the pan until water droplets bead and move quickly.
- Add oil after heating, then let the oil shimmer before adding food.
- Place the food down and leave it until a crust forms.
- Flip only when the food releases with gentle pressure.
Common mistakes
- Adding food before the pan is fully preheated.
- Putting wet protein or vegetables straight into hot oil.
- Moving food before a crust has time to form.
- Crowding the pan until food steams instead of browns.
Useful next reads
Helpful tools for this guide
- stainless steel spatula
- instant-read thermometer
- neutral cooking oil
- splatter screen
Related topic hubs
You’ve finally decided to upgrade from that scratched-up, flakey non-stick pan you bought in college, but now you’re standing in the kitchen aisle staring at two heavy-duty contenders. In one corner, the rugged, jet-black heirloom that looks like it belongs over a campfire. In the other, the gleaming, professional-grade silver skillet that looks like it belongs in a Michelin-starred kitchen. The cast iron vs stainless steel debate is one of the oldest in the culinary world, and for a good reason: both are essential, yet they behave like complete opposites on the stove.
In my 15+ years of testing recipes for CookBuddyGuide.com, I’ve seen home cooks ruin expensive ribeyes in cold stainless steel and strip the seasoning off their grandmother’s cast iron with a single misguided soak. I’ve been there too. I once spent three hours scrubbing a burnt-on balsamic glaze off a tri-ply skillet because I didn't understand heat responsiveness. Whether you are choosing a cast iron or stainless steel pan for your first "adult" kitchen purchase, understanding the physics of metal will change the way you cook forever.
Table of Contents
- Heat Dynamics: Retention vs. Distribution
- The Learning Curve: Mastering the Surface
- Maintenance and Care: Seasoning vs. Scrubbing
- Best Cooking Applications: Which Pan for Which Dish?
- Weight, Handling, and Ergonomics
- The Beginner Verdict: Which Should You Buy First?
- Pro Tips for Longevity and Performance
Introduction: The Great Skillet Debate
Why Your Choice of Metal Matters
When you place a piece of protein on a hot surface, a complex chemical dance begins. This is the Maillard reaction—the process where amino acids and reducing sugars rearrange to create that savory, brown crust we all crave. However, how that heat reaches your food depends entirely on the material of your pan. Choosing between cast iron vs stainless steel isn't just about aesthetics; it’s about controlling the variables of time and temperature.
Our Testing Methodology: Real-World Home Cooking
For this guide, I didn't just look at manufacturer spec sheets. I put these pans through the "Tuesday Night Test." I seared steaks, sautéed delicate fish, simmered acidic tomato sauces, and baked cornbread. I measured cooking temperatures with infrared thermometers and timed how long it took for each pan to reach a sear-ready state. I’ve used everything from budget-friendly Lodge skillets to high-end All-Clad tri-ply construction pieces to give you a verdict rooted in real-world experience.
Heat Dynamics: Retention vs. Distribution
Cast Iron: The Heavy-Duty Heat Battery
Cast iron is often praised for its "even heating," but here is a professional secret: that is actually a myth. Cast iron is a poor conductor of heat. If you put a 12-inch cast iron skillet over a small burner, you will have a scorching hot center and significantly cooler edges. However, what cast iron lacks in conductivity, it makes up for in heat capacity.
Think of cast iron as a massive battery. It takes a long time to "charge" (preheat), but once it is hot, it stays hot. When you drop a cold, thick-cut New York strip steak into the pan, the temperature doesn't plummet. This massive thermal mass is what allows for that deep, dark crust. If you’re curious about the physics, this guide on the differences in heat conductivity explains why cast iron excels at retention while failing at rapid distribution.
Stainless Steel: Precision and Responsiveness
High-quality stainless steel pans are rarely just steel. Because steel itself is a mediocre conductor, quality pans use tri-ply construction—a layer of aluminum or copper sandwiched between two layers of stainless steel. This creates incredible thermal conductivity.
Unlike cast iron, a stainless steel pan is highly responsive. If you see your garlic starting to brown too quickly and you turn the dial down, the pan reacts almost instantly. This precision makes it the superior choice for delicate tasks where a few degrees can mean the difference between a silky sauce and a broken, oily mess.
Thermal Mass and Why It Matters for Searing
In my testing, I found that a cast iron skillet takes about 5 to 8 minutes of preheating on medium-low to achieve an even surface temperature. A stainless steel pan is ready in about 2 to 3 minutes. However, if you are deep-frying or searing multiple batches of meat, the cast iron wins every time because it holds onto its energy, whereas the stainless steel pan requires more "recovery time" between batches.
The Learning Curve: Mastering the Surface
The Leidenfrost Effect: The Secret to Non-Stick Stainless
The biggest complaint I hear from home cooks is, "Everything sticks to my stainless steel pan!" The mistake I made for years was not understanding the Leidenfrost Effect. When a pan is properly heated, a drop of water won't just evaporate; it will bead up and glide across the surface like a puck on an air hockey table. This happens because a tiny layer of vapor forms under the liquid, suspending it.
To achieve a stick-resistant surface on stainless steel, you must preheat the pan before adding your oil. Once the water drop test passes, add your oil, let it shimmer, and then add your food. If you’re making 15-minute chicken breast recipes, this technique ensures the meat releases naturally once the crust has formed.
Building a Patina: The Cast Iron Journey
Cast iron requires a different kind of mastery: seasoning a skillet. Seasoning isn't just "grease"; it is a chemical process called polymerization. When you apply a thin layer of high smoke point oil and heat it past its smoke point, the fats break down and bond to the metal, creating a plastic-like, naturally non-stick coating. Over years of use, this patina becomes smoother and more durable. If you want to dive deep into the chemistry, check out this breakdown of the science of seasoning cast iron.
Common Mistakes Beginners Make with Both
- Using High Heat: Both materials are so efficient that "High" on your stove is usually overkill. Medium-high is plenty for a sear; Medium is standard for most sautéing.
- Crowding the Pan: This is the enemy of the Maillard reaction. Too much food releases too much moisture, steaming the meat instead of searing it.
- Moving Food Too Early: If your meat is sticking, it’s often telling you it isn’t ready. Wait for the protein to naturally release from the surface.
The "Perfect Sear" Technique (Works for both!)
This is the foundational skill I teach every new cook. Use this for steaks, pork chops, or thick salmon fillets.
- Pat Dry: Use paper towels to remove every trace of moisture from the surface of the meat. Moisture creates steam, and steam prevents browning.
- Preheat: Place your cast iron or stainless steel pan on medium heat. For cast iron, wait 5 minutes. For stainless, wait 3 minutes or until the "water drop test" passes.
- Oil Choice: Add 1 tablespoon of avocado or grapeseed oil (both have a high smoke point oil profile).
- The Sear: Lay the meat away from you to avoid splatters. Do not touch it for at least 3-4 minutes.
- The Flip: Once a brown crust has formed, the meat will release easily. Flip and finish to your desired internal temperature.
Maintenance and Care: Seasoning vs. Scrubbing
The Truth About Soap and Cast Iron
Let’s debunk the biggest myth in the kitchen: You can use soap on cast iron. Modern dish soaps are mild detergents, not the lye-based soaps our great-grandparents used that would actually strip seasoning. After 15 years of testing, I can confidently say that a little Dawn won't hurt your pan. What will hurt it is moisture. The golden rule is: Wash, dry immediately on the stove, and oil. For a detailed walkthrough, see this guide on properly cleaning cast iron.
Restoring a Rusted Skillet
If you find a rusted Dutch oven or skillet at a garage sale, don't pass it up. Cast iron is nearly indestructible. You can scrub the rust away with steel wool, re-apply a thin layer of oil, and bake it at 450°F for an hour to restore the polymerization layer. It’s one of the few kitchen essentials that actually gets better with age.
Keeping Stainless Steel Shiny (The Bar Keepers Friend Secret)
Stainless steel will eventually develop "rainbow stains" (heat tint) or white calcium deposits. While soap and water handle daily grime, every few weeks I use Bar Keepers Friend. It contains oxalic acid, which breaks down mineral deposits and burnt-on proteins without scratching the metal. It’s the secret to keeping your pans looking showroom-new for decades.
Best Cooking Applications: Which Pan for Which Dish?
When to Reach for Cast Iron (Steaks, Cornbread, Deep Frying)
Cast iron is my go-to for anything that requires sustained, intense heat. Because of its heat capacity, it is the king of the steakhouse sear. It’s also the best vessel for shallow frying chicken or making crispy-edged cornbread. If you are worried about your mineral intake, research shows that iron leaching into food from cast iron can actually provide a small nutritional boost, especially when cooking acidic foods (though I don't recommend that for other reasons!).
When Stainless Steel Wins (Pan Sauces, Acidic Foods, Delicate Proteins)
Stainless steel is a non-reactive cookware. This means you can simmer a tomato sauce or a wine-based reduction for hours without the metal reacting and giving your food a metallic "tinny" taste. It’s also the best choice for easy one-pot pasta recipes where you need to boil water and sauté ingredients in the same vessel.
The Deglazing Factor: Why Fond is King
In the cast iron vs stainless steel debate, the "sauce factor" is huge. When you sear meat in stainless steel, it leaves behind fond—those little brown bits stuck to the bottom. Because the surface is lighter in color, you can actually see the fond developing. Deglazing the pan with a splash of wine or stock lifts those bits and creates a restaurant-quality pan sauce. While you can do this in cast iron, the dark surface makes it harder to judge the color of the fond, and the seasoning can occasionally impart off-flavors to delicate sauces.
Weight, Handling, and Ergonomics
The Physicality of Cast Iron
A standard 12-inch cast iron skillet weighs about 8 pounds. Add a roast chicken to that, and you’re lifting 12+ pounds with one hand. For many, this is a dealbreaker. If you have wrist issues or arthritis, or if you have a delicate glass-top stove that might crack under a heavy impact, you might prefer carbon steel (which offers similar properties to cast iron but at a lower weight) or stick with stainless.
The Agility of Stainless Steel
A tri-ply stainless pan is significantly lighter and usually features an ergonomic, stay-cool handle. This allows for the "chef flick"—that tossing motion used to flip vegetables or pasta. You generally cannot do this with cast iron without a serious gym membership. If you enjoy the process of active cooking, stainless steel feels much more agile in the hand.
Handle Design and Safety
Always look for a "helper handle"—the small loop opposite the main handle. In my experience, a 12-inch pan without a helper handle is a safety hazard when full of hot oil. Most modern cast iron and high-end stainless pans include this feature, but cheaper models often omit it.
The Beginner Verdict: Which Should You Buy First?
The Budget-Friendly Choice
If you have $30 to spend, buy a 12-inch Lodge cast iron skillet. It will last longer than you will. It is the most versatile, indestructible piece of equipment a beginner can own. You can sear, bake, and fry in it. It’s the ultimate "buy it for life" item.
The One-Pan-Fits-Most Winner
If you have $100 to spend and want one pan that can do everything—from morning eggs to evening pan-seared salmon and a lemon-butter sauce—buy a 12-inch tri-ply stainless steel skillet. The versatility of being able to cook acidic foods and make complex sauces gives it a slight edge for the aspiring home chef. For more help deciding, this guide on choosing your first skillet offers a great tie-breaker perspective.
Maintenance Checklist: Post-Dinner Routine
How I treat my pans after every meal to ensure they last 20+ years.
- For Stainless: Soak in warm soapy water for 5 mins. Scrub with a blue (non-scratch) sponge. If spots remain, a dash of Bar Keepers Friend and a quick rub makes it shine.
- For Cast Iron: Scrub with hot water and a stiff brush (use soap if it’s oily!). Dry with a towel, then place on a medium burner for 60 seconds to evaporate all microscopic moisture. Rub in 1/4 teaspoon of oil while warm.
Pro Tips for Longevity and Performance
Preheating is Non-Negotiable
The most common cause of failure with both cast iron or stainless steel pans is impatience. I always start my pan on the stove before I even start chopping my onions. By the time the prep is done, the metal has reached a stable temperature, ensuring the Maillard reaction happens the moment the food hits the surface.
The Best Oils for Each Surface
Avoid extra virgin olive oil for high-heat searing; its smoke point is too low and it will turn bitter. For seasoning and searing, I recommend:
- Avocado Oil: Very high smoke point (520°F), neutral flavor.
- Grapeseed Oil: Great for seasoning a skillet because it bonds well without being too sticky.
- Ghee (Clarified Butter): Perfect for that buttery flavor without the burning milk solids.
Storage Solutions to Prevent Damage
Don't just stack your pans! Stainless steel can scratch, and cast iron can chip enameled cast iron or strip seasoning from other pans. I use simple felt protectors or even just a folded paper towel between my skillets. This small step prevents moisture traps and physical damage.
Frequently Asked Questions
A: Yes, but it requires the Leidenfrost test and a generous amount of butter. For most home cooks, cast iron with a well-developed patina is much easier for eggs.
A: Enameled (like Le Creuset) is non-reactive cookware, so you can cook tomato sauce in it. However, you can't develop a "seasoning" on it, and it's much more expensive.
A: This is called "heat tint." It happens when the pan is heated very quickly or to very high temperatures. It doesn't affect performance and can be removed with Bar Keepers Friend.
Conclusion: Building Your Kitchen Arsenal
In the battle of cast iron vs stainless steel, the winner is ultimately your cooking style. If you crave the ritual of maintenance and the perfect crust on a steak, cast iron is your soulmate. If you value precision, light weight, and the ability to whip up a complex white wine sauce, stainless steel is your workhorse. In my kitchen, I use both daily. I start my bacon in the cast iron and my omelet in the stainless. By understanding these two metals, you aren't just following a recipe—you're mastering the craft of cooking. Now, go turn on that stove and get searing!