Quick Answer
How to Clean an Air Fryer works best when the food is spaced well, lightly coated, and checked before the final minutes. Use the timing in this guide as a starting point, then adjust for food size, basket crowding, and how crisp you want the result.
CookBuddy Kitchen Note
For How to Clean an Air Fryer, basket crowding and food size usually change the result more than the brand of air fryer. Check early, shake or flip when needed, and record the timing that works for your basket.
Decision table
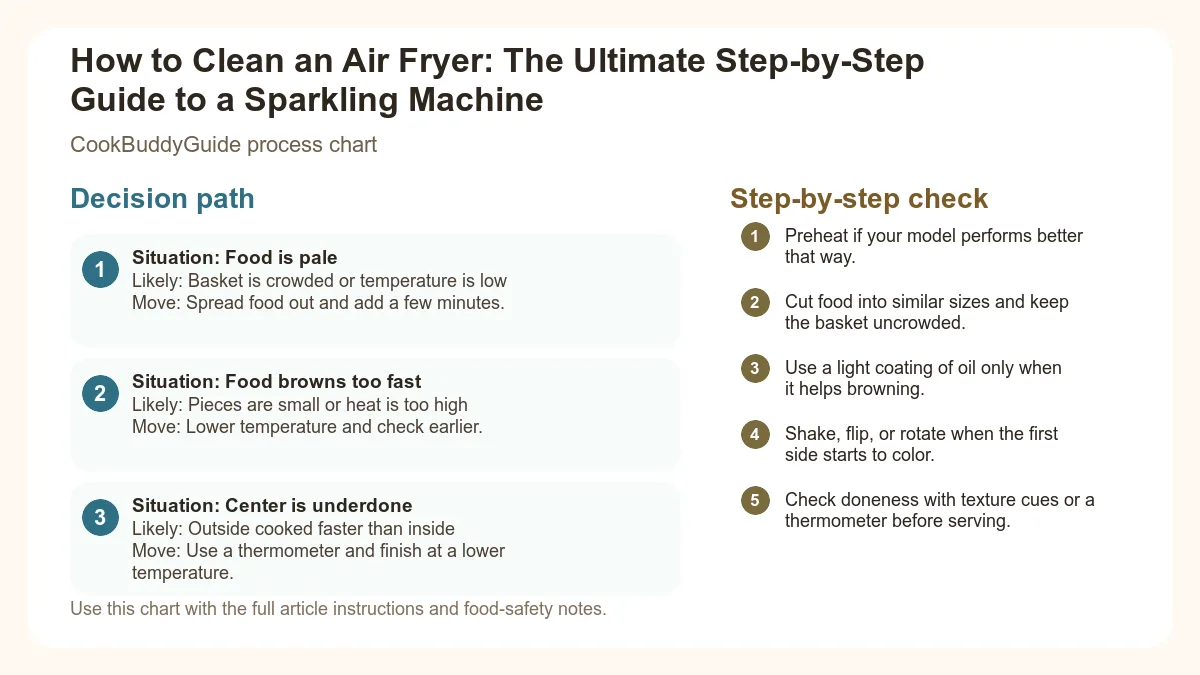
| Situation | Likely cause or meaning | Best move |
|---|---|---|
| Food is pale | Basket is crowded or temperature is low | Spread food out and add a few minutes. |
| Food browns too fast | Pieces are small or heat is too high | Lower temperature and check earlier. |
| Center is underdone | Outside cooked faster than inside | Use a thermometer and finish at a lower temperature. |
Step-by-step fix
- Preheat if your model performs better that way.
- Cut food into similar sizes and keep the basket uncrowded.
- Use a light coating of oil only when it helps browning.
- Shake, flip, or rotate when the first side starts to color.
- Check doneness with texture cues or a thermometer before serving.
Common mistakes
- Crowding the basket until food steams instead of browns.
- Using too much oil and making the surface heavy.
- Following time charts without checking piece size.
- Skipping a thermometer for foods where doneness matters.
Useful next reads
Helpful tools for this guide
- instant-read thermometer
- silicone-tipped tongs
- oil mister
- air fryer parchment liners
Related topic hubs
How to Clean an Air Fryer: The Ultimate Step-by-Step Guide to a Sparkling Machine
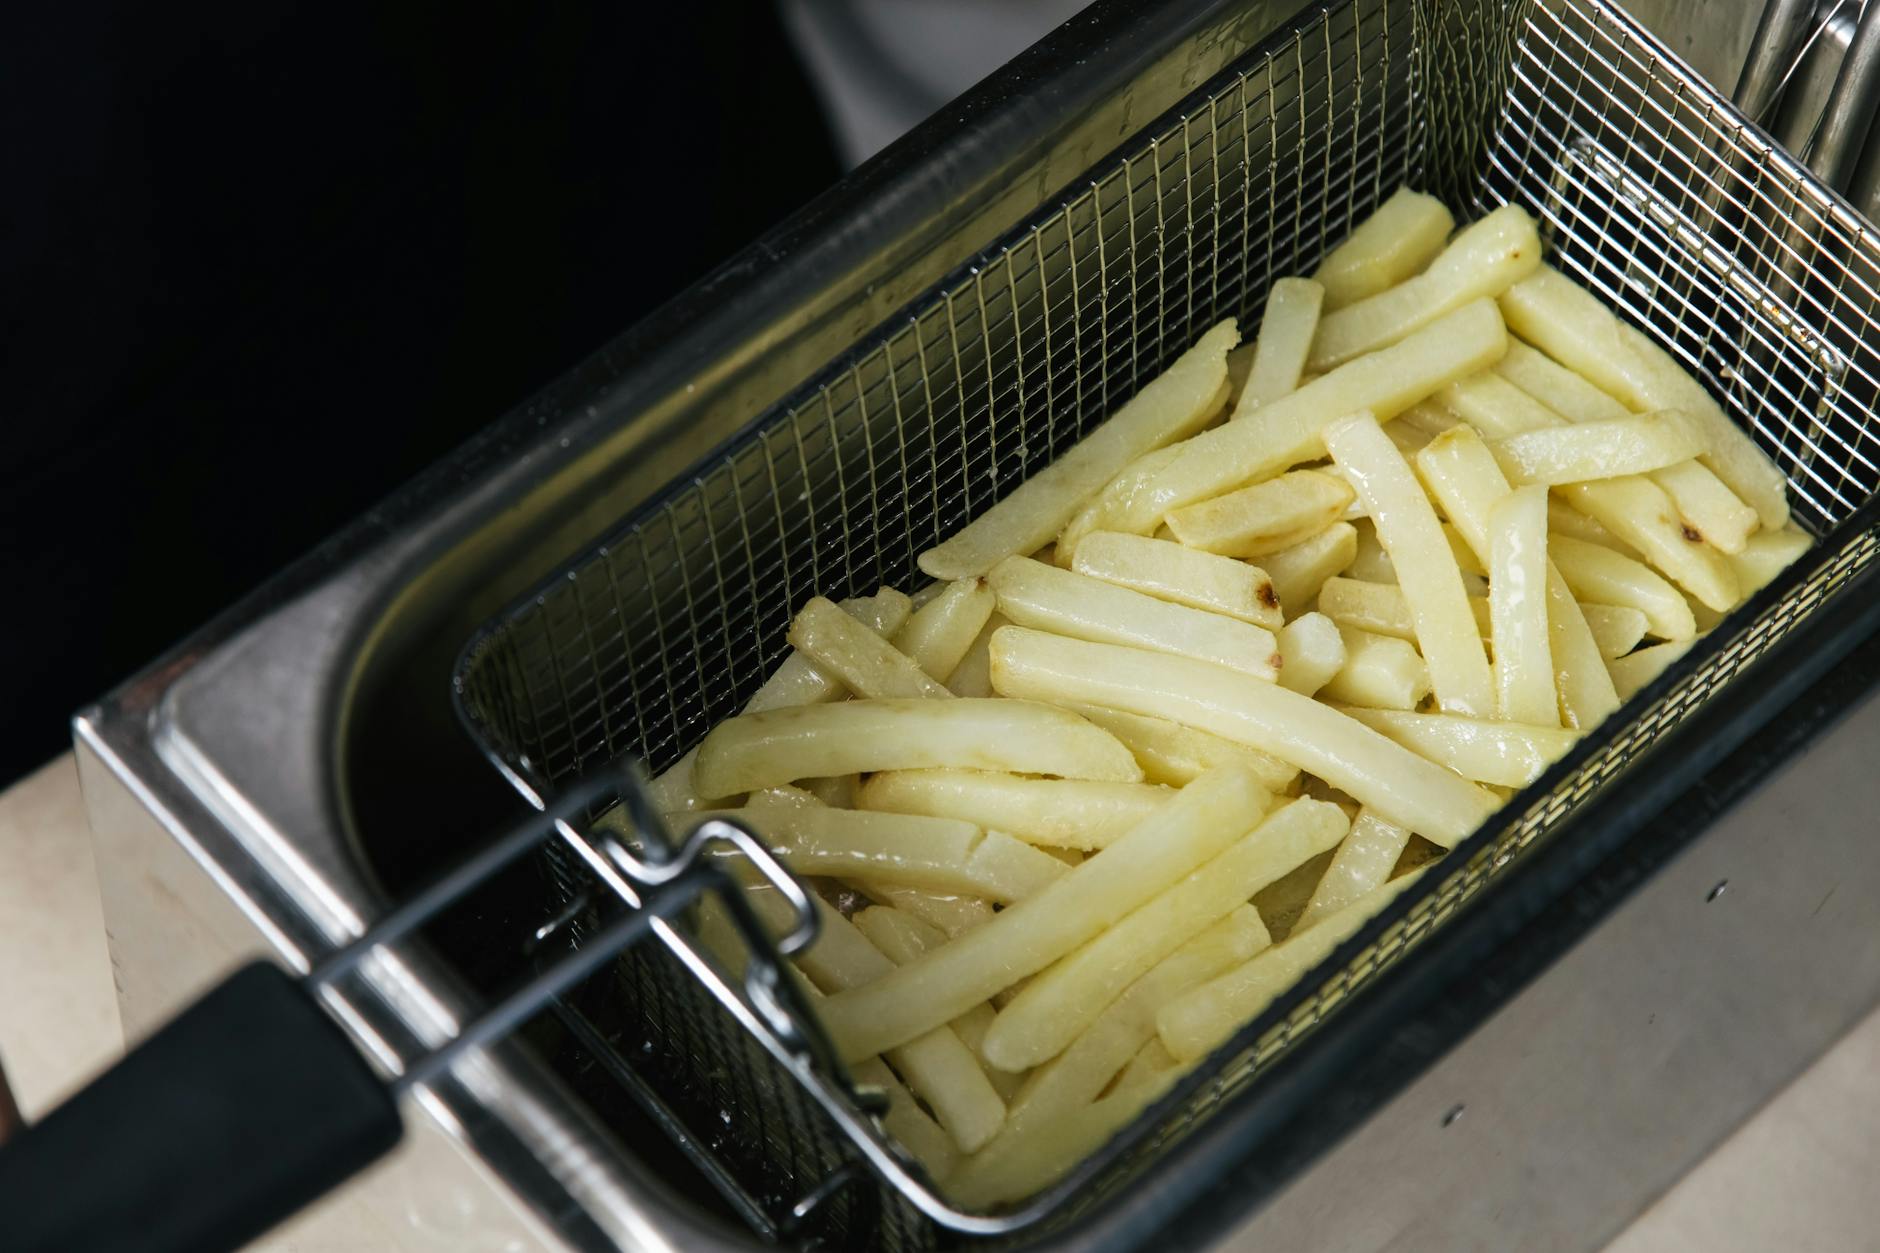
We’ve all been there. It’s 6:30 PM on a Tuesday, you’ve just finished serving a batch of ultra-crispy wings from my favorite easy air fryer chicken recipes, and as you sit down to eat, you catch a glimpse of the air fryer basket. It’s coated in a sticky, amber-colored glaze of rendered fat and burnt-on food. Your first instinct might be to leave it for tomorrow, but as someone who has tested over 50 different air fryer models in my 15+ years as a food writer, I can tell you that "tomorrow" is how great appliances go to die.
Learning how to clean an air fryer properly isn’t just about aesthetics; it’s about performance, safety, and the flavor of your food. If you’ve ever noticed a faint "burnt toast" smell or seen a wisp of blue smoke during a cook cycle, your machine is crying out for a deep clean. In this guide, I’m going to walk you through the exact air fryer cleaning step by step process I use in my own kitchen to keep my machines running like they just came out of the box.
Table of Contents
- Why Proper Air Fryer Maintenance Matters
- Essential Tools and Supplies for Cleaning
- Daily Maintenance: Step-by-Step Guide
- How to Deep Clean Your Air Fryer Periodically
- Dealing with Stubborn Messes and Burnt-On Food
- What NEVER to Do When Cleaning Your Air Fryer
- Dishwasher Safety: What You Need to Know
- Pro Tips for Preventing Buildup
Why Proper Air Fryer Maintenance Matters
Most home cooks treat their air fryer like a microwave—a "set it and forget it" box that only needs a wipe-down when it looks visibly dirty. However, an air fryer is actually a high-powered mini-convection oven. It relies on a high-speed convection fan to circulate hot air around your food. When grease and food particles build up, they don't just sit there; they interfere with the very physics that makes the air fryer work.
Preventing Smoke and Unpleasant Odors
In my experience testing recipes, the number one cause of air fryer smoke is polymerized grease on the heating element. When oil droplets are blown upward by the fan, they coat the heating coil. The next time you turn the machine on, that oil reaches its smoke point and begins to burn. If you’ve ever had your smoke alarm go off while making fries, it’s likely because of old grease, not the current meal. Regular kitchen appliance maintenance ensures your kitchen stays smoke-free.
Extending the Lifespan of Your Appliance
The non-stick coating on most air fryer baskets is surprisingly delicate. When food is allowed to bake onto the surface repeatedly, it creates a bond that is nearly impossible to break without damaging the coating. I’ve seen many high-end air fryers ruined within six months because the owner used metal forks to scrape off burnt-on food. By cleaning your air fryer properly after every use, you protect that coating and ensure the fan motor doesn't have to work overtime against grease-clogged vents.
Maintaining Food Flavor and Safety
Old grease goes rancid. If you don't clean the basket and the area behind the heating coil, those old flavors will literally aerosolize and coat your fresh food. I once made a batch of cinnamon donuts that tasted vaguely of garlic shrimp because I had neglected a deep clean after a seafood feast. Beyond flavor, accumulated oil is a genuine fire hazard. Keeping the interior pristine is a safety requirement, not just a suggestion.
Essential Tools and Supplies for Cleaning
Before you start, put away the steel wool. One of the biggest mistakes I see home cooks make is reaching for aggressive scrubbers. To clean an air fryer correctly, you need a "soft touch" toolkit.
The Non-Abrasive Toolkit
- Microfiber cloth: Perfect for wiping the exterior and the interior walls without scratching.
- Soft-bristled brush or toothbrush: This is my secret weapon for the heating element and the mesh of the basket.
- Non-abrasive sponge: Look for sponges labeled "safe for non-stick."
- Wooden skewer: Useful for poking out crumbs stuck in the tiny holes of the air fryer basket.
Natural Cleaners vs. Commercial Degreasers
For daily cleaning, warm soapy water (using a high-quality dish soap like Dawn) is usually enough. However, for those "I haven't cleaned this in a month" situations, you’ll need something stronger. I highly recommend a degreaser like Dawn Powerwash; it breaks down polymerized grease on contact. If you prefer a natural route, white vinegar and baking soda are your best friends. Vinegar cuts through grease, while baking soda provides a gentle abrasive action that won't destroy the non-stick coating.
Daily Maintenance: Air Fryer Cleaning Step by Step
This is the routine you should follow after every single use. If you make this a habit, you will rarely ever need to do a "hard" deep clean. It should take you no more than five minutes—less time than it takes to clear the table!
The 5-Minute Post-Dinner Clean
Step 1: Unplug and Cool Down. Never clean a hot air fryer. I recommend the "30-minute rule." Let the machine sit for 30 minutes after you finish cooking. This is enough time for the heating element to become safe to touch but keeps the grease just warm enough to be easily wiped away.
Step 2: The Warm Soaking Method. Pull out the air fryer basket and tray. If there is visible grease, pour it into a heat-safe container (never down the sink!). Fill the basket with warm soapy water and let it sit while you eat dinner. This softens any burnt-on food.
Step 3: Scrub Gently. Using a non-abrasive sponge, wipe the interior and exterior of the basket. Use a soft-bristled brush for the corners where the basket meets the handle—grease loves to hide there.
Step 4: Rinse and Dry. Rinse with hot water. Use a microfiber cloth to dry the parts immediately. Never put a wet basket back into the machine, as this can lead to rust or mineral deposits.
I’ve found that hand-washing is almost always superior to the dishwasher. Even if your manual says "dishwasher safe," the high heat and harsh detergents can cause the non-stick coating to flake over time. For more on this, check out air fryer maintenance tips from the pros at America's Test Kitchen.
How to Deep Clean Your Air Fryer Periodically
Even with daily washing, grease particles will eventually find their way to the "ceiling" of the air fryer. I recommend a deep clean once a month, or every two weeks if you use your air fryer daily.
Cleaning the Heating Element Safely
This is the part that scares most people, but it’s essential. To deep clean the heating element, you first need to ensure the unit is completely unplugged and cool. In my testing, the easiest way to access the coil is to actually turn the main unit upside down (if your model allows it). This gives you a clear view of the heating coil and the convection fan.
Use a damp microfiber cloth or a soft-bristled brush dipped in a mixture of white vinegar and water. Gently scrub the coil to remove any carbonized food. If there is thick, sticky grease, you can use a small amount of baking soda paste, but be extremely careful not to let any liquid drip into the electrical components of the machine.
Tackling the Interior Walls and Ceiling
The interior walls are often made of metal or plastic. Use a degreaser or a paste of baking soda and water. Apply the paste to the grease spots, let it sit for 15 minutes, and then wipe it away with a damp cloth. You’ll be shocked at how much brown residue comes off, even if the walls look clean to the naked eye. This is the polymerized grease that causes that "old oil" smell.
Dealing with Stubborn Messes and Burnt-On Food
Sometimes, a simple soak isn't enough. If you’ve cooked something with a high sugar content—like BBQ ribs or honey-glazed salmon—you might find yourself with a literal rock-hard mess. Don't reach for a knife! You will destroy the basket.
The "Air Fryer Steam Bath" Hack
This is the most effective way I’ve found to loosen burnt-on food without scrubbing.
- Fill the air fryer basket with about 1 inch of water and a few slices of lemon or a tablespoon of white vinegar.
- Place the basket in the machine and turn it on to 400°F (200°C) for 5 minutes.
- The steam will circulate and penetrate the hardened grease.
- After the timer goes off, let it sit (closed) for another 5 minutes.
- Open it up, and the residue should wipe away like butter.
If you're dealing with lingering odors (like fish or onions), the lemon juice in the steam bath is particularly effective. It neutralizes the alkaline compounds that cause those pungent smells. If you want a meal that requires almost zero cleanup after this deep clean, try one of my minimal cleanup pasta recipes to give your air fryer a rest!
What NEVER to Do When Cleaning Your Air Fryer
In my 15 years of kitchen testing, I have seen some absolute horror stories. To keep your warranty intact and your house safe, follow these "never" rules:
- NEVER submerge the main unit: The base of your air fryer contains the motor, fan, and heating controls. Submerging it in water will permanently destroy the electronics and poses a massive electric shock risk.
- NEVER use aerosol cooking sprays: This is a pro tip many people miss. Most aerosol sprays (like PAM) contain soy lecithin. At high temperatures, lecithin creates a gummy, plastic-like buildup on the non-stick coating that is nearly impossible to remove. Use an oil mister with pure avocado or olive oil instead.
- NEVER use abrasive scrubbers: As Consumer Reports warns, avoid using abrasive scrubbers like steel wool or metal sponges. Once the non-stick coating is scratched, food will stick even worse, and the coating may begin to flake into your food.
- NEVER use bleach or oven cleaner: These chemicals are far too harsh for the materials used in air fryers and can emit toxic fumes when the machine is heated.
Dishwasher Safety: What You Need to Know
The "dishwasher safe" label is a bit of a marketing trap. While technically true for many brands, the reality of dishwasher safety is more nuanced. Most air fryer baskets are made of aluminum or thin steel coated in a non-stick polymer.
Dishwasher detergents are highly abrasive—they are essentially liquid sandpaper designed to blast food off plates. When combined with the high heat of the drying cycle, they can cause the non-stick surface to degrade and the outer coating of the basket to turn dull or chalky. According to Better Homes & Gardens, if you must use the dishwasher, always place the parts on the top rack and use a gentle cycle. However, my professional recommendation is to hand-wash 90% of the time to preserve the lifespan of your appliance.
Pro Tips for Preventing Buildup with Every Use
The best way to clean an air fryer is to prevent it from getting dirty in the first place. Here are my top three strategies for kitchen appliance maintenance:
1. Using Parchment Paper and Silicone Liners
You can buy perforated parchment paper specifically designed for air fryers. These allow airflow through the holes while catching the majority of the grease and crumbs. Pro tip: Never put parchment paper in the air fryer while it's preheating without food on top; the fan will suck the paper into the heating element, where it will catch fire.
2. The "Wipe While Warm" Strategy
Keep a roll of paper towels near your air fryer. As soon as you remove your food, give the basket a quick wipe with a dry paper towel while it's still warm. This removes the "liquid" grease before it has a chance to cool and solidify into polymerized grease. This simple 30-second habit can reduce your deep-cleaning frequency by half.
3. Choosing the Right Oils
The type of oil you use matters. Oils with a high smoke point, like avocado oil (520°F) or refined light olive oil (465°F), are less likely to burn and create that sticky residue. Avoid using butter or extra virgin olive oil for high-heat air frying, as they break down quickly and create more burnt-on food mess.
Frequently Asked Questions
A: If you use your air fryer 3-4 times a week, check the element once a month. If you see visible grease or smell smoke, clean it immediately.
A: Only on the exterior plastic. Never use a Magic Eraser on the interior or the non-stick basket, as it is a micro-abrasive that will strip the coating.
A: This is common with new machines. Run the "Steam Bath" method mentioned above with lemon slices and vinegar for 15 minutes. This usually neutralizes the "new factory" scent.
Conclusion: A Clean Machine is a Happy Kitchen
Cleaning an air fryer doesn't have to be a dreaded chore. By understanding the air fryer cleaning step by step process and staying on top of daily maintenance, you ensure that every meal you make—from crispy fries to succulent chicken—tastes exactly as it should. Remember, the goal is to protect the non-stick coating and keep the heating element free of debris. Treat your air fryer with a little respect, and it will reward you with years of perfectly cooked, healthy meals. Now that your machine is sparkling, why not put it to use with a fresh recipe? Happy cooking!