Quick Answer
Homemade Teriyaki Sauce is built around practical home-kitchen ratios and simple texture checks. Follow the main method first, then use the variation and troubleshooting notes to adjust sweetness, salt, moisture, or cook time.
CookBuddy Kitchen Note
For Homemade Teriyaki Sauce, this guide centers on Mise en Place, Combine, Dissolve. Those are the checkpoints we would use first in a normal home kitchen before making a bigger change.
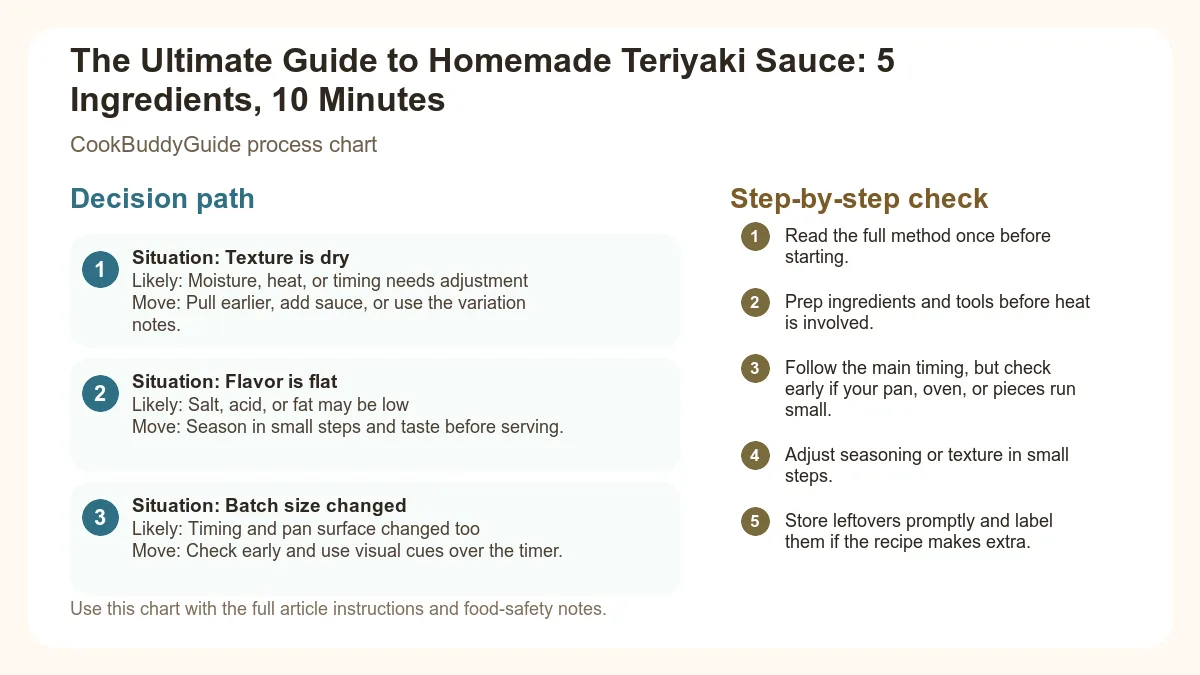
Decision table
| Situation | Likely cause or meaning | Best move |
|---|---|---|
| Texture is dry | Moisture, heat, or timing needs adjustment | Pull earlier, add sauce, or use the variation notes. |
| Flavor is flat | Salt, acid, or fat may be low | Season in small steps and taste before serving. |
| Batch size changed | Timing and pan surface changed too | Check early and use visual cues over the timer. |
Step-by-step fix
- Read the full method once before starting.
- Prep ingredients and tools before heat is involved.
- Follow the main timing, but check early if your pan, oven, or pieces run small.
- Adjust seasoning or texture in small steps.
- Store leftovers promptly and label them if the recipe makes extra.
Common mistakes
- Changing the recipe before trying the base method once.
- Measuring casually when texture depends on ratios.
- Waiting until the end to fix seasoning.
- Ignoring carryover heat or resting time.
Useful next reads
Helpful tools for this guide
- instant-read thermometer
- digital kitchen scale
- cutting board
- airtight storage containers
Related topic hubs
You’re standing in the international aisle of the grocery store, staring at twenty different bottles of teriyaki sauce. One is too watery, another is loaded with high-fructose corn syrup, and a third has a sodium count that makes your heart race just looking at it. It’s 6:00 PM on a Tuesday, you have a pack of chicken thighs in the fridge, and you just want a dinner that tastes like a restaurant-quality meal without the chemical aftertaste of a preservative-laden bottle. I have been there more times than I can count in my 15 years of professional recipe testing.
In my experience, the secret to a transformative weeknight dinner isn't a complex cooking technique; it’s a reliable homemade teriyaki sauce. After making this specific recipe over 50 times in my own kitchen, I’ve discovered that you only need five basic pantry staples and about ten minutes to create a sauce that puts every commercial brand to shame. This isn't just a recipe; it's a fundamental building block of Japanese-inspired home cooking that will change how you approach meal prep forever.
Table of Contents
Why Homemade Teriyaki Sauce Beats Store-Bought Every Time
The Problem with Bottled Sauces
If you flip over a standard bottle of commercial stir-fry sauce, the first three ingredients are often water, sugar (or corn syrup), and modified food starch. These brands prioritize shelf-stability over flavor. They use thickeners to mimic the body of a properly reduced sauce and artificial "smoke" or "ginger" flavors that lack the punch of the real thing. When I first started testing this recipe, I did a side-by-side taste test with a popular brand. The bottled version tasted one-dimensional—just salt and sugar. The homemade version had layers: the bite of fresh ginger root, the aromatic pungency of garlic cloves, and the complex sweetness of fermented rice.
The Cost-Benefit Analysis of DIY Sauce
Let’s talk numbers. A high-end bottle of teriyaki sauce can run you $6 to $8. A homemade teriyaki sauce made with staples you already have—like Kikkoman soy sauce and brown sugar—costs pennies per serving. Because you are controlling the reduction yourself, you don't need to pay for the water and fillers that companies use to bulk up their products. You are investing in quality ingredients that last for months in your pantry rather than a single-use bottle.
Control Over Sodium and Sugar
One of the biggest advantages of an easy teriyaki sauce recipe is the ability to customize it for your health needs. Commercial sauces are notorious for their sky-high sodium content. By making it at home, you can opt for a low-sodium soy sauce or even a gluten-free tamari. You can also manage the sodium in your diet more effectively without sacrificing the umami depth that makes teriyaki so addictive. I’ve found that reducing the sugar by even 25% still yields a delicious result, something you simply can’t do with a pre-mixed bottle.
The Core 5 Ingredients: A Deep Dive into Flavor Science
Soy Sauce: The Umami Foundation
The backbone of any teriyaki is soy sauce. It provides the salt and the deep savory notes known as umami. In my testing, I’ve found that using a naturally brewed soy sauce like Kikkoman provides the most consistent results. If you use a "dark" soy sauce, the result will be much richer and more syrupy, whereas a "light" soy sauce (which is actually saltier) will yield a thinner, sharper flavor. For a balanced sauce, stick to a standard all-purpose soy sauce.
Mirin vs. Rice Wine: Understanding the Sweetness
Mirin is a Japanese sweet rice wine that is essential for achieving the signature "teriyaki" shine. The word teriyaki actually comes from teri (luster) and yaki (grill). Mirin contains sugars that caramelize beautifully under heat, creating a distinct luster and sweetness that regular sugar can't replicate alone. If you can’t find mirin, you can substitute dry sherry or sake mixed with a little extra sugar, but the authentic flavor really comes from the mirin’s fermentation process.
Sugar: Balancing the Brine
While mirin provides some sweetness, brown sugar adds the molasses-like depth required to balance the saltiness of the soy. During the reduction process, the sugar undergoes the Maillard reaction, reacting with the amino acids in the soy sauce to create complex new flavor compounds and a dark, rich color. In my 15 years of cooking, I’ve found that dark brown sugar works best for a robust glaze, while white sugar keeps the flavors cleaner and more focused on the aromatics.
Fresh Aromatics: The Power of Garlic and Ginger
This is where store-bought sauces fail most miserably. Fresh ginger root and garlic cloves are non-negotiable. The volatile oils in fresh ginger provide a spicy, citrusy heat that cuts through the richness of the sugar. When I’m in a rush, I might be tempted to use ginger powder—don't do it. The flavor becomes dusty and flat. Grating the ginger directly into the pot allows the juice to emulsify into the sauce, creating a vibrant, zingy finish that defines a high-quality homemade teriyaki sauce.
The Master Recipe: Step-by-Step Instructions
The CookBuddy Master Teriyaki Sauce
This recipe makes approximately 1.5 cups of sauce. It is the perfect balance of sweet, salty, and aromatic.
Ingredients:- 1 cup soy sauce (standard or low-sodium)
- 1 cup mirin (or sake/water with 2 tbsp extra sugar)
- 1/2 cup brown sugar (packed)
- 1 tablespoon fresh ginger root, finely grated
- 2 large garlic cloves, minced or pressed
- Optional: 1 teaspoon sesame oil for finishing
- Mise en Place: Grate your ginger and mince your garlic before you turn on the stove. This process moves fast once the heat is on.
- Combine: In a small saucepan, combine the soy sauce, mirin, brown sugar, ginger, and garlic over medium-high heat.
- Dissolve: Whisk the mixture constantly until the sugar is fully dissolved.
- Simmer: Bring the liquid to a gentle boil, then immediately reduce the heat to low. Let it simmer for about 5 minutes. You will see the bubbles change from thin and watery to larger and more "soapy" looking—this is the sign of reduction.
- Finish: Remove from heat. If you want a smooth sauce, strain it through a fine-mesh sieve. I personally prefer leaving the bits of ginger and garlic in for texture. Stir in the sesame oil at the very end to preserve its delicate aroma.
Thin vs. Thick: Mastering the Consistency
The Thin Formula: Perfect for Marinating
If you are planning to soak proteins for several hours, you want a thin sauce. A thin marinade can penetrate the fibers of the meat more effectively than a thick glaze, which just sits on the surface. For a marinade, follow the master recipe but do not simmer it for more than 2 minutes. You want the flavors combined but the viscosity to remain like water. This allows the salt to brine the meat, keeping it juicy during high-heat cooking.
The Thick Formula: Creating the Ultimate Glaze
For that iconic restaurant-style "cling" on your chicken wings or salmon, you need a cornstarch slurry. Without it, you would have to reduce the sauce for 30 minutes to get it thick, which would make it far too salty. By using a starch, you get the body without the over-concentration of salt. This is the secret to a Japanese cuisine aesthetic where the sauce coats the back of a spoon perfectly.
The Cornstarch Slurry Technique
To thicken your easy teriyaki sauce recipe, mix 1 tablespoon of cornstarch with 1 tablespoon of cold water in a small bowl. Whisk until smooth. While the sauce is simmering, slowly pour in the slurry while whisking the sauce constantly. Continue to cook for exactly 1-2 minutes. You must bring it back to a boil for the starch to "activate" and clear up; otherwise, your sauce will look cloudy and taste floury. You can find more details on how to use cornstarch slurries to achieve that professional gloss.
Customizing Your Flavor Profile
Adjusting Sweetness and Saltiness
The beauty of a homemade teriyaki sauce is its flexibility. If you find the recipe too sweet, add a splash of rice wine vinegar. The acidity cuts through the sugar and brightens the entire profile. If it's too salty, don't just add water—add a tablespoon of honey or maple syrup. Honey provides a different type of viscosity and a floral note that pairs exceptionally well with pork.
Adding Heat: Spicy Teriyaki Variations
I love a bit of a kick in my stir-fries. To turn this into a spicy sauce, I recommend adding 1 teaspoon of Sambal Oelek or sriracha during the simmering stage. Alternatively, adding a pinch of red pepper flakes during the initial aromatics phase will infuse the oil of the flakes into the entire batch of sauce, giving it a consistent, glowing heat.
Fruit-Infused Teriyaki (Pineapple and Orange)
For a Hawaiian-style twist, replace half of the mirin with pineapple juice. The enzymes in pineapple juice (bromelain) act as a natural meat tenderizer, making this variation incredible for tougher cuts of beef. If you want a brighter, citrusy note for seafood, whisk in a tablespoon of orange zest and 2 tablespoons of fresh orange juice at the very end of the cooking process.
The Best Ways to Use Your Homemade Teriyaki Sauce
Teriyaki Chicken: The Gold Standard
For the best teriyaki chicken, I always recommend using boneless, skinless chicken thighs. They have more fat than breasts, which means they won't dry out during the glazing process. Sear the chicken in a hot pan until 80% cooked, then pour in the sauce. The sauce will reduce and glaze the chicken simultaneously. If you're looking for more inspiration, check out our 15-minute chicken breast recipes for quick weeknight ideas.
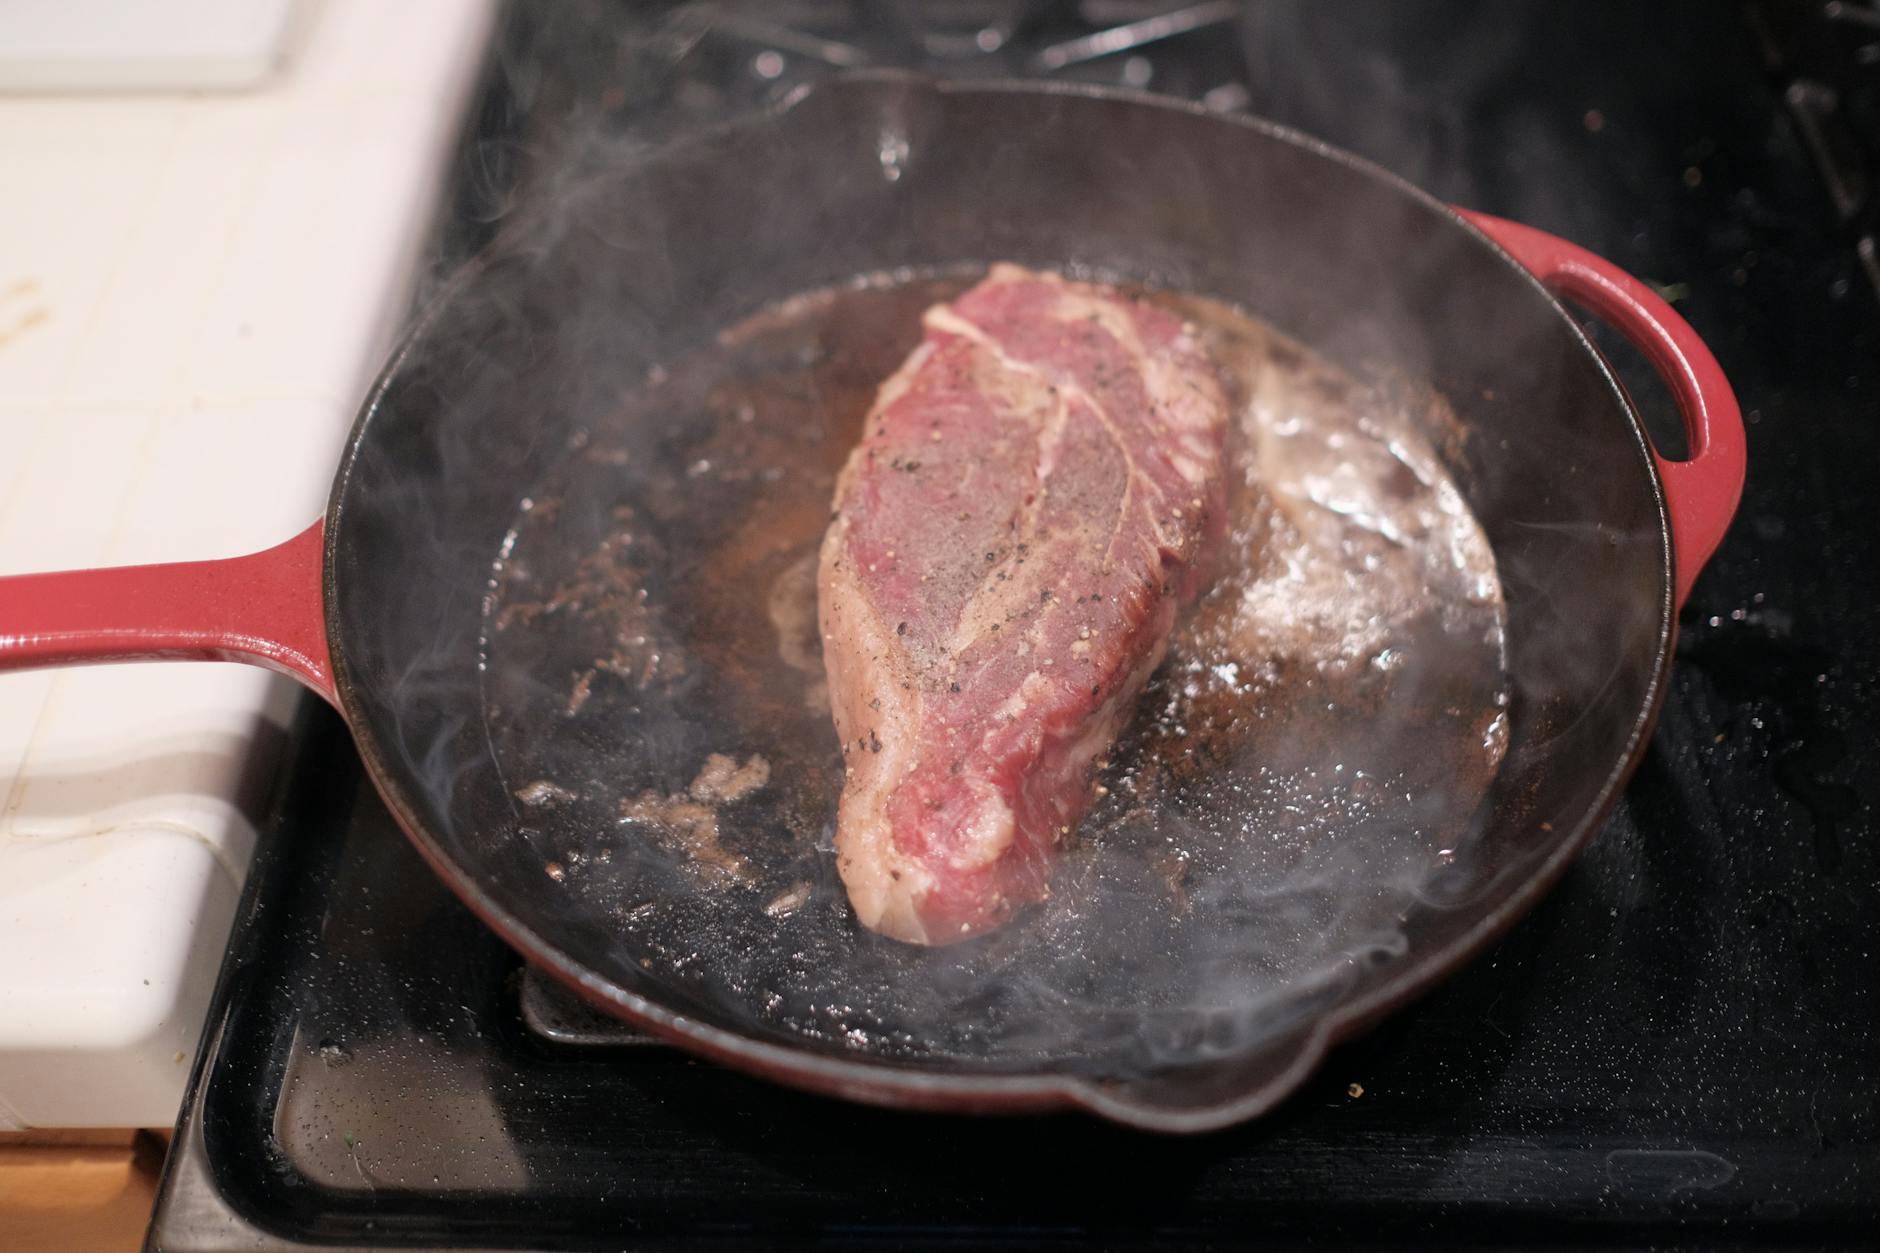
Glazed Salmon: Achieving the Perfect Crust
Salmon and teriyaki are a match made in heaven. My preferred method is to pan-sear the salmon skin-side down first to get it crispy. Then, use a basting brush to coat the top of the fish with a thick version of the sauce. Transfer the pan to the oven under the broiler for 2 minutes. The sugar in the sauce will bubble and slightly char, creating a professional-looking crust that is sweet, salty, and smoky.
Tofu and Plant-Based Proteins
To get tofu to actually taste like something, you must press it first to remove excess water. Once pressed and cubed, toss it in cornstarch and pan-fry until crispy. Only then should you add the homemade teriyaki sauce. The crispy exterior of the tofu acts like a sponge, soaking up the sauce while maintaining its structural integrity. This technique works equally well with tempeh or seitan.
Roasted Vegetables and Stir-Fries
Teriyaki isn't just for meat. It’s my go-to for sheet pan dinner ideas. Toss broccoli, bell peppers, and snap peas in a light coating of the sauce before roasting at 400°F. The high heat of the oven caramelizes the sauce onto the vegetables, making even the pickiest eaters want seconds of broccoli. I’ve found that bok choy is particularly good here, as the leaves catch the sauce while the stalks stay crunchy.
Pro Tips for Success (Testing Notes & Common Mistakes)
Why Your Sauce Might Be Too Salty
In my test kitchen, the most common mistake I see is over-reduction. If you simmer the sauce for 15 minutes instead of 5, the water evaporates, but the salt stays. If you are using a standard Kikkoman soy sauce, be very careful with your simmering time. If the sauce does become too salty, do not despair—whisk in a little unsalted chicken broth or water, one tablespoon at a time, until the balance is restored.
Achieving the 'Mirror Shine'
To get that perfect glaze and mirror shine, you must understand the role of residual heat. The sauce will continue to thicken as it cools. If it looks exactly the right thickness in the pan, it will be a solid brick once it hits the plate. Aim for a consistency that is slightly thinner than your target; by the time you serve it, it will be perfect.
The Importance of Cooling
Never put a hot homemade teriyaki sauce into a plastic container. The heat can cause the plastic to warp and leach chemicals. Furthermore, if you are using the sauce as a marinade, it must be completely cold before it touches raw meat. Adding warm sauce to raw chicken can raise the temperature of the meat into the "danger zone" for bacterial growth. Always chill your sauce in the fridge for at least 30 minutes if using it as a marinade.
Storage, Shelf Life, and Meal Prep
Fridge Storage Guidelines
Because of the high sugar and salt content, this sauce acts as its own preservative. When stored in an airtight glass jar (like a mason jar), it will stay fresh in the refrigerator for up to one month. This makes it a meal prep ideas superstar. I usually double the batch on a Sunday so I have sauce ready for quick stir-fries throughout the month.
Can You Freeze Teriyaki Sauce?
Yes, you can freeze it! However, if you have thickened it with a cornstarch slurry, the texture might become slightly spongy upon thawing. For the best results, freeze the "thin" version of the sauce in ice cube trays. Once frozen, pop the cubes into a freezer bag. You can then drop a couple of cubes directly into a hot pan with vegetables for an instant flavor boost.
Reheating Without Breaking the Emulsion
When reheating the sauce, do it gently. If you microwave it on high, the sugar can scorch at the edges of the bowl. Instead, use a small saucepan over low heat. If the sauce has thickened too much in the fridge, simply whisk in a teaspoon of water to loosen it back up to its original glory.
Dietary Adaptations
Gluten-Free Teriyaki (Tamari Substitution)
Standard soy sauce contains wheat. To make this recipe gluten-free, simply swap the soy sauce for gluten-free tamari or liquid aminos. In my testing, tamari actually provides a slightly richer, smoother flavor than traditional soy sauce, so some people prefer it even if they aren't gluten-sensitive.
Keto-Friendly/Low-Carb Options
To make a keto version, you need to replace both the sugar and the mirin. Use a brown sugar substitute (like Swerve or Lakanto) and replace the mirin with rice vinegar plus a few drops of liquid stevia. Since cornstarch is high in carbs, use a 1/4 teaspoon of xanthan gum to thicken the sauce. Be careful: xanthan gum is very powerful, and a little goes a long way!
Vegan Considerations
While most teriyaki ingredients are naturally vegan, some highly processed sugars are filtered through bone char. To ensure your homemade teriyaki sauce is 100% vegan, use organic brown sugar or agave nectar. Also, check your mirin label; some cheaper "mirin-style" seasonings contain honey or other additives that may not align with a vegan diet.
Frequently Asked Questions
In a pinch, yes, but use only 1/4 teaspoon of ground ginger for every tablespoon of fresh. The flavor will be significantly different—less bright and more "warm" and spicy.
You can substitute with dry sherry or a sweet white wine. If you have neither, use rice wine vinegar but add an extra 2 tablespoons of sugar to counteract the acidity.
No! That is just the gelatin from the aromatics or the thickening of the sugar and starch. It will turn back into a liquid as soon as you heat it up.
Conclusion: Your Kitchen, Upgraded
Mastering a homemade teriyaki sauce is a rite of passage for any home cook looking to balance a busy schedule with a desire for high-quality food. By understanding the balance between the umami of the soy, the luster of the mirin, and the bite of fresh aromatics, you’ve moved beyond following a recipe—you’ve learned the science of flavor. Whether you’re glazing a piece of salmon for a fancy Friday dinner or tossing together a 10-minute vegetable stir-fry on a Monday night, this sauce is your secret weapon. Ditch the bottle, grab your ginger root, and taste the difference that ten minutes can make.