Quick Answer
The Ultimate Egg Muffin Recipe is built around practical home-kitchen ratios and simple texture checks. Follow the main method first, then use the variation and troubleshooting notes to adjust sweetness, salt, moisture, or cook time.
CookBuddy Kitchen Note
For The Ultimate Egg Muffin Recipe, this guide centers on Heavy Cream, Whole Milk, Unsweetened Almond or Soy Milk. Those are the checkpoints we would use first in a normal home kitchen before making a bigger change.
Decision table
| Situation | Likely cause or meaning | Best move |
|---|---|---|
| Texture is dry | Moisture, heat, or timing needs adjustment | Pull earlier, add sauce, or use the variation notes. |
| Flavor is flat | Salt, acid, or fat may be low | Season in small steps and taste before serving. |
| Batch size changed | Timing and pan surface changed too | Check early and use visual cues over the timer. |
Step-by-step fix
- Read the full method once before starting.
- Prep ingredients and tools before heat is involved.
- Follow the main timing, but check early if your pan, oven, or pieces run small.
- Adjust seasoning or texture in small steps.
- Store leftovers promptly and label them if the recipe makes extra.

Common mistakes
- Changing the recipe before trying the base method once.
- Measuring casually when texture depends on ratios.
- Waiting until the end to fix seasoning.
- Ignoring carryover heat or resting time.
Useful next reads
Helpful tools for this guide
- instant-read thermometer
- digital kitchen scale
- cutting board
- airtight storage containers
Related topic hubs
The Ultimate Egg Muffin Recipe: 12 Flavor Variations for Easy Meal Prep
You know the feeling. It’s 7:15 AM on a Tuesday, you’ve hit snooze twice, the coffee isn't brewed yet, and your stomach is already growling. You reach for a sugary granola bar or, worse, skip breakfast entirely, only to find yourself crashing by 10:00 AM. In my 15 years of testing recipes for CookBuddyGuide.com, I’ve found that the secret to a successful week isn't a complex morning routine—it’s a stash of high-quality, pre-made protein in your fridge. This egg muffin recipe is the single most effective tool in my meal prep arsenal. I’ve made thousands of these little "mini-frittatas" over the years, and today, I’m sharing the hard-won secrets to making them perfectly every single time.
Table of Contents
- Why Egg Muffins are the Ultimate Meal Prep Solution
- The Golden Ratio: The Science of the Perfect Egg Base
- The Secret to Non-Stick Egg Muffins
- 12 Flavor Variations to Keep Breakfast Exciting
- Step-by-Step: How to Make Ahead Egg Muffins
- Baking Time and Testing for Doneness
- Storage Guide: Fridge vs. Freezer
- The Best Reheating Methods (No Rubbery Eggs!)
- Troubleshooting Common Egg Muffin Mistakes
Why Egg Muffins are the Ultimate Meal Prep Solution
When we talk about make ahead egg muffins meal prep, we aren't just talking about convenience; we’re talking about a nutritional powerhouse. After testing hundreds of breakfast meal prep ideas, I keep coming back to egg cups because they are infinitely customizable. Whether you are following a low-carb diet, looking for keto-friendly recipes, or adhering to a strict Whole30 month, the humble egg muffin fits the bill.
The Benefits of High-Protein Breakfasts
Starting your day with a protein-packed breakfast is scientifically proven to regulate hunger hormones throughout the day. In my experience, eating two of these muffins (providing about 12-14 grams of protein) keeps me satisfied significantly longer than a bowl of oatmeal. This makes them excellent high protein meals for weight loss because they prevent the mid-morning snack raid. According to the nutritional benefits of whole eggs, you're also getting essential choline and vitamins that support brain health—perfect for those early morning meetings.
Cost-Effective Batch Cooking
One of the biggest hurdles to healthy eating is the cost. However, batch cooking egg muffins is incredibly budget-friendly. A dozen eggs, a splash of milk, and whatever leftover vegetables are lingering in your crisper drawer can yield a week's worth of grab and go breakfast options for less than the price of a single latte at a coffee shop. I discovered that by using "fridge-clearing" veggies, I reduced my weekly food waste by nearly 15%.
The Golden Ratio: The Science of the Perfect Egg Base
The biggest mistake I see home cooks make is whisking plain eggs and pouring them straight into the tin. The result? A spongy, dry, and somewhat "sulfury" texture. To achieve a tender, custard-like bite, you need to treat these like a frittata.
Egg to Liquid Proportions
After making this 20+ times in a single month to find the perfect texture, I landed on the 1/2 tablespoon of liquid per egg rule. For a standard 12-slot muffin tin eggs recipe (using 10-12 large eggs), you want about 5-6 tablespoons of liquid. This provides enough moisture to prevent the proteins from over-coagulating and becoming rubbery. For an even deeper dive into the chemistry of this, I highly recommend checking out this ideal egg to dairy ratio guide which explains how fats interact with egg proteins.
Choosing Your Dairy (or Non-Dairy) Component
- Heavy Cream: This creates the most luxurious, "Starbucks-style" breakfast egg bites. It’s perfect for keto diets.
- Whole Milk: My standard go-to. It provides a great balance of lightness and creaminess.
- Unsweetened Almond or Soy Milk: Works surprisingly well for a dairy-free version, though the muffins will be slightly less "sturdy."
Seasoning the Base for Maximum Flavor
Eggs are a blank canvas, which means they need aggressive seasoning. I always add 1/2 teaspoon of kosher salt and 1/4 teaspoon of black pepper to the base mixture. Pro Tip: Add your salt at least 10 minutes before baking if possible. This allows the salt to break down the egg proteins slightly, resulting in a more tender texture and better moisture retention during the microwave reheating process later.
The Secret to Non-Stick Egg Muffins
If you’ve ever spent 20 minutes scrubbing "egg glue" off a metal muffin tin, you know the pain. Eggs contain proteins that bond almost instantly to metal surfaces when heated. To avoid this, you have three primary options.
Silicone vs. Metal Muffin Tins
In my kitchen, a silicone muffin pan is non-negotiable for this recipe. Because silicone is flexible, you can literally pop the egg cups out from the bottom. If you must use a metal tin, I strongly suggest using silicone liners. They are reusable, environmentally friendly, and guarantee a clean release every time.
The Best Greasing Agents
If you are using metal without liners, don't just use a quick spritz of spray. I’ve found that brushing the slots with melted butter or avocado oil provides a much more reliable barrier. After testing several methods, I found that even "non-stick" pans benefit from a generous coating. This guide on preventing egg muffins from sticking suggests that the combination of fat and the right vessel is the only way to ensure success.
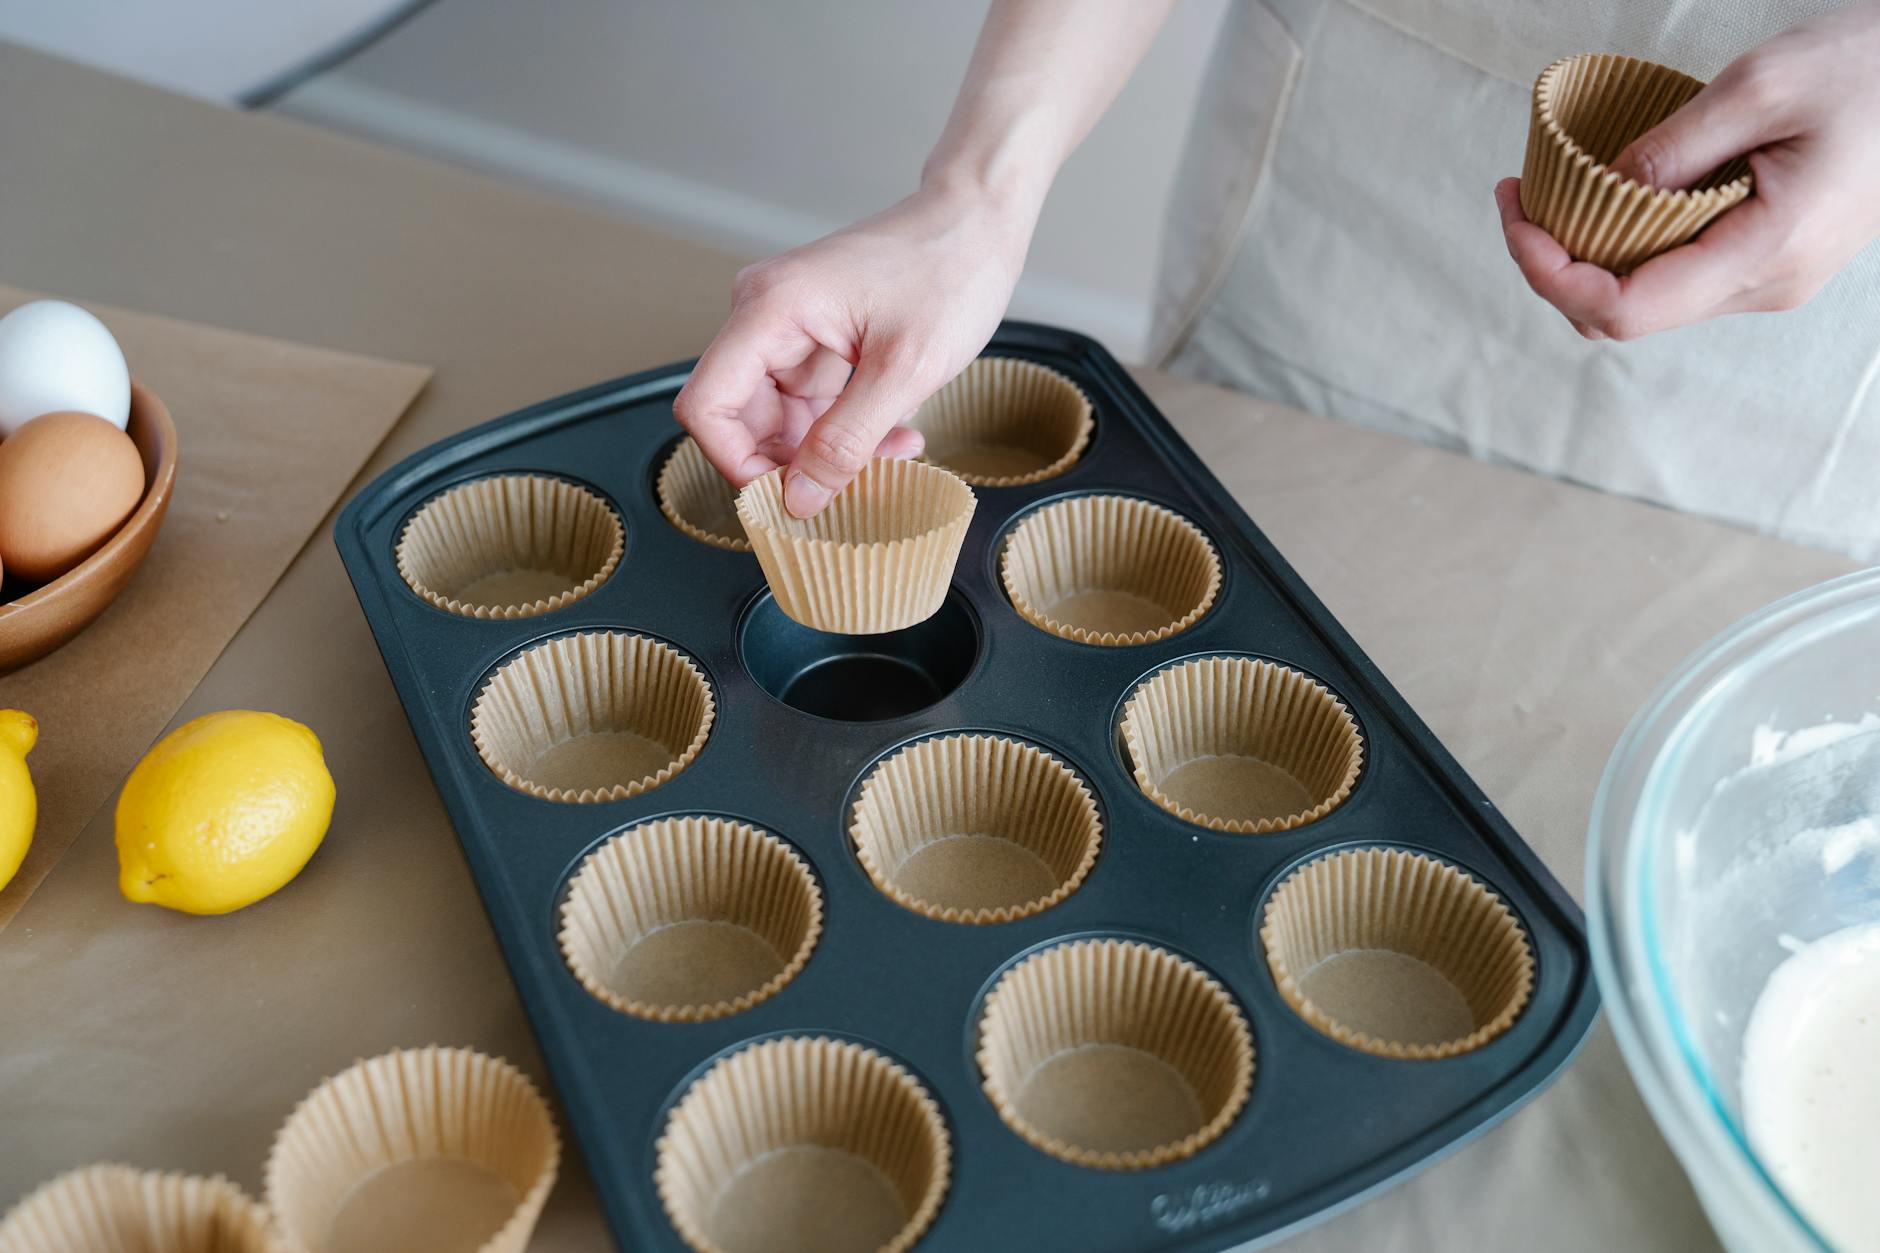
The Parchment Paper Hack
If you're in a pinch and don't have silicone, you can cut small squares of parchment paper and press them into the muffin slots. It gives the muffins a rustic, bakery-style look and makes cleanup non-existent. Just be sure to grease the parchment slightly so the egg doesn't stick to the paper itself!
12 Flavor Variations to Keep Breakfast Exciting
The beauty of the egg muffin recipe is that you can make three or four different flavors in one single tin. Here are my top 12 tested and approved variations.
1. Classic Bacon and Sharp Cheddar
The gold standard. The secret: You must pre-cook the bacon until crispy before adding it to the eggs. If you add raw bacon, the fat won't render properly, and the muffins will be greasy. Use a sharp aged cheddar for the best flavor punch.
2. Spinach, Feta, and Sun-Dried Tomato
A Mediterranean favorite. The secret: Squeeze the moisture out of your chopped spinach. If you use frozen spinach, thaw it and wring it out in a kitchen towel. Excess water is the #1 cause of "soggy" egg muffins.
3. Sausage, Bell Pepper, and Onion
This tastes like a classic western omelet. I always sauté the peppers and onions for about 5 minutes before adding them to the tin. This develops the sugars and prevents the vegetables from being "crunchy" in an otherwise soft egg cup.
4. The Garden Veggie (Broccoli and Mushroom)
Perfect for healthy breakfast ideas. Chop the broccoli into very small florets (the size of a pea) so they cook through in the 20-minute bake time. I recommend sautéing the mushrooms first to release their water content.
5. Mediterranean (Olives, Tomatoes, and Oregano)
Use kalamata olives and halved cherry tomatoes. A pinch of dried oregano in the egg base ties this together perfectly. It’s a high protein snack that feels like a mini-vacation.
6. Buffalo Chicken and Blue Cheese
Use leftover rotisserie chicken shredded finely. Toss the chicken in a little buffalo sauce before putting it in the tin. Top with blue cheese crumbles for a tangy, spicy kick that is surprisingly great for breakfast.
7. Southwest (Black Beans, Corn, and Jalapeño)
This is a hearty, frozen breakfast staple. Ensure the black beans are rinsed and dried thoroughly. Top with a little pepper jack cheese for extra heat.
8. Ham and Swiss with Chives
A sophisticated classic. Use high-quality deli ham diced into small cubes. The nuttiness of the Swiss cheese pairs perfectly with the fresh, oniony bite of the chives.
9. Kale and Goat Cheese
The secret: Massage the kale with a tiny bit of olive oil and salt for 30 seconds before adding it. This softens the tough fibers. The creamy goat cheese creates a beautiful contrast with the earthy kale.
10. Turkey Sausage and Spinach
A leaner protein option for those watching their saturated fat intake. Use pre-cooked turkey sausage crumbles. It’s a light yet filling meal planning favorite.
11. Caprese (Fresh Mozzarella, Cherry Tomatoes, and Basil)
Wait to add the fresh basil until after the muffins come out of the oven to keep the herb bright and green. Use "pearl" mozzarella balls for the perfect melty center.
12. Everything Bagel (Cream Cheese and Seasoning)
Drop a half-teaspoon dollop of cream cheese into the center of the egg mixture before baking. Sprinkle the top generously with "Everything Bagel" seasoning. It’s like a bagel breakfast sandwich without the heavy carbs.
Step-by-Step: How to Make Ahead Egg Muffins
The process is simple, but the order of operations matters for consistent results. Follow these steps that I’ve refined over 15 years of batch cooking.
Prepping Your Fillings
As mentioned in the variations, always pre-cook your meats and high-moisture vegetables. I like to set out all my "mix-ins" in small bowls—this makes the assembly line process much faster. If you're doing make ahead egg muffins meal prep for the whole family, you can even let the kids "build their own" by choosing their fillings.
Mixing and Pouring Techniques
In a large bowl or a 4-cup glass measuring pitcher (the spout makes pouring much easier!), whisk your eggs, liquid, and seasonings. Experience Note: Do not over-whisk. You want the eggs combined, but you don't want to incorporate too much air. Excess air causes the muffins to puff up like soufflés in the oven and then collapse into sad, wrinkled pucks as they cool.
Baking to Perfection
- Preheat your oven to 350°F (175°C). This is the "sweet spot" temperature—high enough to set the eggs quickly but low enough to prevent the edges from browning too much before the center is done.
- Place your fillings into the greased muffin slots first. Fill them about 1/3 of the way with solids.
- Pour the egg mixture over the fillings. The 'Two-Thirds Full' rule: Never fill the slots to the brim. Leave about 1/4 inch of space at the top to allow for natural expansion.
- Bake for 20-25 minutes.
Baking Time and Testing for Doneness
Cooking eggs is a game of seconds. Overcooked eggs become "weepy" and rubbery, while undercooked eggs won't hold their shape when you try to eat them on the go.
The Jiggle Test
At the 20-minute mark, gently shake the muffin pan. The centers should look set and firm, not liquidy. If they still have a significant "jiggle" in the very center, they need another 3-5 minutes. They will puff up slightly above the rim of the pan when they are nearing completion.
Internal Temperature Guidelines
If you want to be 100% certain, use an instant-read thermometer. According to food safety standards, eggs are fully cooked when they reach an internal temperature of 160°F (71°C). I usually pull mine at 158°F because of carryover cooking.
The Carryover Cooking Factor
Eggs continue to cook for several minutes after being removed from the heat. Let the muffins sit in the pan for 5-10 minutes before attempting to remove them. This "cooling rule" allows the steam to subside and the structure to firm up, ensuring they don't fall apart when you pop them out.
Storage Guide: Fridge vs. Freezer
Proper storage is the difference between a delicious meal and a food safety hazard. Always let your muffins cool completely to room temperature before storing. Putting hot eggs in a sealed container creates condensation, which leads to soggy muffins and faster spoilage.
How to Store in the Refrigerator
Place the cooled muffins in an airtight container. I like to line the bottom with a paper towel to absorb any residual moisture. They will stay fresh for up to 4 days. For more details on the science of this, the USDA offers a guide on the safe storage of egg dishes.
Flash Freezing for Long-Term Storage
To freeze, place the cooled muffins on a baking sheet in a single layer (not touching) and freeze for 2 hours. This is called "flash freezing." Once they are hard, transfer them to a heavy-duty freezer bag. This prevents them from sticking together in one giant clump. They will last for up to 3 months in the freezer. Refer to the American Egg Board’s tips on freezing and reheating cooked eggs for more professional storage advice.
The Best Reheating Methods (No Rubbery Eggs!)
Reheating is where most people fail. If you blast an egg muffin on high power for 2 minutes, you’ll end up with something resembling a pencil eraser. Here is how to keep them tender.
The Microwave Damp Paper Towel Trick
This is my #1 tip. Wrap your egg muffin in a damp (not soaking) paper towel. The moisture creates a mini-steam chamber, keeping the egg soft.
- From Fridge: Microwave for 30-45 seconds at 70% power.
- From Frozen: Microwave for 60-90 seconds at 50% power.
Air Fryer Reheating for Crispy Edges
If you have an extra 5 minutes, the air fryer is superior. Set it to 300°F and heat for 4-5 minutes. This gives the edges a slight "crisp" while keeping the center moist. It’s the closest you’ll get to a freshly baked muffin.
Oven Reheating for Large Batches
If you’re reheating for the whole family, place them on a baking sheet, cover with foil (to prevent drying), and heat at 350°F for 10-15 minutes.
Troubleshooting Common Egg Muffin Mistakes
This is almost always due to "weeping" vegetables. Zucchini, mushrooms, and spinach are the main culprits. Always sauté or squeeze these vegetables to remove moisture before adding them to the eggs. Additionally, overcooking the eggs can cause the protein structure to collapse and squeeze out water (syneresis).
A little bit of sinking is normal as they cool, but a total collapse usually means you whisked too much air into the eggs. The air expands in the heat and then escapes as they cool. Whisk gently by hand rather than using a high-speed blender or mixer.
Eggs require more salt than you think. In my testing, I found that adding 1/2 teaspoon of salt per 10 eggs is the bare minimum. Don't forget to use flavorful fats like sharp cheeses, hot sauce, or even a teaspoon of Dijon mustard in the base mix to add depth.
Final Thoughts from the CookBuddy Kitchen
Mastering this egg muffin recipe has changed my mornings forever. No more standing over a stove when I'm half-asleep or settling for a mediocre drive-thru sandwich. By spending just 40 minutes on a Sunday afternoon, you're gifting your future self a week of stress-free, protein-packed breakfasts. Remember: start with the golden ratio, use silicone for easy release, and don't be afraid to get creative with your fillings. Happy cooking, and here’s to reclaiming your morning routine!