Quick Answer
The Ultimate Easy Lemon Bars Recipe is built around practical home-kitchen ratios and simple texture checks. Follow the main method first, then use the variation and troubleshooting notes to adjust sweetness, salt, moisture, or cook time.
CookBuddy Kitchen Note
For The Ultimate Easy Lemon Bars Recipe, this guide centers on Make the crust, Make the filling, The "Hot-on-Hot" Step. Those are the checkpoints we would use first in a normal home kitchen before making a bigger change.
Decision table
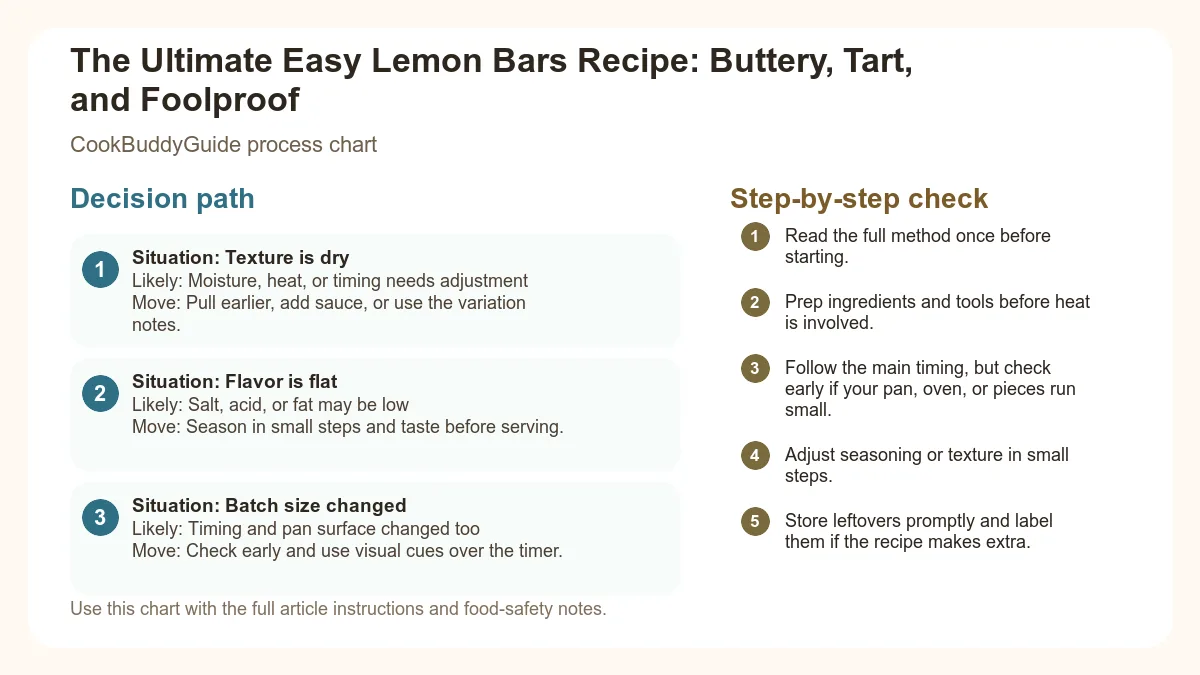
| Situation | Likely cause or meaning | Best move |
|---|---|---|
| Texture is dry | Moisture, heat, or timing needs adjustment | Pull earlier, add sauce, or use the variation notes. |
| Flavor is flat | Salt, acid, or fat may be low | Season in small steps and taste before serving. |
| Batch size changed | Timing and pan surface changed too | Check early and use visual cues over the timer. |
Step-by-step fix
- Read the full method once before starting.
- Prep ingredients and tools before heat is involved.
- Follow the main timing, but check early if your pan, oven, or pieces run small.
- Adjust seasoning or texture in small steps.
- Store leftovers promptly and label them if the recipe makes extra.
Common mistakes
- Changing the recipe before trying the base method once.
- Measuring casually when texture depends on ratios.
- Waiting until the end to fix seasoning.
- Ignoring carryover heat or resting time.
Useful next reads
Helpful tools for this guide
- instant-read thermometer
- digital kitchen scale
- cutting board
- airtight storage containers
Related topic hubs
The Ultimate Easy Lemon Bars Recipe: Buttery, Tart, and Foolproof
There is nothing more disappointing than biting into a lemon bar only to find a bland, overly sweet custard sitting atop a mushy, flavorless base. I’ve spent over 15 years in my test kitchen chasing the dragon of the perfect citrus square—one that balances a puckeringly tart lemon filling with a sturdy, melt-in-your-mouth buttery base. Most recipes you find online are either too sugary or too flimsy to hold their shape. After testing 12 different crust-to-filling ratios and countless batches of homemade lemon bars, I have finally perfected this easy lemon bars recipe that delivers a professional-grade result every single time.
Table of Contents
- Why This Is the Only Easy Lemon Bars Recipe You Need
- Essential Ingredients for Homemade Lemon Bars
- Mastering the Press-In Shortbread Crust
- The Perfect Lemon Curd Filling Ratio
- Step-by-Step Instructions
- Doneness Testing: How to Know When They Are Ready
- The Importance of Chilling and Slicing
- Common Mistakes and Troubleshooting
- Variations and Dietary Substitutions
- Storage, Freezing, and Make-Ahead Tips
Why This Is the Only Easy Lemon Bars Recipe You Need
The Balance of Tart vs. Sweet
Most commercial lemon bars rely heavily on sugar to act as a stabilizer, resulting in a cloying sweetness that masks the fruit. In my testing, I discovered that a higher lemon juice-to-sugar ratio—specifically using a full cup of juice for a standard 9x13 pan—creates that signature "zing" that clears the palate. We aren't just making a sweet treat; we are making a citrus dessert recipe that celebrates the fruit's natural acidity. By balancing this with a high-fat shortbread, the fat coats the tongue and allows the tartness to shine without being overwhelming.
The CookBuddyGuide Testing Process
I didn't just stumble upon this formula. Over the last decade, I’ve experimented with everything from pre-cooking the curd on the stovetop to using different types of flour in the filling. I found that the "hot-on-hot" method—pouring the liquid filling onto a pre-bake crust while it’s still steaming—is the absolute secret to preventing the dreaded separation of layers. This ensures the citrus curd bonds to the shortbread crust, creating a seamless transition from crunchy to creamy. This easy lemon bars recipe is the result of those failures and successes, refined for the busy home cook who wants bakery-quality results without the fuss.
Essential Ingredients for Homemade Lemon Bars
Fresh Lemons vs. Bottled Juice
If there is one hill I will die on as a food writer, it is this: fresh squeezed lemons are non-negotiable. Bottled lemon juice contains preservatives and has been pasteurized in a way that kills the volatile aromatic oils. When you use fresh fruit, you also get the benefit of lemon zest. The zest contains the essential oils that provide the "scent" of lemon, which is just as important as the taste. According to the nutritional profile of fresh lemons, you’re also getting a boost of Vitamin C and antioxidants that bottled versions simply lack.
The Role of Room Temperature Eggs
In my 15+ years of baking, I’ve seen many a lemon square recipe fail because of cold eggs. When you whisk cold eggs into sugar and flour, they don't emulsify as smoothly, which can lead to tiny bits of cooked egg white in your finished bars. Room temperature eggs incorporate air more easily and create a more uniform tart lemon filling. If you're in a hurry, place your eggs in a bowl of warm water for 5 minutes before cracking them.
Choosing the Right Flour for Shortbread
For the buttery base, I recommend a standard All-Purpose flour with a moderate protein content (around 10-11%). You want enough structure to hold the heavy filling, but not so much gluten that the crust becomes tough. Combined with high-quality, European-style butter (which has less water and more butterfat), this creates a shortbread that is sturdy yet shatters delicately when bitten.
Mastering the Press-In Shortbread Crust
Why We Skip the Rolling Pin
One of the main reasons this is an easy lemon bars recipe is the press-in crust. Traditional tart shells require chilling the dough, rolling it out, and carefully draping it into a pan. That is too much work for a Tuesday night. By using a "short" dough (high fat to flour ratio), we can simply crumble the mixture into the baking sheet or pan and press it down with our fingers or the bottom of a measuring cup. This prevents overworking the gluten, ensuring the crust remains tender.
The Secret to a Non-Crumbly Base
A common complaint with homemade lemon bars is that the crust falls apart. To prevent this, ensure your butter is softened but not melted when mixing. You want the flour to be fully coated in fat. This creates a waterproof barrier. For a deeper dive into the physics of this, you can read about the science of a perfect shortbread, which explains how the ratio of butter to flour creates a sturdy yet tender base that resists soaking up the filling.
Pre-Baking: The Only Way to Prevent a Soggy Crust
You must pre-bake crust layers for at least 20 minutes before adding the filling. This "blind baking" sets the structure. If you pour liquid lemon curd onto raw dough, the dough will simply absorb the liquid and turn into a gummy mess. As noted in this guide on preventing a soggy bottom crust, creating this baked-on barrier is the single most important step for structural integrity.
The Perfect Lemon Curd Filling Ratio
Whisking Technique to Avoid Air Bubbles
When mixing your filling, the goal is to combine the ingredients without whipping in too much air. If you whisk too vigorously, you’ll create a foam on top that bakes into a thin, white, crackly crust. While some people like this, it can obscure the beautiful yellow color of the citrus curd. I recommend using a lateral whisking motion rather than a circular, lifting motion to keep the filling dense and creamy.
The Science of Egg Coagulation in Citrus
The acid in the lemon juice actually helps the egg proteins denature and bond at a lower temperature. This is why lemon bars have that unique, soft-set texture. However, if the ratio of acid to egg is off, the filling won't set. My formula uses 6 large eggs to 1 cup of juice, which provides enough protein to create a stable gel that still feels light on the tongue.
Adjusting Tartness for Your Palate
I prefer a very tart bar, but I know some families like them milder. If you prefer a sweeter profile, you can reduce the juice to 3/4 cup and replace that volume with more sugar. However, I always include a pinch of salt in my filling. Salt is the secret ingredient that enhances the citrus notes and cuts through the sugar, making the lemon flavor "pop."
The Ultimate Easy Lemon Bars
Yields: 24 bars
Ingredients
For the Shortbread Crust:- 1 cup (225g) unsalted butter, softened
- 1/2 cup (100g) granulated sugar
- 2 cups (250g) all-purpose flour
- 1/2 tsp salt
- 6 large eggs, room temperature
- 3 cups (600g) granulated sugar
- 1 cup (240ml) fresh squeezed lemons juice
- 1 tbsp lemon zest
- 1/2 cup (65g) all-purpose flour
- 1/4 tsp salt
- Confectioners' sugar (for dusting)
Instructions
- Preheat oven to 350°F (175°C). Line a 9x13 inch baking pan with parchment paper, leaving an overhang on the sides.
- Make the crust: Cream the butter and sugar until smooth. Stir in the flour and salt until a soft dough forms. Press firmly into the bottom of the prepared pan.
- Bake the crust for 20-22 minutes until the edges are very lightly golden.
- Make the filling: While the crust bakes, whisk together the eggs and sugar. Add the lemon juice, zest, flour, and salt. Whisk until no flour lumps remain.
- The "Hot-on-Hot" Step: Pour the filling directly over the hot crust as soon as it comes out of the oven.
- Reduce oven temp to 325°F (160°C) and bake for 22-26 minutes.
- Cool completely at room temperature, then refrigerate for at least 4 hours.
- Lift out using the parchment, slice with a wet knife, and dust with powdered sugar topping.
Step-by-Step Instructions for Easy Lemon Bars
Preparing the Pan and Oven
Before you even touch a lemon, prep your pan. I always use parchment paper "slings." Cut a piece of parchment that is the width of your pan but long enough to hang over the two long sides. This allows you to lift the entire block of chilled bars out of the pan for clean slicing. Without this, the first bar you try to remove will inevitably crumble. Grease the pan lightly before laying the paper down to help it stick.
Mixing and Baking the Shortbread
When mixing your crust, don't over-cream the butter and sugar. You aren't making a fluffy cake; you're making a dense buttery base. Once the flour is added, stop mixing as soon as the white streaks disappear. When pressing it into the pan, pay extra attention to the corners. We want a uniform thickness so the crust bakes evenly. I don't find "docking" (pricking with a fork) necessary for this recipe, as the heavy filling will weigh down any air bubbles that try to form.
Pouring the Filling onto a Hot Crust
This is the most critical technique for easy summer desserts. By pouring the room-temperature filling onto the hot crust, the bottom layer of the filling starts to cook immediately. This creates a "seal" that prevents the liquid from seeping into the shortbread. If you let the crust cool completely, you risk a "separation layer" where the filling slides right off the base when you try to eat it.
Doneness Testing: How to Know When They Are Ready
The Jiggle Test Explained
Knowing when to pull the bars out is the hardest part of any lemon square recipe. You are looking for the "jiggle," not a "slosh." When you gently shake the pan, the edges should be firm and set, while the center should move slightly like firm gelatin. If it ripples like water, it needs 3-5 more minutes. If it doesn't move at all, you’ve overbaked it, and the texture may become rubbery.
Internal Temperature Benchmarks
For those who love precision, an instant-read thermometer is your best friend. The tart lemon filling is technically "done" when it reaches 170°F (77°C). At this temperature, the egg proteins have fully coagulated to hold their shape but haven't yet become tough. For more visual cues, check out this guide on testing lemon bars for doneness.
Visual Cues: The Edge Set
Look at the very edges of the pan where the filling meets the crust. You should see a slight golden browning and perhaps a few tiny bubbles. The top of the bars should transition from a shiny, liquid look to a matte, opaque finish. This indicates the sugar has stabilized the eggs and the citrus curd is set.
The Importance of Chilling and Slicing
Why Room Temp Cooling Isn't Enough
I have seen many homemade lemon bars ruined by impatience. When the bars come out of the oven, they are still very soft. As they cool, the fats in the butter and the proteins in the eggs continue to firm up. A minimum of 4 hours in the refrigerator is required to achieve that clean, biteable texture. If you cut them too early, the filling will bulge and run.
How to Get Clean, Professional Squares
To get those sharp edges you see in professional bakeries, you must use a hot, clean knife. Run your knife under hot water, wipe it completely dry, make one long cut, and then wipe the knife clean again. Repeat this for every single cut. This prevents the sticky lemon filling from dragging across the white shortbread crust. These bars are a great follow-up to refreshing summer meal ideas, providing a bright finish to a light dinner.
The Powdered Sugar Dusting Technique
Never dust your bars with confectioners' sugar until right before serving. Lemon bars are naturally moist, and the sugar will dissolve into the filling within an hour, leaving a sticky white film. For the best look, use a fine-mesh sieve and dust from about 12 inches above the bars to get an even, snow-like coating.
Common Mistakes and Troubleshooting
This is usually caused by over-whisking the eggs and sugar, which incorporates air. The air rises to the top during baking and forms a thin, meringue-like layer. It’s perfectly safe to eat, but if you want to avoid it, whisk more gently or strain the filling through a fine-mesh sieve before pouring it onto the crust.
If your bars are still runny after chilling, they were likely underbaked. You can try putting them back in a 300°F oven for 10-15 minutes, though this may toughen the crust. Next time, ensure your lemon juice measurement is exact and your eggs are "Large" size (about 50g each without the shell).
Even with parchment paper, the sugar in the crust can caramelize and stick. Make sure to grease the parchment itself with a little bit of butter or non-stick spray. Also, ensure the bars are completely cold before attempting to lift them out.
Variations and Dietary Substitutions
Gluten-Free Lemon Bars
You can easily adapt this easy lemon bars recipe for gluten-free diets. For the crust, swap the All-Purpose flour for a 1:1 gluten-free baking blend or a mix of almond flour and rice flour. Because there is no gluten to develop, the crust will actually be incredibly tender. In the filling, you can use cornstarch or a gluten-free flour blend as the thickener.
Meyer Lemon vs. Eureka Lemon
Most grocery stores sell Eureka or Lisbon lemons, which are very tart. Meyer lemons are a cross between a lemon and a mandarin orange. They are much sweeter and less acidic. If you use Meyer lemons, reduce the sugar in the filling by 1/4 cup and add an extra tablespoon of lemon juice to maintain the balance.
Adding Herbs: Rosemary and Thyme Infusions
If you want to elevate this citrus dessert recipe for a dinner party, try infusing the butter for the crust with fresh rosemary or thyme. Simply melt the butter with the herbs, let it sit for 10 minutes, strain out the herbs, and let the butter solidify again before making the crust. The earthy notes of the herbs pair beautifully with the bright lemon.
Storage, Freezing, and Make-Ahead Tips
How Long Do Lemon Bars Last in the Fridge?
Because of the high egg and dairy content, these bars must be refrigerated. They will stay fresh in an airtight container for up to 5 days. For food safety specifics, refer to the USDA guidelines on storing egg-based desserts safely. Always keep them covered to prevent them from absorbing "fridge odors" like onions or garlic.
The Best Way to Freeze for Later
Lemon bars freeze surprisingly well! I recommend "flash freezing" them first. Place the individual, un-sugared squares on a baking sheet in the freezer for 2 hours until hard. Then, wrap each square in plastic wrap and place them in a freezer bag. They will last for up to 3 months. To serve, thaw in the refrigerator overnight and dust with confectioners' sugar just before eating.
Refreshing the Topping Before Serving
If you made these a day in advance and the sugar has dissolved, don't panic. Simply take a paper towel and gently dab the top of the bars to remove excess moisture, then apply a fresh dusting of powdered sugar topping. They will look brand new. If you're looking for more quick kitchen wins, check out our guide on simple five ingredient recipes to save time on your main course so you can focus on dessert.
Conclusion: Your New Go-To Dessert
Mastering the easy lemon bars recipe is a rite of passage for any home cook. By focusing on high-quality fresh squeezed lemons, a properly pre-bake crust, and the "hot-on-hot" filling technique, you eliminate the variables that lead to soggy or bland results. These homemade lemon bars aren't just a treat; they are a masterclass in balancing flavor and texture. Whether you're bringing them to a summer potluck or enjoying a square with your afternoon tea, this recipe is guaranteed to be a foolproof favorite in your kitchen for years to come. Now, grab those lemons and get zesting!