Quick Answer
How to Cook Rice Without a Rice Cooker is built around practical home-kitchen ratios and simple texture checks. Follow the main method first, then use the variation and troubleshooting notes to adjust sweetness, salt, moisture, or cook time.
CookBuddy Kitchen Note
For How to Cook Rice Without a Rice Cooker, this guide centers on Rinse, Combine, Boil. Those are the checkpoints we would use first in a normal home kitchen before making a bigger change.
Decision table
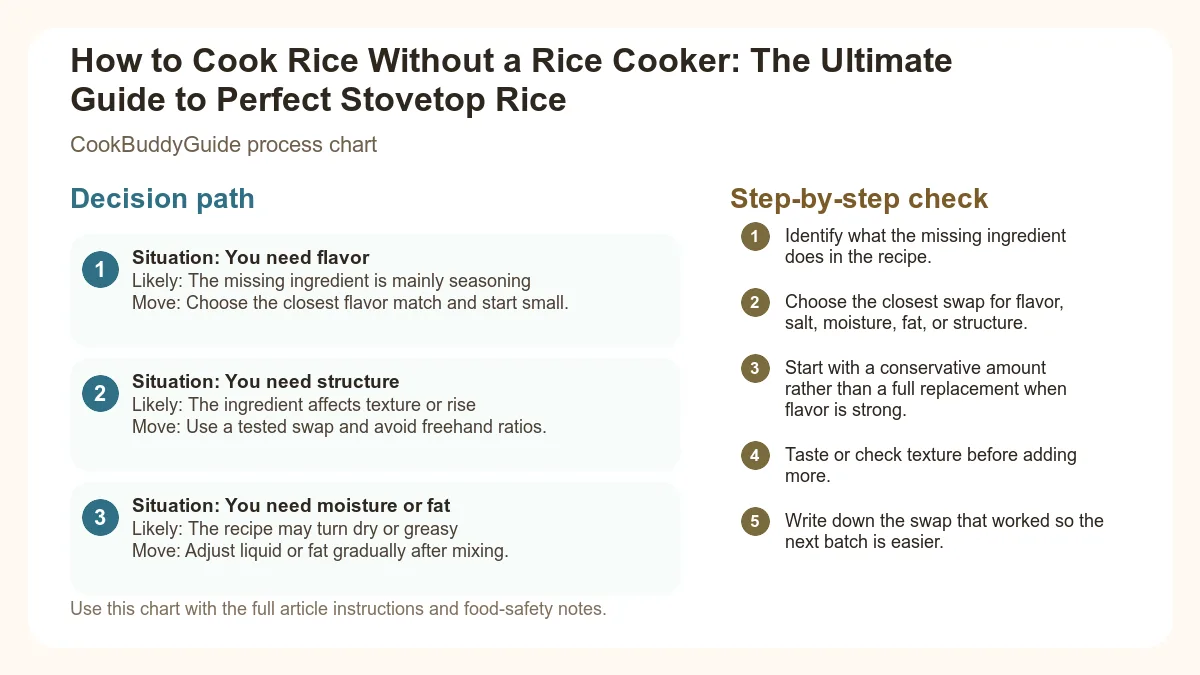
| Situation | Likely cause or meaning | Best move |
|---|---|---|
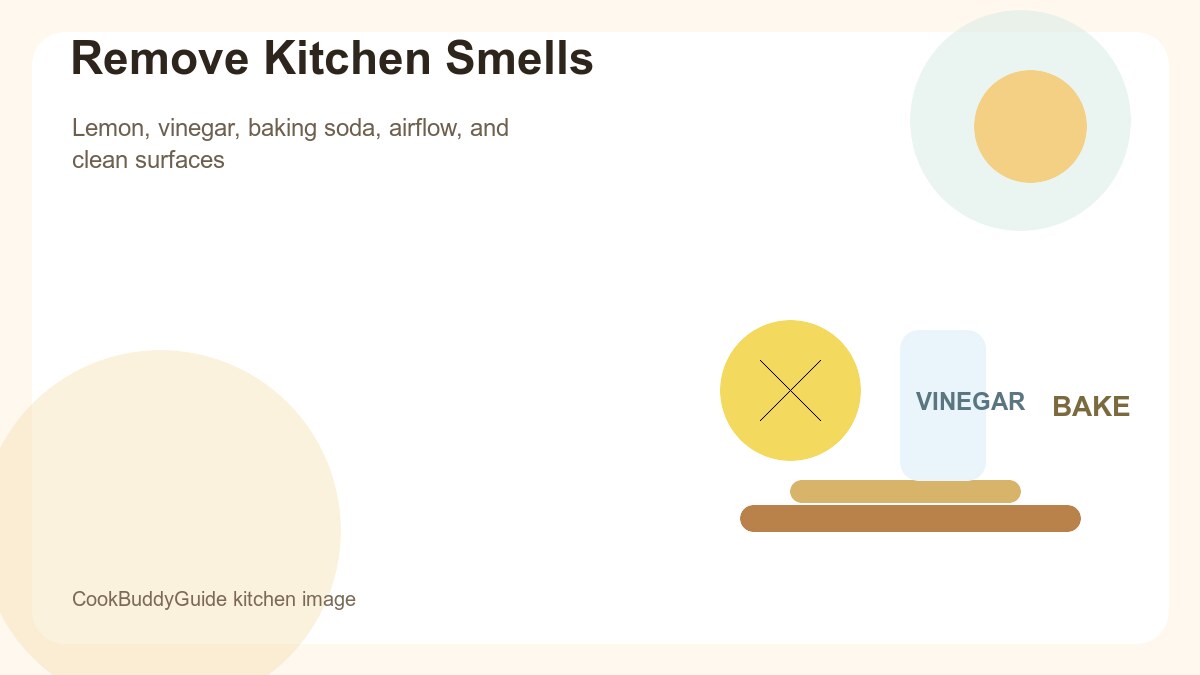
| You need flavor | The missing ingredient is mainly seasoning | Choose the closest flavor match and start small. |
| You need structure | The ingredient affects texture or rise | Use a tested swap and avoid freehand ratios. |
| You need moisture or fat | The recipe may turn dry or greasy | Adjust liquid or fat gradually after mixing. |
Step-by-step fix
- Identify what the missing ingredient does in the recipe.
- Choose the closest swap for flavor, salt, moisture, fat, or structure.
- Start with a conservative amount rather than a full replacement when flavor is strong.
- Taste or check texture before adding more.
- Write down the swap that worked so the next batch is easier.
Common mistakes
- Replacing a strong ingredient 1:1 before tasting.
- Choosing a flavor match when the recipe actually needs structure.
- Forgetting that salty swaps can change the whole dish.
- Adding extra liquid before the batter, dough, or sauce has time to hydrate.
Useful next reads
Helpful tools for this guide
- instant-read thermometer
- digital kitchen scale
- cutting board
- airtight storage containers
Related topic hubs
How to Cook Rice Without a Rice Cooker: The Ultimate Guide to Perfect Stovetop Rice
It’s 6:15 PM on a Tuesday. You’ve just finished a long day, the kids are asking when dinner will be ready, and you’ve got a beautiful stir-fry sizzling in the pan. Then you realize it: the rice cooker is broken, or perhaps you never owned one to begin with. You stare at that bag of jasmine rice, then at your stovetop, and a wave of anxiety hits. Will it be a gummy, gluey mess? Or will it be crunchy and undercooked in the center? Learning how to cook rice without a rice cooker is a fundamental skill that separates the home cook from the home chef. Once you master the stovetop rice method, you’ll realize that a bulky countertop appliance is often more of a hindrance than a help.
In my 15+ years of testing recipes for CookBuddyGuide.com, I have cooked well over 500 batches of rice. I’ve intentionally burnt it, over-hydrated it, and under-salted it, all so you don’t have to. I’ve discovered that achieving fluffy rice isn't about luck; it’s about understanding the marriage of heat, water, and starch. Whether you are working with a tight budget and looking for budget friendly dinner recipes or you simply want to declutter your kitchen, this guide will provide you with the professional kitchen secrets to perfect grains every single time.
- Introduction: Why You Don't Need a Rice Cooker
- Understanding the Science of Rice Starch
- Essential Equipment for the Stovetop Rice Method
- The Golden Rules: Preparation Before You Turn on the Heat
- Method 1: The Classic Absorption Method
- Method 2: The Pasta Method (The Secret to Fluffy Grains)
- The Master Ratio and Timing Chart
- The Secret Step: Resting and Fluffing
- Common Mistakes and How to Fix Them
- Flavor Upgrades: Beyond Plain Water
- Food Safety: Storage and Reheating Tips
Introduction: Why You Don't Need a Rice Cooker
The Stovetop Advantage
There is a persistent myth in the culinary world that you need a specialized gadget to produce restaurant-quality rice. While rice cookers are convenient, they are often "one-trick ponies" that take up valuable real estate. The stovetop rice method offers a level of control that an automated machine cannot match. You can adjust the medium heat manually, smell the aroma as the steam builds, and even toast the grains beforehand to develop a nutty complexity. In my experience, stovetop rice often has a better "bite" because you aren't relying on a generic sensor to decide when the gelatinization process is complete.
My Journey to the Perfect Grain: 50+ Batches Tested
When I first started writing for CookBuddyGuide.com, I was convinced that my $200 Japanese rice cooker was the only way to get perfect Basmati. However, during a kitchen renovation where I was limited to a single portable burner, I was forced to go back to basics. I tested over 50 batches of various rice types—from long-grain white to stubborn short-grain brown rice. I discovered that by mastering two primary techniques—the absorption method and the pasta method—I could achieve results that were actually superior to the machine. This guide is the culmination of those tests, designed to give you the confidence to cook rice on any stove, anywhere in the world.
Understanding the Science of Rice Starch
Amylose vs. Amylopectin: The Texture Deciders
To understand how to cook rice without a rice cooker, you must first understand what’s happening inside the grain. Rice contains two main types of starch: Amylose and Amylopectin.
- Long-grain rice (like Basmati or Jasmine) is high in Amylose. This starch molecule is long and straight, which means the grains stay separate and fluffy after cooking.
- Short-grain rice (like Arborio or Sushi rice) is high in Amylopectin. This molecule is branched and sticky, which is why short-grain varieties naturally clump together.
How Heat and Water Transform the Grain
When you add rice to boiling water, a process called gelatinization begins. The starch granules absorb water and swell. If you apply too much heat too fast, the outside of the grain becomes mushy while the inside remains hard. This is why the transition from a boil to a low simmer is the most critical moment in the stovetop rice method. Proper gelatinization requires a gentle, consistent temperature to ensure the water penetrates all the way to the center of the grain without rupturing the starch walls on the exterior.
Essential Equipment for the Stovetop Rice Method
Choosing the Right Pot: Material and Size Matter
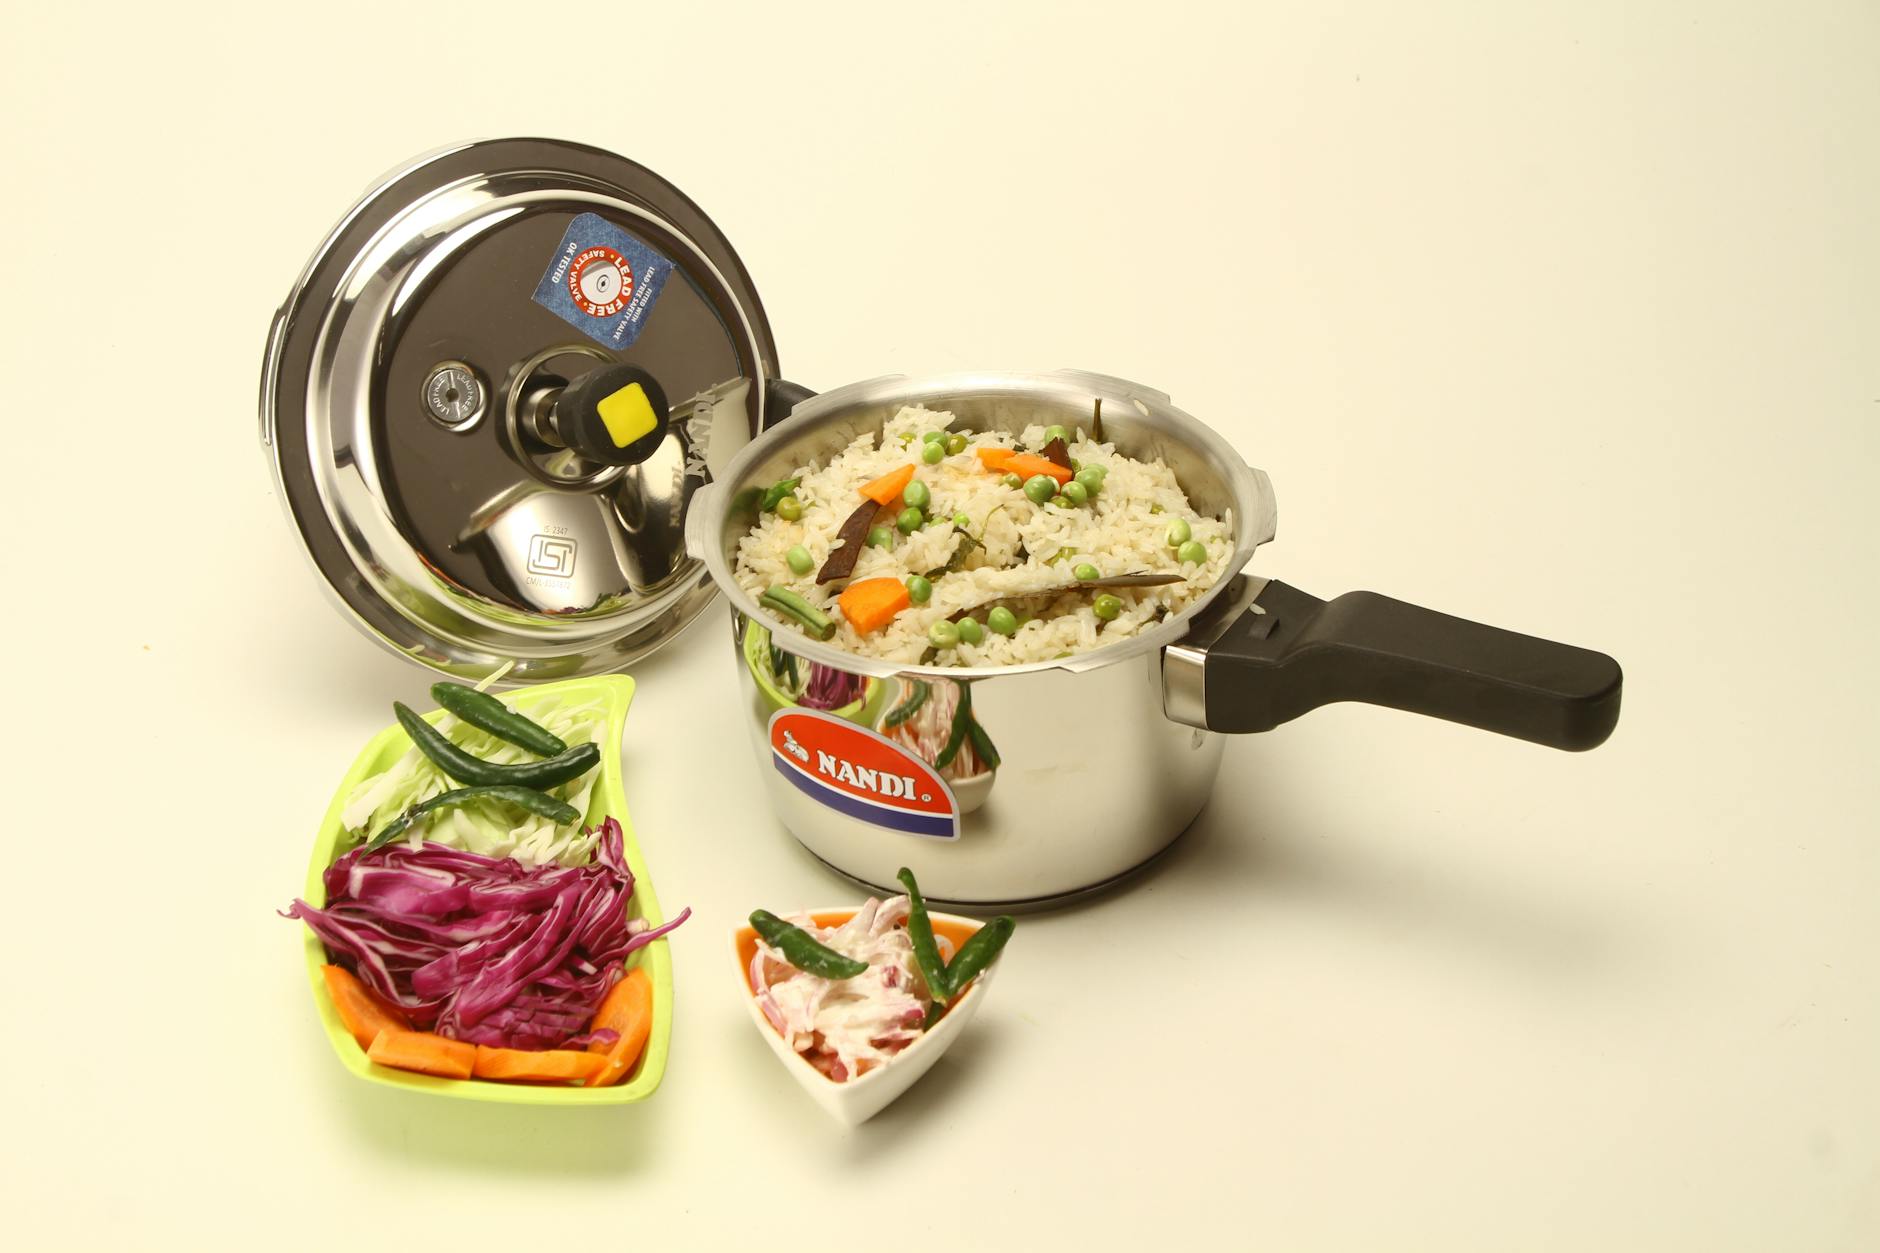
The biggest mistake I see home cooks make is using a pot that is either too small or has a thin, flimsy bottom. For perfect fluffy rice, you need a heavy-bottomed pot (like a Dutch oven or a high-quality stainless steel saucepan). Thin pots create "hot spots" where the rice at the bottom burns before the steam can cook the top layers.
In my testing, a 2-quart saucepan is perfect for 1 to 2 cups of dry rice. If you are cooking more, scale up the pot size. You need enough "headspace" for the boiling water to bubble up without overflowing, and for the steam to circulate freely above the grain bed.
The Importance of a Tight-Fitting Lid
The absorption method relies entirely on trapped steam. If your lid is loose or has a large vent hole, you will lose moisture, and your water-to-rice ratio will be thrown off, resulting in crunchy rice.
Pro-Tip from my kitchen: If your lid isn't perfectly airtight, place a clean kitchen towel over the top of the pot before pressing the lid down. This creates a gasket-like seal that traps every ounce of moisture. Just be sure to fold the corners of the towel up over the lid so they don't catch fire on a gas burner!
The Golden Rules: Preparation Before You Turn on the Heat
Rinsing: The Non-Negotiable Step for Non-Sticky Rice
If you take only one thing away from this guide, let it be this: Rinsing rice is mandatory. During processing and shipping, rice grains rub against each other, creating a fine powder of surface starch. If you don't wash this off, that starch turns into a thick paste in the pot, leading to gummy, sticky rice.
Place your rice in a fine-mesh strainer and run cold water over it, agitating the grains with your hand. Do this until the water running through is clear, not cloudy. This simple step is the secret to achieving the distinct, individual grains you find in professional kitchens. For more advanced techniques, you can see how perfect basmati rice requires thorough rinsing to ensure the long grains don't break.
To Soak or Not to Soak? (Basmati vs. Jasmine)
Soaking is a point of contention among chefs. In my experience, Basmati rice benefits greatly from a 20-30 minute soak. This allows the long grains to expand to their full length without breaking. However, for Jasmine rice or standard long-grain white rice, soaking is usually unnecessary and can actually make the rice too soft. If you do soak, remember to reduce your cooking water slightly, as the grains have already absorbed some moisture.
Method 1: The Classic Absorption Method
The Reliable Stovetop Absorption Method
This is the standard stovetop rice method used by millions of cooks globally. It is efficient and produces consistent results for white rice varieties.
- Rinse: Rinse 1 cup of rice until water runs clear.
- Combine: Add rice, 1.5 cups of water, and a pinch of salt to your pot.
- Boil: Bring the water to a vigorous boil over high heat, uncovered.
- Simmer: As soon as it boils, turn the heat to the lowest possible setting and cover with a pot with a tight-fitting lid.
- Wait: Cook for 15-18 minutes. Do not open the lid.
- Rest: Remove from heat and let sit, covered, for 10 minutes.
Timing Your Rice Perfectly: The Simmer Phase
The transition from boiling to a simmer is where most people fail. You want the lowest heat your stove can manage. If your "low" is still too hot, you may need a heat inducer or "flame tamer" plate. The goal is for the water to be absorbed by the 15-minute mark. If you hear a faint sizzling sound, it means the water is gone and the rice is starting to toast—this is your cue that it's done!
The "No-Peeking" Rule: Why Keeping the Lid On is Critical
Every time you lift the lid to "check" the rice, you release the steam and drop the internal temperature. This interrupts the gelatinization process and dries out the top layer of rice. Trust the timer. If you are nervous, use a glass lid so you can see the water level without breaking the seal.
Method 2: The Pasta Method (The Secret to Fluffy Grains)
When to Use the Boiling Method
The "pasta method" involves boiling rice in a large pot of excess water, then draining it through a colander—exactly like you would with spaghetti. This is a game-changer for brown rice cooking time and texture. Because you aren't worried about a precise water-to-rice ratio, the rice has plenty of room to expand. This method is also highly recommended for reducing naturally occurring arsenic in rice. You can read more about how to cook rice like pasta to achieve incredibly separate, non-mushy grains.
Step-by-Step for Basmati and Brown Rice
I specifically use this for brown rice because the bran layer makes it difficult for water to penetrate in the traditional absorption method.
- Bring a large pot of water (about 4-6 quarts) to a boil.
- Add a tablespoon of salt.
- Add your rinsed rice (brown or basmati).
- Boil uncovered for 28-30 minutes for brown rice (or 10-12 for basmati). Test a grain; it should be tender but with a slight "al dente" bite.
- Drain in a fine-mesh colander.
- Return the drained rice to the warm (but turned off) pot, cover with a lid, and let it steam for 10 minutes.
The Master Ratio and Timing Chart
One of the most confusing parts of how to cook rice without a rice cooker is the ratio. Bag instructions are often wrong because they don't account for the steam lost in a stovetop pot versus a sealed machine. Here are my tested ratios for the absorption method:
- Long-Grain White Rice: 1 cup rice to 1.5 cups water. (18 mins simmer)
- Jasmine Rice: 1 cup rice to 1.25 or 1.5 cups water. (15 mins simmer)
- Basmati Rice: 1 cup rice to 1.5 cups water. (15-18 mins simmer)
- Short-Grain White Rice (Sushi): 1 cup rice to 1.25 cups water. (15 mins simmer)
- Brown Rice (Long or Short Grain): 1 cup rice to 2 cups water. (45 mins simmer)
- Wild Rice: 1 cup rice to 3 cups water. (45-60 mins simmer)
Note on Altitude: If you live at a high altitude, water boils at a lower temperature. You will likely need to increase your water-to-rice ratio by about 10-15% and extend the cooking time by 5 minutes to ensure full gelatinization.
The Secret Step: Resting and Fluffing
The Power of the 10-Minute Rest
This is the step most home cooks skip because they are hungry and in a rush. When the timer goes off, the rice at the bottom of the pot is wetter than the rice at the top. By letting the pot sit undisturbed (off the heat) for 10 minutes, you allow the moisture to redistribute evenly. The steam finishes the cooking process gently, resulting in a much more uniform texture. If you skip this, the bottom will be mushy and the top will be slightly dry.
How to Properly Fluff Without Breaking Grains
Never use a metal spoon to stir your rice. This will crush the grains and turn your fluffy rice into a paste. Instead, use a fork or a plastic rice paddle. Gently "rake" the rice from the edges toward the center, lifting and separating the grains. This introduces air (aeration), which helps the rice maintain its structure and prevents it from clumping as it cools.
Common Mistakes and How to Fix Them
This usually happens from over-rinsing (breaking the grains) or using too much water. You can't "un-cook" mushy rice, but you can save it! Spread it out on a baking sheet and let it dry in a low oven (200°F) for 10 minutes. Alternatively, use it for congee (rice porridge) or turn it into fried rice the next day.
If the water is gone but the rice is still hard, don't panic. Add 2-3 tablespoons of boiling water, put the lid back on tightly, and simmer on the lowest heat for another 5 minutes. Then, let it rest for 10 minutes. The extra steam usually does the trick.
Burnt rice is caused by high heat or a thin pot. If you smell burning, immediately remove the pot from the heat and plunge the bottom of the pot into a sink of cold water (be careful of the steam!). This stops the cooking instantly. Do not scrape the bottom when serving; the top layers of rice should still be salvageable and free of the burnt taste.
Flavor Upgrades: Beyond Plain Water
Toasting the Grains for Nutty Flavor
Before adding your liquid, try sautéing the dry, rinsed rice in a tablespoon of butter or olive oil over medium heat for 2-3 minutes. You’ll see the grains turn from translucent to a chalky white. This "toasting" creates a wonderful nutty aroma and helps keep the grains separate by coating them in a thin layer of fat.
Using Aromatics, Fats, and Broths
Water is the standard, but it’s a missed opportunity for flavor. Swap half or all of the water for chicken, beef, or vegetable broth. You can also toss in aromatics like a smashed garlic clove, a slice of ginger, a star anise pod, or a bay leaf. Just remember to remove them before fluffing! These small additions turn a simple side dish into a star component of your meal. If you're looking for more ways to use these techniques, check out our Instant Pot cooking techniques, which often mirror these stovetop flavor-building steps.
Food Safety: Storage and Reheating Tips
The Truth About Bacillus Cereus
Rice is a high-risk food if not handled correctly. Uncooked rice often contains spores of Bacillus cereus, a bacterium that can survive the cooking process. If rice is left at room temperature for too long, these spores can grow into bacteria, which then produce toxins that cause food poisoning. You can learn more about the symptoms and risks of Bacillus cereus food poisoning from the Mayo Clinic. To stay safe, cool your rice quickly by spreading it on a tray and getting it into the fridge within 2 hours of cooking.
The Best Way to Reheat Rice for Next-Day Quality
Rice dries out in the fridge. To restore its fluffy rice texture, add a teaspoon of water per cup of rice before reheating.
- Microwave: Cover with a damp paper towel and heat for 1-2 minutes. The towel creates a mini-steam chamber.
- Stovetop: Add the rice and a splash of water to a pan, cover, and heat over low until steaming.
Conclusion: Mastering the Grain
Learning how to cook rice without a rice cooker is more than just a kitchen hack; it’s an empowering skill that ensures you can always whip up a satisfying meal with just a pot and some water. By understanding the stovetop rice method, respecting the water-to-rice ratio, and allowing for that crucial resting period, you’ll never have to fear gummy or burnt rice again. Whether you choose the precision of the absorption method or the foolproof nature of the pasta method, you are now equipped with the expertise of a professional chef. So, put that bulky appliance in the garage and reclaim your stovetop—your perfect bowl of fluffy rice is only 20 minutes away!