Quick Answer
Your cookies flat usually comes down to a controllable kitchen variable such as heat, timing, moisture, measuring, or storage history. Start with the most visible clue, change one variable, and compare the next batch before changing the whole method.
CookBuddy Kitchen Note
For your cookies flat, the most useful home checks are temperature, measuring, resting time, and visible texture. Those details tell you more than guessing, especially before adding extra flour, liquid, heat, or leavening.
Decision table
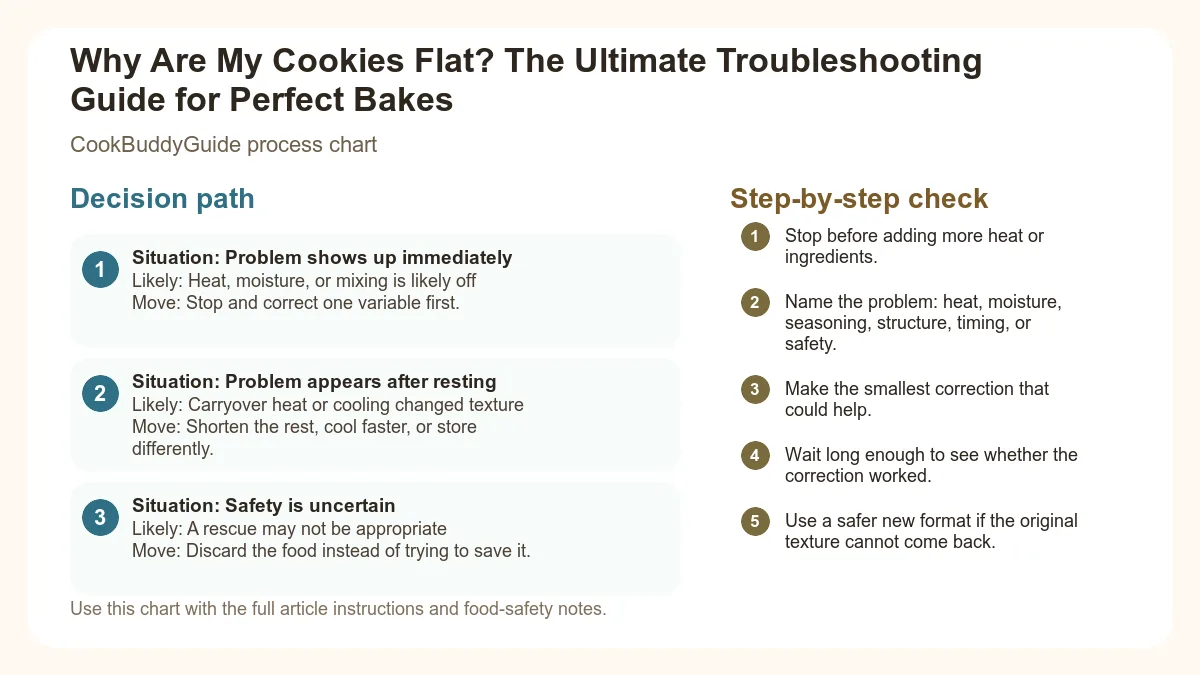
| Situation | Likely cause or meaning | Best move |
|---|---|---|
| Problem shows up immediately | Heat, moisture, or mixing is likely off | Stop and correct one variable first. |
| Problem appears after resting | Carryover heat or cooling changed texture | Shorten the rest, cool faster, or store differently. |
| Safety is uncertain | A rescue may not be appropriate | Discard the food instead of trying to save it. |
Step-by-step fix
- Stop before adding more heat or ingredients.
- Name the problem: heat, moisture, seasoning, structure, timing, or safety.
- Make the smallest correction that could help.
- Wait long enough to see whether the correction worked.
- Use a safer new format if the original texture cannot come back.
Common mistakes
- Adding several fixes at once and losing track of what helped.
- Using high heat to rush a texture problem.
- Trying to rescue food when safety is uncertain.
- Repeating the recipe without writing down the likely cause.
Useful next reads
Helpful tools for this guide
- digital kitchen scale
- instant-read thermometer
- rimmed sheet pan
- silicone spatula
Related topic hubs
Why Are My Cookies Flat? The Ultimate Troubleshooting Guide for Perfect Bakes
It was three days before Christmas in 2012, and my kitchen looked like a flour-dusted war zone. I was preparing five dozen of my grandmother’s famous chocolate chip cookies for a neighborhood swap. I followed the recipe—or so I thought—and slid the first tray into the oven. Twelve minutes later, I didn't find golden, chewy mounds. Instead, I stared at a single, giant, shimmering sheet of sugar-laden "cookie pancake." The edges were burnt, the centers were translucent, and my heart sank. I remember asking the empty kitchen, "Why are my cookies flat?"
After 15 years of testing recipes for CookBuddyGuide.com, I’ve realized that the "pancake cookie" is the most common heartbreak for home bakers. Whether you are a novice or a seasoned pro, a slight deviation in temperature or a heavy hand with the sugar can turn a masterpiece into a puddle. In this guide, I’m going to break down the science of cookie spread and show you exactly how to fix flat cookies so you never have to toss a tray again.
Table of Contents
- The Science of the Spread: How Cookies Work
- Reason 1: Butter Temperature and Texture
- Reason 2: Skipping the Dough Chill
- Reason 3: Inaccurate Flour Measurements
- Reason 4: Baking Sheet Blunders
- Reason 5: Sugar and Leavening Ratios
- Reason 6: Oven Temperature Inaccuracies
- How to Fix Flat Cookies: Emergency Rescues
- The Ultimate 'No-Flat' Cookie Checklist
The Science of the Spread: How Cookies Work
To understand why your cookies are losing their shape, we have to look at the chemistry happening behind the oven door. A cookie is essentially a battle between "spreaders" and "setters."
The Role of Fat, Sugar, and Structure
In the world of baking, ingredients like brown sugar and saturated fats (butter) are spreaders. When heat hits the dough, the butter melts and the sugar liquefies, causing the dough to relax and expand. Conversely, all-purpose flour and eggs are setters. They provide the structure through gluten development and protein coagulation. If the spreaders outpace the setters, your cookie collapses before it can "set."
The Maillard Reaction and Caramelization
As the cookie bakes, two critical chemical processes occur: the Maillard reaction and caramelization. The Maillard reaction is a chemical reaction between amino acids and reducing sugars that gives browned food its distinctive flavor. Meanwhile, sucrose crystallization and caramelization create that crisp, golden edge. If your cookie spreads too quickly, it becomes too thin for these reactions to create a complex flavor profile, resulting in a cookie that tastes like one-dimensional burnt sugar.
Reason 1: Butter Temperature and Texture
In my experience, 90% of the time the answer to "why are my cookies flat" lies in the butter dish. The creaming method—beating butter and sugar together—is designed to aerate the dough. If your butter is too soft, it cannot hold those tiny air pockets. Instead of a fluffy mixture, you get a greasy sludge.
The Danger of Melted or Overly Soft Butter
When butter is melted or even just "too soft," it releases its water content almost immediately in the oven. This water dissolves the sugar into a syrup before the flour can form a structure, leading to an immediate and irreversible spread. According to research on the impact of butter temperature, the physical state of the fat at the moment it enters the oven dictates the final height of the cookie.
The "Fingerprint Test" for Perfect Butter
Don't rely on the clock to tell you when butter is ready. Use this sensory test:
- The Temperature: Aim for exactly 65°F (18°C).
- The Feel: Press your finger into the stick. It should be cool to the touch.
- The Result: Your finger should leave an indentation, but the butter should not "squish" or lose its shape. If your finger slides through without resistance, the butter is too warm.
How to Fix: The Quick-Chill Method
If you realize your butter was too soft after you've already started the creaming process, stop! Place the mixing bowl in the refrigerator for 5–10 minutes. You want to bring the temperature back down to a point where the fat is solid enough to trap air during over-creaming prevention.
Reason 2: Skipping the Dough Chill
We live in a world of instant gratification, but great cookies require patience. If you’re wondering how to fix flat cookies, the simplest answer is often "wait."
Why 30 Minutes in the Fridge Changes Everything
Chilling the dough serves two purposes. First, it re-solidifies the fat. Cold fat takes longer to melt in the oven, giving the flour and eggs more time to set the structure. Second, it allows for flour hydration. When the flour has time to fully absorb the moisture from the eggs and butter, the dough becomes thicker and more cohesive.
I’ve conducted side-by-side tests where I baked one batch immediately and another after a 24-hour rest. The chilled batch was consistently taller, with a deeper flavor profile. King Arthur Baking discusses the benefits of chilling cookie dough, noting that it concentrates sugars and prevents that dreaded "pancake" effect.
Reason 3: Inaccurate Flour Measurements
Flour is the skeletal system of your cookie. If you don't have enough "bone," the cookie will collapse. This is where most home cooks stumble without even realizing it.
The 'Scoop and Level' Mistake
When you dip a measuring cup directly into a bag of flour, you compress the powder. You might end up with 150 grams of flour in a cup that should only hold 120 grams. Conversely, if you scoop too loosely, you might only get 100 grams. This inconsistency is a primary reason why are my cookies flat. Too little flour means there isn't enough starch to absorb the liquid fat and sugar.
Why Every Home Baker Needs a Digital Scale
In my kitchen, I stopped using measuring cups for dry ingredients years ago. A kitchen scale is the only way to ensure accuracy. If a recipe calls for a "cup" of flour, aim for 120g to 125g. If you don't have a scale, use the "spoon-and-level" method. Spoon the flour into the cup until it overflows, then level it off with the back of a knife. For more on this, check out this guide on properly measuring your flour.
Reason 4: Baking Sheet Blunders
You’ve made the perfect dough, chilled it for 24 hours, and measured your flour to the gram. You put the cookies in the oven, and they still flatten out. Look at your pan.
The 'Hot Pan' Trap
This happens most often during the second or third batch. You pull a hot tray out of the oven, slide the cookies onto a wire cooling rack, and immediately drop fresh, cold dough onto that same hot tray. The residual heat begins melting the butter from the bottom up before the tray even makes it back into the oven. This creates an immediate "grease ring" and causes the cookie to spread prematurely.
The Fix: Always use room-temperature baking sheets. If you only have one pan, run it under cold water and dry it thoroughly between batches. This is a key tip for preventing cookies from spreading.
Greasing vs. Parchment vs. Silicone Mats
What you put on your pan matters.
- Non-stick spray/Butter: These add extra grease to the bottom of the cookie, encouraging spread.
- Silicone baking mat: These are great for sustainability, but they are very slippery. Cookies tend to spread more on silicone than on paper.
- Parchment paper: This is my gold standard. It provides just enough "grip" for the dough to hold onto as it rises, preventing excessive cookie spread.
While you're waiting for your pans to cool, you might want to check out some Sheet Pan Dinner Ideas for your next meal—just make sure to wash the pan between cookies and chicken!
Reason 5: Sugar and Leavening Ratios
Sugar is often misunderstood. We think of it as a dry ingredient, but in the oven, sugar is a liquid. It liquefies and contributes to the spread. If you’ve accidentally added too much sugar, or if your ratio of brown sugar (which contains moisture-rich molasses) is too high, your cookies will be thin and lacy.
Expired Baking Soda and Powder
Leavening agents are responsible for the "lift." If your baking soda or powder is expired, the carbon dioxide bubbles won't form, and the cookie will simply melt outward instead of upward.
- Baking Soda: Needs an acid (like brown sugar or cocoa) to react.
- Baking Powder: Contains its own acid and reacts with heat and moisture.
Reason 6: Oven Temperature Inaccuracies
Your oven dial is a liar. I have tested dozens of ovens in my career, and I have rarely found one that is perfectly calibrated. If your oven is too cool, the butter will melt and spread long before the proteins in the flour and eggs have a chance to firm up.
The Importance of an Oven Thermometer
A $10 oven thermometer is the best investment you can make. Place it in the center of the oven and wait for it to reach the target temperature. Often, an oven will "beep" that it is preheated when it is actually 50 degrees too cold. Modern ovens have complex heating elements, but they still fluctuate. (Speaking of modern tech, have you seen the latest 2026 Kitchen Design Trends? Smart ovens are getting better at oven calibration, but a manual check is still safest!)
How to Fix Flat Cookies: Emergency Rescues
If you see your cookies spreading into a giant blob mid-bake, don't panic. You can still save the batch.
The "Cookie Scooting" Trick
This is my favorite professional secret for fixing the shape of cookies immediately after they leave the oven.
- Find a round glass or a circular cookie cutter that is slightly larger than your cookie.
- While the cookies are still piping hot and soft on the baking sheet, place the glass over the cookie.
- Gently move the glass in a circular motion (scooting) to push the edges back toward the center.
- The cookie will form a perfect, thick circle and "set" in that shape as it cools.
The Test Bake
Before you commit an entire tray of 12 cookies to the oven, do a test bake. Place just two dough balls on a tray and bake them. If they come out flat, you know you need to adjust. You can try adding 1–2 tablespoons of all-purpose flour to the remaining dough or chilling the dough for an additional hour before proceeding with the rest of the batch.
The Ultimate 'No-Flat' Cookie Checklist
Print this out and tape it to the inside of your pantry. Use it every time you bake to ensure bakery-quality results.
- Butter: Is it 65°F? Does it pass the fingerprint test?
- Flour: Did I weigh it in grams on a kitchen scale?
- Leaveners: Are the baking soda and powder fresh (less than 6 months old)?
- Chilling: Has the dough rested in the fridge for at least 30 minutes?
- Pan: Is the baking sheet room temperature? Am I using parchment paper?
- Oven: Have I verified the temperature with an external thermometer?
Frequently Asked Questions
A: Margarine often has a higher water content than butter, which can lead to even more spread. If you must use it, ensure it is the stick variety, not the tub version, but for the best results, stick to high-quality butter.
A: This is usually due to "hot spots" in your oven. Try rotating your baking sheet halfway through the baking time to ensure even heat distribution.
A: Yes! Brown sugar is hygroscopic, meaning it attracts moisture. If your recipe uses all brown sugar and no granulated sugar, the cookies will naturally be softer and spread more. A mix is usually best for structure.
Final Thoughts from the Kitchen
Baking is as much a science as it is an art. When you ask "why are my cookies flat," you are really asking about the delicate balance of heat, fat, and structure. By controlling your butter temperature, weighing your ingredients, and giving your dough time to rest, you can master the how to fix flat cookies dilemma once and for all.
The next time you’re in the kitchen, remember that even a "failed" flat cookie is still a delicious treat. Crumble them over vanilla ice cream or sandwich them with frosting! But with these professional tips in your back pocket, your next batch will be the thick, chewy, bakery-style perfection you’ve been dreaming of. Happy baking!