Quick Answer
How to Thicken Soup is built around practical home-kitchen ratios and simple texture checks. Follow the main method first, then use the variation and troubleshooting notes to adjust sweetness, salt, moisture, or cook time.
CookBuddy Kitchen Note
For How to Thicken Soup, this guide centers on White Roux, Blond Roux, Brown Roux. Those are the checkpoints we would use first in a normal home kitchen before making a bigger change.
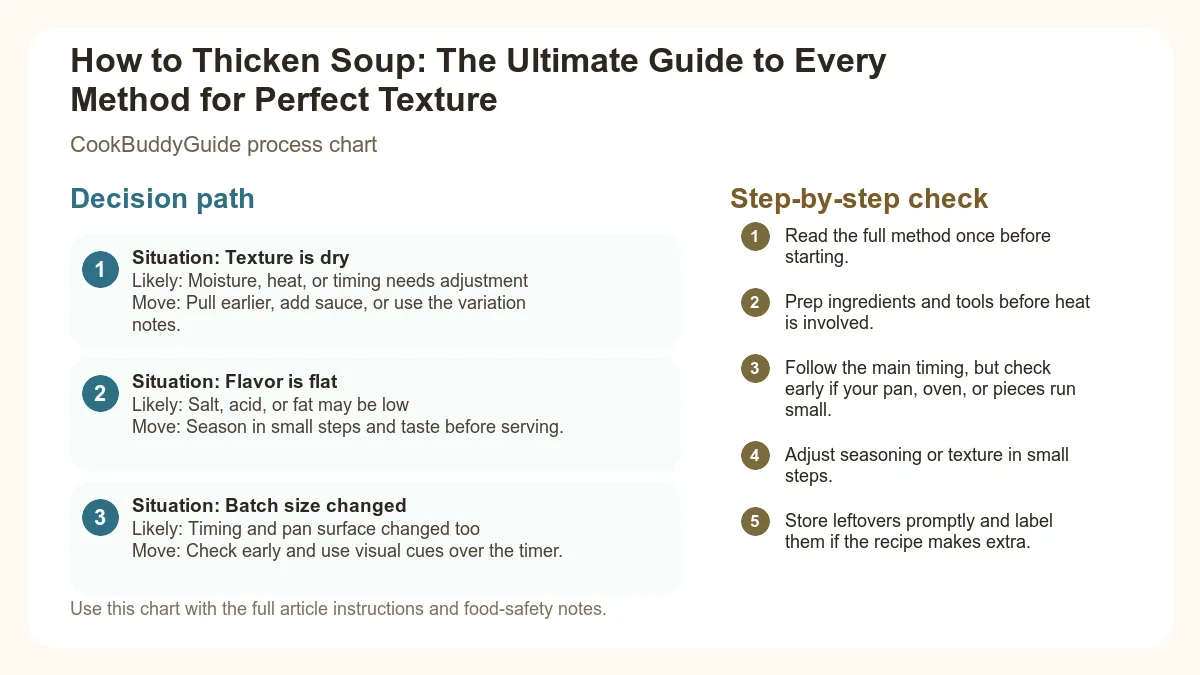
Decision table
| Situation | Likely cause or meaning | Best move |
|---|---|---|
| Texture is dry | Moisture, heat, or timing needs adjustment | Pull earlier, add sauce, or use the variation notes. |
| Flavor is flat | Salt, acid, or fat may be low | Season in small steps and taste before serving. |
| Batch size changed | Timing and pan surface changed too | Check early and use visual cues over the timer. |
Step-by-step fix
- Read the full method once before starting.
- Prep ingredients and tools before heat is involved.
- Follow the main timing, but check early if your pan, oven, or pieces run small.
- Adjust seasoning or texture in small steps.
- Store leftovers promptly and label them if the recipe makes extra.
Common mistakes
- Changing the recipe before trying the base method once.
- Measuring casually when texture depends on ratios.
- Waiting until the end to fix seasoning.
- Ignoring carryover heat or resting time.
Useful next reads
Helpful tools for this guide
- instant-read thermometer
- digital kitchen scale
- cutting board
- airtight storage containers
Related topic hubs
How to Thicken Soup: The Ultimate Guide to Every Method for Perfect Texture
It’s 6:30 PM on a Tuesday. You’ve spent the last hour prepping vegetables, searing meat, and simmering a pot of what you hoped would be a hearty, soul-warming stew. But as you lift the lid, you’re met with a disappointing sight: the liquid is thin, watery, and lacks that rich, cling-to-the-spoon body you were craving. It looks more like a tea than a meal. We’ve all been there. In my 15 years of professional recipe testing, I’ve rescued hundreds of "thin broth" disasters, and I can tell you that learning how to thicken soup is the single most important skill for elevating your home cooking from "fine" to "restaurant-quality."
Achieving the perfect creamy texture isn't just about dumping in flour and hoping for the best. It’s a delicate balance of science and timing. Whether you’re looking for a gluten-free thickener or a classic French technique, understanding how starch granules behave under heat is key. In this guide, I’ll walk you through every soup thickening method I use in the CookBuddyGuide kitchen, from the lightning-fast cornstarch slurry to the deep, nutty flavors of a dark roux.
- The Science of Viscosity and Mouthfeel
- Method 1: The Cornstarch Slurry (The Quick Fix)
- Method 2: The Flour-Based Roux (The Chef's Standard)
- Method 3: Blending a Portion (The Low-Calorie Choice)
- Method 4: Adding Pureed Vegetables (The Nutrient Boost)
- Method 5: Potatoes and Starchy Pasta Water
- Method 6: Cream, Coconut Milk, and Dairy Enrichments
- Comparison Guide: Which Method Should You Choose?
- Troubleshooting: Fixing Lumps and Mistakes
Introduction: Why Texture Matters in the Perfect Bowl of Soup
The Science of Viscosity and Mouthfeel
In the culinary world, we talk a lot about "mouthfeel." This refers to the physical sensation of food in your mouth—is it oily, watery, velvety, or gritty? When we discuss how to thicken soup, we are essentially manipulating the viscosity of the liquid. Viscosity is a measure of a fluid's resistance to flow. A high-viscosity soup feels luxurious and rich, coating the palate and carrying flavors longer than a thin broth.
The magic happens through a process called Gelatinization. When starches (like flour or cornstarch) are heated in a liquid, the starch molecules—specifically Amylose and amylopectin—absorb water and swell. Eventually, these starch granules burst, releasing a cloudy mesh that traps water molecules, effectively thickening the liquid. In some cases, we also use Emulsification, where fat and liquid are forced together to create a stable, creamy bond.
Common Reasons Your Soup is Too Thin
Before we fix the problem, let's look at why it happened. Often, it's a lack of simmering techniques. If you don't allow enough time for the reduction method (letting water evaporate), the flavors and textures remain diluted. Another culprit is using high-moisture vegetables like zucchini or mushrooms, which release their own water into the pot as they cook. If you're following Crockpot freezer meals, the lack of evaporation in a sealed slow cooker often results in a thinner consistency than stovetop versions.
Method 1: The Cornstarch Slurry (The Quick Fix)
If you need a thin broth fix in under three minutes, the cornstarch slurry is your best friend. I use this method frequently for Asian-inspired soups, like Hot and Sour or Egg Drop, because it provides a clear, glossy finish that doesn't cloud the broth's color.
How to Make a Fail-Proof Slurry
The mistake I made early in my career was adding dry cornstarch directly to a hot pot. Never do this! It will instantly clump into "starch balls" that are impossible to dissolve. Instead, you must create a slurry. Combine 1 part cornstarch with 2 parts cold liquid (water or room-temp broth). Whisk until it looks like heavy cream.
The Perfect Cornstarch Slurry Ratio
Ingredients:
- 1 tablespoon cornstarch
- 2 tablespoons cold water or broth
Instructions:
- Whisk the cornstarch and cold liquid in a small bowl until perfectly smooth.
- Bring your soup to a full simmer.
- Slowly drizzle the slurry into the pot while whisking the soup constantly.
- Follow the "boil rule": Cornstarch must reach a simmer to activate its thickening power. Cook for exactly 1-2 minutes to remove the starchy taste.
Pros and Cons: Glossy Finish vs. Reheating Issues
The main advantage of cornstarch is its neutral flavor and high potency—it has twice the thickening power of flour. However, it can become "rubbery" if overcooked. Also, be aware that soups thickened with cornstarch don't freeze well; the starch bonds break down when thawed, leaving the soup watery again. For more precision on this, check out this guide on making a cornstarch slurry.
Method 2: The Flour-Based Roux (The Chef's Standard)
A roux is the foundation of classical French cooking. It is a cooked mixture of equal parts fat and flour. In my testing, I’ve found that a roux provides the most stable creamy texture for long-simmering stews and chowders.
White, Blond, and Brown Roux: When to Use Which
The longer you cook a roux, the darker it becomes and the more flavor it develops, but it also loses some of its thickening power.
- White Roux: Cooked for 2 minutes. Best for white sauces and potato soups.
- Blond Roux: Cooked for 5 minutes until it smells like toasted bread. Best for chicken or vegetable soups.
- Brown Roux: Cooked for 15-20 minutes. This involves the Maillard reaction, creating a deep, nutty flavor. Essential for Gumbo.
The Beurre Manié: The "Kneaded Butter" Shortcut
If your soup is already finished but still too thin, you can't easily add a hot roux. This is where the Beurre manié comes in. It’s essentially a "reverse roux." You knead equal parts softened butter and flour together into small pea-sized balls. Drop them into the simmering soup one by one. The butter melts slowly, releasing the flour into the liquid without whisking lumps. It’s a lifesaver for late-stage adjustments.
Method 3: Blending a Portion (The Low-Calorie Choice)
When I’m making a bean or lentil soup, I rarely reach for a thickening agent. Instead, I let the soup thicken itself. This is one of the most popular thickening with pureed vegetables techniques used by professional chefs to keep recipes light.
Immersion Blender vs. Stand Blender Safety
In my experience, an immersion blender (stick blender) is the safest and most convenient tool. You can simply pulse it a few times directly in the pot. If you use a stand blender, be extremely careful. Never fill a blender more than halfway with hot liquid. The steam creates pressure that can blow the lid off, causing severe burns. Always remove the center plastic piece of the lid and cover it with a folded kitchen towel to allow steam to escape.
The "Partial Blend" Technique
Best for: Black bean soup, split pea, or rustic vegetable soup.
- Once the vegetables or beans are tender, ladle 2 cups of the soup (solids and liquid) into a blender.
- Blend until completely smooth.
- Stir the puree back into the main pot.
- This creates a creamy base while leaving plenty of chunky "bits" for texture.
Method 4: Adding Pureed Vegetables (The Nutrient Boost)
This is my favorite "hidden" trick for picky eaters. You can dramatically increase the viscosity of a soup by adding a neutral-flavored vegetable puree. After making this 20+ times for my own family, I’ve found that cauliflower is the undisputed king of this method.
Best Vegetables for Thickening
- Cauliflower: When steamed and blended, it has a texture almost identical to heavy cream but with a fraction of the calories. It’s a perfect gluten-free thickener.
- Butternut Squash: Adds a beautiful golden hue and natural sweetness. Perfect for tomato or bell pepper soups.
- Cooked Onions: Pureeing caramelized onions adds incredible depth and body to beef-based broths.
I often keep small bags of "thickening puree" in my freezer. If a soup looks thin, I just drop in a frozen cube of cauliflower puree, and it melts right in!
Method 5: Potatoes and Starchy Pasta Water
Potatoes are nature’s thickening agent. They are packed with starch that breaks down during the cooking process. If you're making beginner Instant Pot recipes, adding a diced potato is a great way to ensure a thick sauce without extra steps.
The Power of Potato Flakes (The Secret Industry Hack)
I’ll let you in on a secret: many commercial kitchens keep a box of instant mashed potato flakes on hand. If a rustic farmhouse soup or a corn chowder is too thin, stir in 1/4 cup of potato flakes. They dissolve instantly, don't clump, and add a wonderful earthy thickness. It is the ultimate pantry staple for a quick fix.
Using Reserved Pasta Water
If your soup includes pasta (like Minestrone), don't cook the pasta separately in plain water. Cook it directly in the soup, or if you must cook it separately, save a cup of that cloudy pasta water. It’s rich in amylopectin, a type of starch that provides instant body and helps the broth cling to the noodles.
Method 6: Cream, Coconut Milk, and Dairy Enrichments
Sometimes, you don't just want thickness; you want richness. This is where fats come into play. Adding dairy or plant-based milks creates a luxurious mouthfeel through the process of fat suspension.
Tempering: How to Prevent Curdling
The biggest mistake home cooks make is pouring cold cream directly into a boiling soup. The sudden temperature change can cause the proteins to denature and clump, resulting in a curdled mess. To prevent this, use tempering: Whisk a ladle of hot soup into your cream in a separate bowl, then slowly pour that warmed mixture back into the pot. For a heart-healthy approach, you can also use healthy dairy-based thickeners like evaporated milk or Greek yogurt.
Dairy-Free Alternatives: Cashew Cream and Coconut Milk
For vegan or dairy-free soups, cashew cream is unmatched. Soak 1 cup of raw cashews in water for 4 hours, then blend with 1/2 cup of fresh water until silky. It’s incredibly stable and won't curdle even at high heat. Full-fat coconut milk is another excellent option, particularly for Thai or Indian-inspired soups, providing a thick, velvety finish.
Comparison Guide: Which Method Should You Choose?
Not every soup thickening method works for every recipe. Here is a quick reference chart to help you decide which tool to pull from your culinary belt.
| Method | Best For | Pros | Cons |
|---|---|---|---|
| Cornstarch Slurry | Clear broths, Asian soups | Fast, glossy finish, gluten-free | Can be "gloopy," doesn't freeze well |
| Roux | Gumbos, Chowders, Stews | Rich flavor, very stable | Contains gluten, takes time to cook |
| Blending | Bean, Lentil, Root Veggie | Low calorie, uses existing ingredients | Changes the texture of the whole pot |
| Potato Flakes | Rustic, Farmhouse soups | Instant, no prep needed | Adds a slight potato flavor |
| Arrowroot Powder | Fruit soups, acidic broths | Neutral taste, stays clear | More expensive than cornstarch |
| Heavy Cream | Bisques, Cream of Mushroom | Incredible mouthfeel | High calorie, can curdle |
For more unconventional ideas, you can check out these common soup thickening methods which include using egg yolks or even crushed nuts.
Troubleshooting: How to Fix Common Thickening Mistakes
Even experts have bad days. Here’s how to rescue a soup that has gone sideways.
A: Don't panic. Slowly whisk in more broth or water, 1/4 cup at a time, until you reach the desired consistency. Often, a splash of acid (like lemon juice or apple cider vinegar) can also help "cut" through the heaviness and make the soup feel lighter on the tongue.
A: If the lumps are small, you can try using an immersion blender to zap them. If the soup is chunky and you can't blend it, your best bet is to pour the liquid through a fine-mesh strainer into a new pot, then return the solids to the strained liquid.
A: This happens when a roux or slurry isn't cooked long enough. You need to simmer the soup for at least another 5-10 minutes. The heat will break down the raw starch molecules and eliminate that pasty flavor.
Conclusion: Mastering the Art of the Perfect Simmer
Learning how to thicken soup is a journey of experimentation. In my kitchen, I’ve discovered that the best results often come from a combination of methods—perhaps a small roux for flavor and a quick blend of the vegetables for body. The goal is always to enhance the ingredients you already have, creating a cohesive, satisfying meal.
One final CookBuddyGuide tip: Always wait to do your final seasoning (salt and pepper) after you have thickened the soup. Thickeners like potatoes or flour can absorb salt, and the reduction method concentrates flavors. If you salt too early, you might end up with a bowl that is perfectly thick but way too salty. Now, grab your whisk, head to the kitchen, and turn that watery broth into a masterpiece!