Quick Answer
How to Poach an Egg is built around practical home-kitchen ratios and simple texture checks. Follow the main method first, then use the variation and troubleshooting notes to adjust sweetness, salt, moisture, or cook time.
CookBuddy Kitchen Note
For How to Poach an Egg, this guide centers on Prepare the Water, The Strainer Trick, The Gentle Vortex. Those are the checkpoints we would use first in a normal home kitchen before making a bigger change.
Decision table
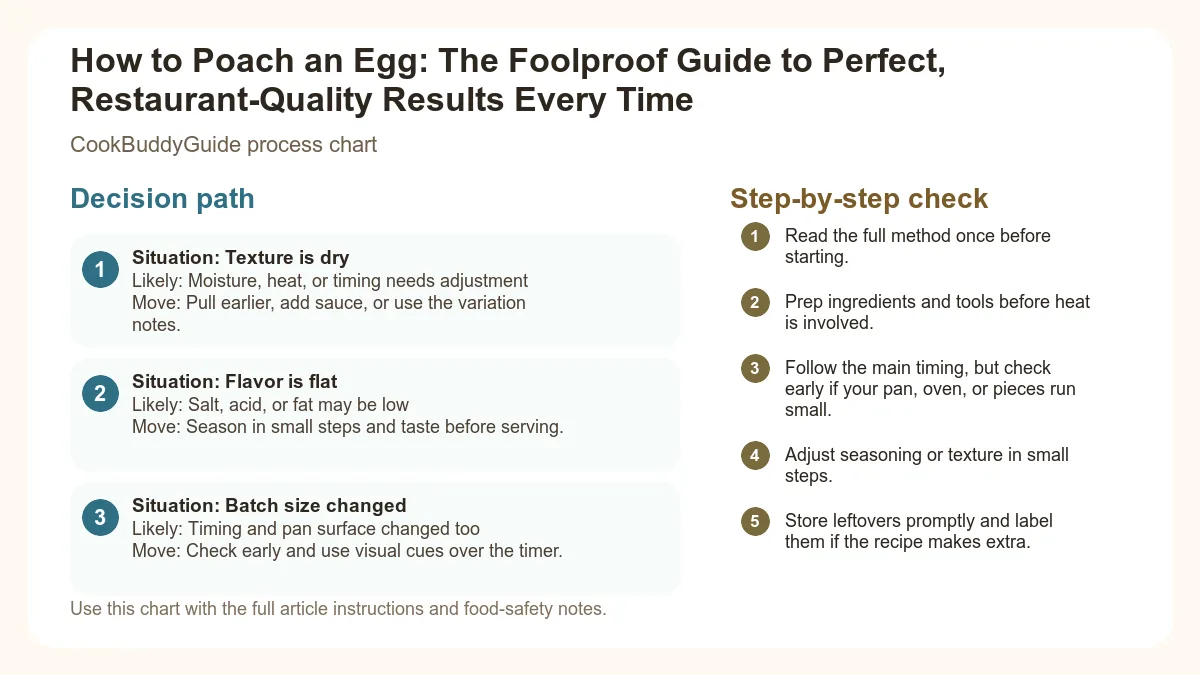
| Situation | Likely cause or meaning | Best move |
|---|---|---|
| Texture is dry | Moisture, heat, or timing needs adjustment | Pull earlier, add sauce, or use the variation notes. |
| Flavor is flat | Salt, acid, or fat may be low | Season in small steps and taste before serving. |
| Batch size changed | Timing and pan surface changed too | Check early and use visual cues over the timer. |
Step-by-step fix
- Read the full method once before starting.
- Prep ingredients and tools before heat is involved.
- Follow the main timing, but check early if your pan, oven, or pieces run small.
- Adjust seasoning or texture in small steps.
- Store leftovers promptly and label them if the recipe makes extra.
Common mistakes
- Changing the recipe before trying the base method once.
- Measuring casually when texture depends on ratios.
- Waiting until the end to fix seasoning.
- Ignoring carryover heat or resting time.
Useful next reads
Helpful tools for this guide
- instant-read thermometer
- digital kitchen scale
- cutting board
- airtight storage containers
Related topic hubs
How to Poach an Egg: The Foolproof Guide to Perfect, Restaurant-Quality Results Every Time
You stand over a pot of swirling water, a cracked egg in your hand, and a sense of impending doom in your heart. We’ve all been there. You drop the egg in, and instead of a tight, elegant orb, you get what I like to call "egg drop soup"—a chaotic mess of wispy whites clouding the water while the yolk sinks to the bottom, lonely and exposed. It’s the primary reason many home cooks relegate poached eggs to the "order at a restaurant" category. But after 15 years of professional recipe testing and literally cracking over a thousand eggs in pursuit of the perfect poached eggs, I can tell you with absolute certainty: poaching is not a matter of luck. It is a matter of physics, chemistry, and two specific tools you likely already have in your kitchen.
In this guide, I’m going to strip away the mystery of how to poach an egg. We aren't just going to talk about "swirling the water." We are going to dive into the molecular coagulation of proteins, the specific role of acetic acid, and the "Strainer Secret" that changed my life. Whether you are prepping for a high-stakes Sunday brunch or looking for high protein meals for weight loss, mastering this skill will elevate your home cooking from basic to professional. Let’s turn that "egg drop soup" into a masterpiece.
Table of Contents
- The Science of Egg Poaching: Why Freshness Matters
- Essential Tools for Success
- Step-by-Step: How to Poach an Egg Perfectly
- Timing and Temperature: The Doneness Scale
- Advanced Technique: Poaching Multiple Eggs
- The Pro Secret: Batch Cooking and Reheating
- Common Mistakes and Troubleshooting
- Serving Suggestions to Elevate Your Eggs
The Science of Egg Poaching: Why Freshness Matters
Before you even turn on the stove, the success of your poached egg is often decided at the grocery store. To understand how to poach an egg, you must understand the anatomy of the egg itself. An egg consists of the egg yolk and the egg white (or albumen). However, the white isn't a single uniform liquid. It actually consists of two parts: a thick, viscous inner white and a thin, watery outer white.
As an egg ages, the proteins in the thick white begin to break down, transitioning into the thinner, more liquid state. When you drop an older egg into simmering water, that thin, watery portion immediately detaches and creates those frustrating wispy whites. This is why fresh eggs are the gold standard for poaching; their thick whites are structurally sound and cling tightly to the yolk.
How to Test for Freshness at Home
In my testing, I’ve found that the "Sell By" date isn't always the best indicator of poaching suitability. Instead, use the "Float Test." Place your egg in a bowl of water. If it lays flat on the bottom, it’s remarkably fresh and perfect for poaching. If it stands up on one end but stays on the bottom, it’s better for hard-boiling. If it floats? Toss it—the air cell has grown too large, indicating it's past its prime according to egg safety and storage guidelines.
Another expert tip: while many chefs advocate for room temperature eggs for baking, I discovered that cold eggs straight from the fridge are actually superior for poaching. The cold temperature keeps the proteins more tightly bound for those few extra seconds it takes for the outer layer to set in the hot water.
Essential Tools for Success
You don't need fancy gadgets or silicone "poaching pods" (which, in my opinion, just produce steamed eggs with a rubbery texture). You need three specific items to achieve perfect poached eggs.
The Best Pan for the Job
Many people reach for a deep stockpot, thinking they need a "deep dive" for the egg. I disagree. After testing various vessels, I’ve found that a deep skillet or a wide, shallow saucepan (about 3 inches deep) is ideal. A wider surface area allows you to manage multiple eggs without them bumping into each other, and you don't need four gallons of water to get the job done.
The Secret Weapon: The Fine-Mesh Sieve
If you take nothing else away from this guide, remember this: use a fine-mesh strainer. By cracking your egg into a strainer over a small bowl first, you allow the liquid egg whites (the watery part that causes the mess) to drain away. This leaves you with only the thick, structural white. This technique, popularized by the science of poaching eggs, is the single most effective way to get a clean, restaurant-style shape.
The Ramekin and Slotted Spoon
Never crack an egg directly into the water. The impact usually breaks the yolk or creates too much turbulence. Instead, transfer your strained egg into a small ramekin or prep bowl. This allows for a controlled, gentle "drop" into the water. Finally, a high-quality slotted spoon (preferably stainless steel or silicone) is essential for lifting the egg out while letting the water drain away.
Step-by-Step: How to Poach an Egg Perfectly
The Master Method for Poached Eggs
Ingredients:
- 2 large, cold eggs (the fresher, the better)
- 1 tablespoon white vinegar
- Water (filtered is best)
- Flaky sea salt and freshly cracked black pepper
Instructions:
- Prepare the Water: Fill a deep skillet with about 3-4 inches of water. Add 1 tablespoon of white vinegar. Bring to a boil, then reduce the heat to a very low simmer.
- The Strainer Trick: Crack one egg into a fine-mesh strainer over a bowl. Let the watery whites drain for 30-60 seconds. Gently transfer the remaining egg into a ramekin.
- The Gentle Vortex: Use a spoon to stir the simmering water in a circular motion to create a gentle whirlpool method.
- The Drop: Carefully lower the ramekin close to the water's surface and drop the egg into the center of the whirlpool.
- The Wait: Cook for 3 to 4 minutes depending on desired doneness.
- The Retrieval: Use a slotted spoon to lift the egg. Gently touch the white to ensure it is set. Blot the bottom of the spoon on paper towels to remove excess water.
Step 1: The Vinegar Trick
Why do we add vinegar? It’s all about Acetic acid. A small amount of acid in the water lowers the pH level, which speeds up the coagulation of the egg proteins. This helps the egg white set almost instantly upon contact with the water, preventing it from spreading. Use clear white vinegar; apple cider or balsamic will discolor your beautiful whites. According to the adding vinegar to poaching water guide, you only need about 1 tablespoon per liter of water.
Step 2: Water Temperature Control
The most common mistake is poaching in boiling water. Boiling water is turbulent; those bubbles will tear your egg apart. You are looking for "shimmering" water—roughly 180°F to 190°F. If you see large bubbles breaking the surface, it’s too hot. If the water is completely still, it may take too long to set, causing the egg to stick to the bottom.
Timing and Temperature: The Poached Egg Doneness Scale
Timing is everything when you want that "liquid gold" egg yolk. Because eggs vary in size and stoves vary in heat, I always recommend the "finger poke" test. Gently press the center of the yolk with your finger while it's still on the slotted spoon. It should feel like a soft water balloon—yielding but with a slight spring.
- 3 Minutes (The Ultra-Runny): The white is just barely set, and the yolk is completely liquid. Perfect for stirring into hot pasta or congee.
- 4 Minutes (The Gold Standard): This is what you want for Eggs Benedict. The white is opaque and firm, but the yolk is a thick, pouring sauce.
- 5 Minutes (The Jammy Egg): The yolk has begun to set around the edges, resulting in a custard-like texture. This is excellent for breakfast meal prep ideas.
For a more precise breakdown of textures, check out this guide on perfect poached egg timing. Note that altitude plays a role; if you are in the mountains, you may need to add 30-60 seconds to these times as water boils at a lower temperature.
Advanced Technique: Poaching Multiple Eggs at Once
The whirlpool method is fantastic for one egg, but if you're making brunch recipes for a family of four, it’s inefficient. You cannot create four whirlpools at once. Here is how I handle a crowd:
First, skip the swirl. Instead, use a large, wide skillet and ensure the water is deep enough. Use the "Clock Face Method." Drop your first egg at the 12 o'clock position, the second at 3 o'clock, the third at 6 o'clock, and the fourth at 9 o'clock. This ensures you know exactly which egg went in first and which one needs to come out first.
To prevent the eggs from spreading without the whirlpool, ensure you have used the fine-mesh strainer to remove the wispy whites. Without that watery excess, the eggs will naturally stay in a tight "teardrop" shape on their own. If the eggs look like they might stick to the bottom, wait 30 seconds for the bottom to set, then gently nudge them with your slotted spoon to free them.
The Pro Secret: Batch Cooking and Reheating
Ever wonder how a busy brunch spot serves 50 orders of Eggs Benedict at once? They don't poach them to order. They use the ice water bath technique. This is a game-changer for hosting.
- Poach your eggs for slightly less time than usual (about 3 minutes).
- Immediately transfer the cooked eggs into a bowl filled with ice and cold water. This stops the cooking process instantly.
- Store the eggs in a container of cold water in the fridge for up to 2 days.
- When ready to serve, bring a pot of water to a simmer (not a boil). Drop the cold eggs into the water for exactly 60 seconds.
This "re-warming" method results in a perfectly hot egg with a runny yolk every single time. Professional chefs swear by this method for poaching eggs for a crowd because it removes the stress of timing from the actual mealtime.
Common Mistakes and Troubleshooting
This usually happens for two reasons: your eggs aren't fresh enough, or your water is boiling too hard. The turbulence of boiling water tears the delicate proteins apart before they can undergo coagulation. Switch to a low simmer and use the strainer trick.
You likely dropped the egg from too high above the water. The impact against the surface can rupture the yolk membrane. Hold your ramekin right at the surface of the water—or even slightly submerged—when you let the egg go.
This happens if the water is too still or the pan isn't clean. A gentle swirl before adding the egg helps keep it suspended. Alternatively, you can lightly grease the bottom of your skillet with a drop of neutral oil before adding the water.
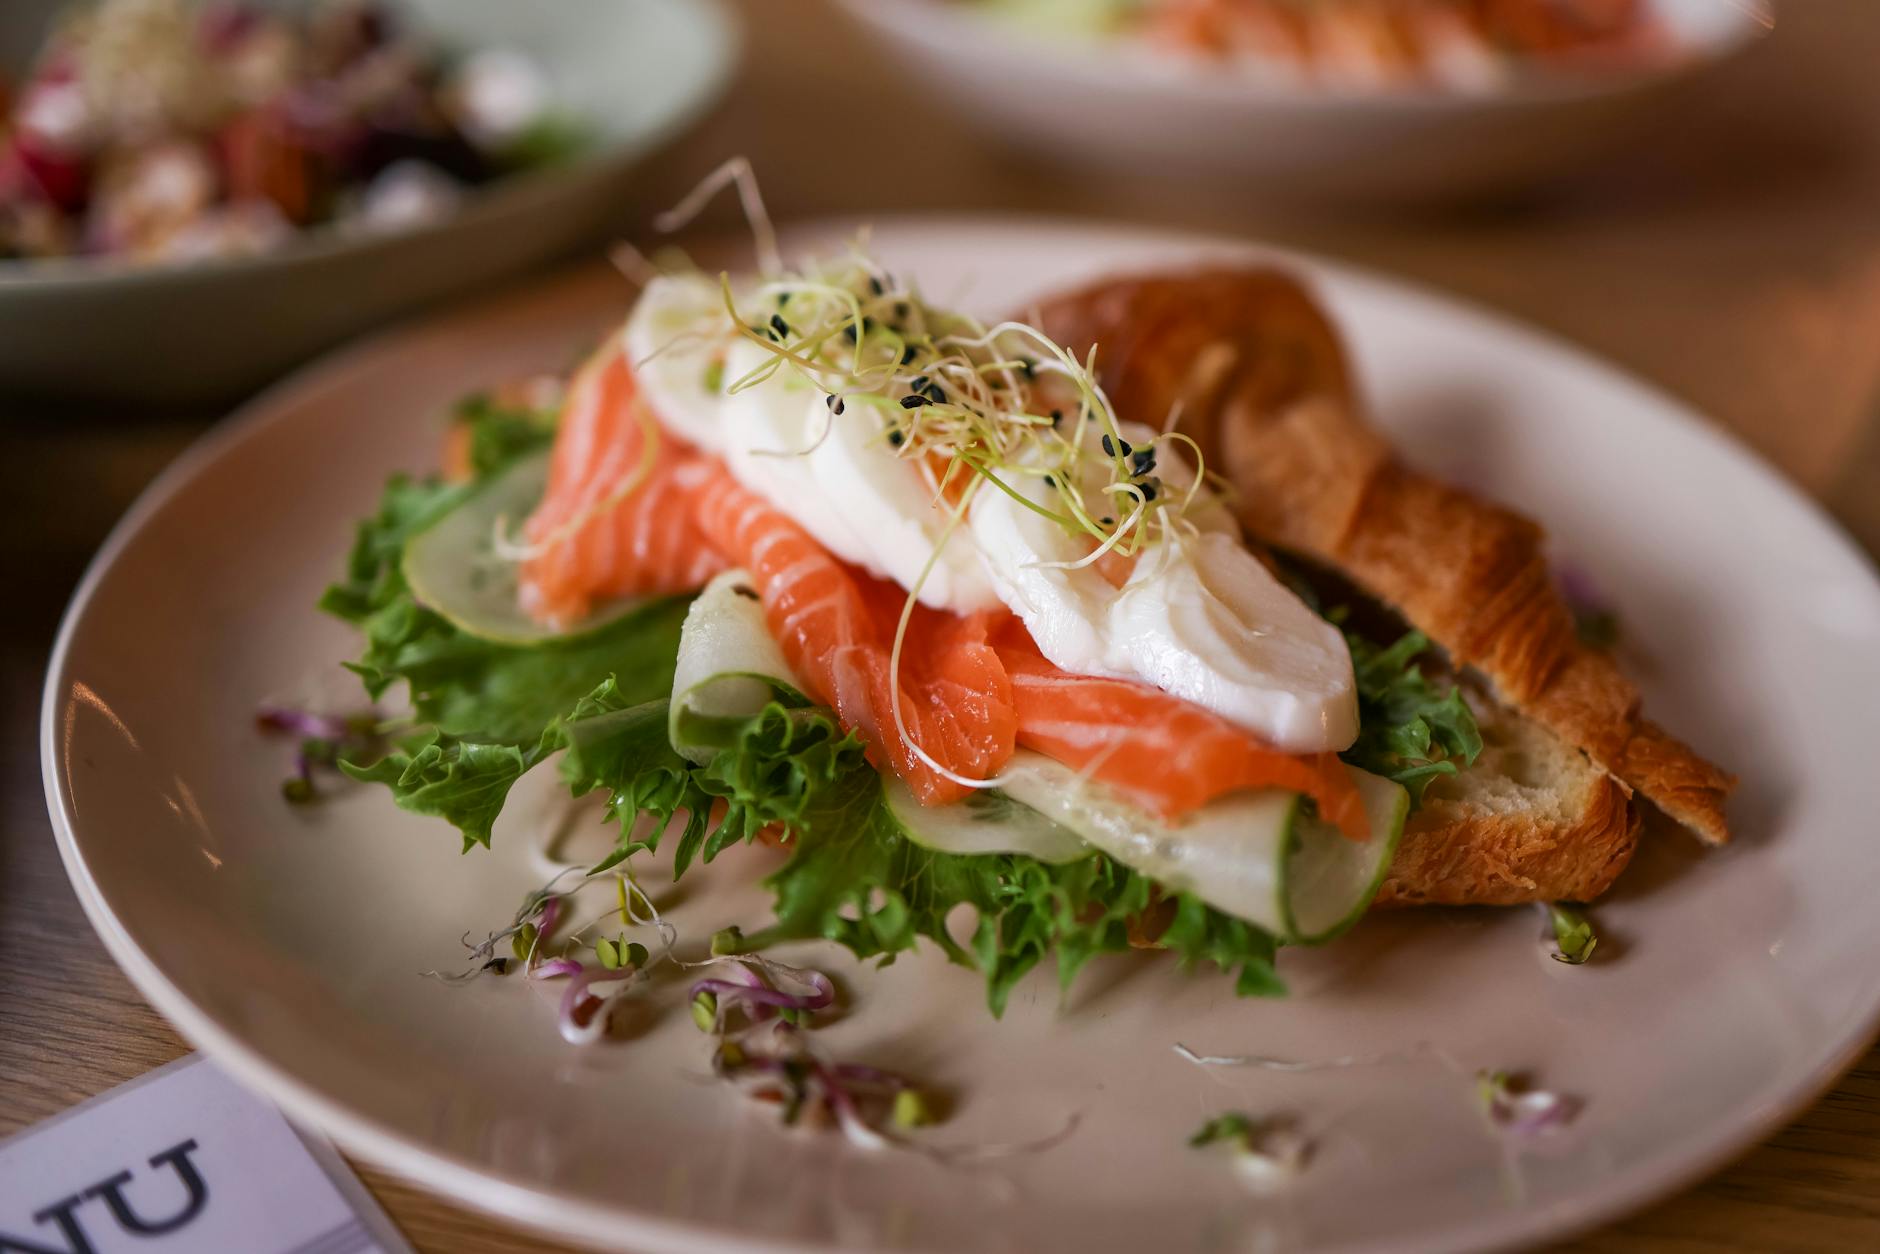
Serving Suggestions to Elevate Your Eggs
The final, and perhaps most overlooked, step in how to poach an egg is the "The Drain." If you move an egg directly from the water to a piece of toast, you will end up with soggy, unappetizing bread. Always rest your slotted spoon on a folded paper towel for 5 seconds to wick away excess moisture before plating.
Classic and Modern Pairings
While Eggs Benedict with hollandaise is the classic, don't be afraid to experiment. In my kitchen, I love serving a poached egg over a bed of sautéed kale and garlic for a high protein start to the day. For a modern twist, try "Turkish Eggs" (Cilbir)—poached eggs served over garlicky Greek yogurt and topped with warm Aleppo pepper butter.
Seasoning is also key. Don't just settle for table salt. Use Maldon sea salt for crunch, or a sprinkle of Furikake or chili crisp for an umami bomb. The beauty of a perfect poached egg is that it acts as its own sauce, turning even a simple piece of sourdough into a luxury meal.
Conclusion: Practice Makes Perfect
Poaching an egg is a culinary rite of passage. It requires patience and a bit of scientific understanding, but once you master the fine-mesh strainer and the simmering water temperature, you'll never look back. Remember: use fresh, cold eggs, add a splash of vinegar, and don't let the water boil. Whether you’re meal prepping for the week or hosting a lavish brunch, you now have the tools to produce restaurant-quality results in your own kitchen. Now, go grab a carton of eggs and start practicing—your future self (and your toast) will thank you.