Quick Answer
How to Make Muffins Like a Pro is built around practical home-kitchen ratios and simple texture checks. Follow the main method first, then use the variation and troubleshooting notes to adjust sweetness, salt, moisture, or cook time.
CookBuddy Kitchen Note
For How to Make Muffins Like a Pro, this guide centers on 2 cups (250g) All-purpose flour, 1/2 cup (100g) Granulated sugar, 1 tablespoon Baking powder. Those are the checkpoints we would use first in a normal home kitchen before making a bigger change.
Decision table
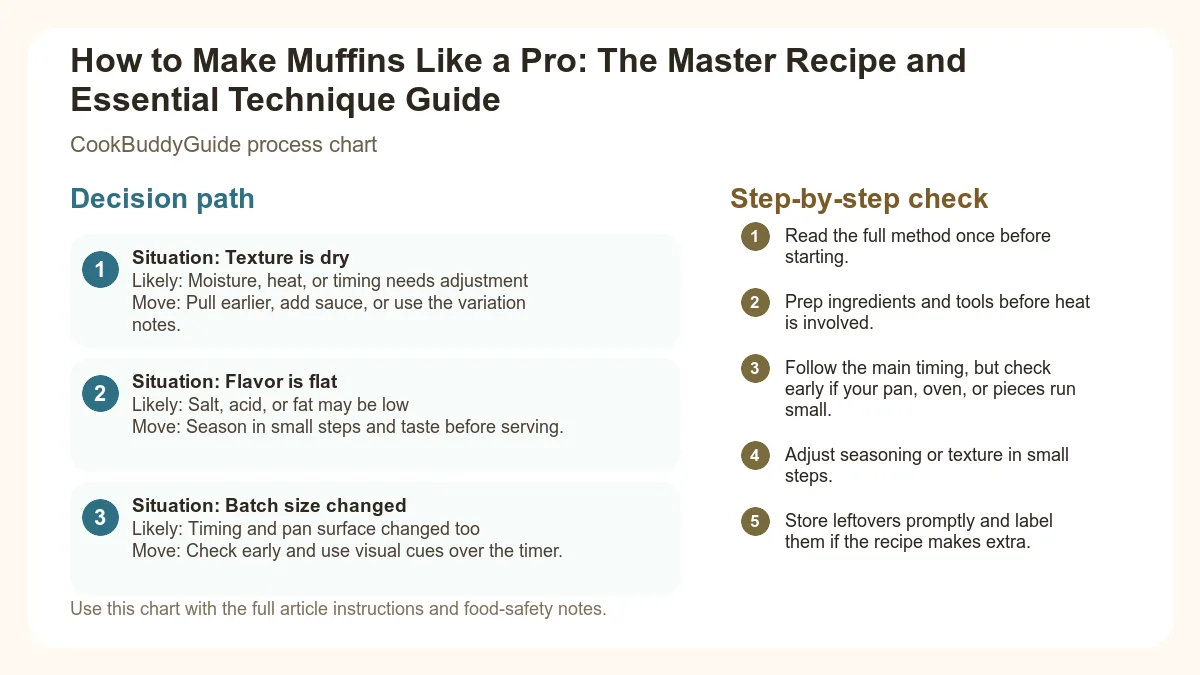
| Situation | Likely cause or meaning | Best move |
|---|---|---|
| Texture is dry | Moisture, heat, or timing needs adjustment | Pull earlier, add sauce, or use the variation notes. |
| Flavor is flat | Salt, acid, or fat may be low | Season in small steps and taste before serving. |
| Batch size changed | Timing and pan surface changed too | Check early and use visual cues over the timer. |
Step-by-step fix
- Read the full method once before starting.
- Prep ingredients and tools before heat is involved.
- Follow the main timing, but check early if your pan, oven, or pieces run small.
- Adjust seasoning or texture in small steps.
- Store leftovers promptly and label them if the recipe makes extra.
Common mistakes
- Changing the recipe before trying the base method once.
- Measuring casually when texture depends on ratios.
- Waiting until the end to fix seasoning.
- Ignoring carryover heat or resting time.
Useful next reads
Helpful tools for this guide
- instant-read thermometer
- digital kitchen scale
- cutting board
- airtight storage containers
Related topic hubs
How to Make Muffins Like a Pro: The Master Recipe and Essential Technique Guide
There is a specific kind of disappointment that only a home cook understands: pulling a tray of muffins out of the oven only to find they are flat, tough, and more reminiscent of a hockey puck than a bakery treat. We’ve all been there. You followed the back of a box or a random Pinterest find, and yet, the results were lackluster. After 15 years of testing hundreds of batches in my own kitchen for CookBuddyGuide.com, I can tell you that learning how to make muffins isn't just about following a list of ingredients; it’s about mastering a specific culinary rhythm called the "Muffin Method."
In this comprehensive guide, I’m going to strip away the mystery. We’ll dive into the chemistry of gluten development, the importance of hydration, and why your muffin recipe from scratch needs a 20-minute nap before it ever touches the oven. Whether you are looking for a quick weekday breakfast or a reliable toddler friendly meal idea, this master guide will turn you into the muffin authority of your neighborhood.
Table of Contents
- The Difference Between a Cupcake and a Muffin
- The Science of the 'Muffin Method'
- The Golden Rule: Why You Must Never Over-Mix
- Master Muffin Recipe from Scratch
- Secrets to Bakery-Style Domed Tops
- 5 Essential Variations from One Base Recipe
- Troubleshooting Common Muffin Mistakes
- Storage, Freezing, and Reheating
Introduction: Why the Perfect Muffin is a Kitchen Essential
Muffins are the workhorses of the baking world. They are portable, customizable, and arguably the most forgiving "quick bread" in existence. However, the term "muffin" is often used interchangeably with "cupcake," which is a fundamental culinary error. To understand how to make muffins like a professional, you must first understand what they are not.
The Difference Between a Cupcake and a Muffin
A cupcake is essentially a miniature cake. It relies on the "creaming method," where softened butter and sugar are beaten together until aerated and fluffy. This creates a fine, delicate crumb structure. A muffin, however, is a quick bread. It uses the classic muffin method, which involves mixing liquid fats (like melted butter or oil) with dry ingredients. The result should be moist, tender, and slightly dense, with a characteristic "pebble" top rather than a perfectly smooth, frosted surface.
What to Expect from This Master Guide
My philosophy at CookBuddyGuide.com is simple: I want you to have reliable results every single time. In the following sections, I will walk you through the precise mechanics of emulsification—ensuring your fats and liquids bond correctly—and the Maillard reaction, which gives your muffin tops that beautiful golden brown crust. We aren't just baking; we are engineering the perfect breakfast.
The Science of the 'Muffin Method'
The "Muffin Method" is a specific technique designed to limit gluten development. When wheat flour meets liquid and is agitated, proteins (glutenin and gliadin) link up to form gluten. In a baguette, we want lots of gluten for chewiness. In a muffin, we want as little as possible to keep the texture tender.
Why We Separate Wet and Dry Ingredients
In my testing, I’ve found that the secret to a light muffin lies in the "two-bowl system." In bowl one, you whisk your dry ingredients: all-purpose flour, sugar, and your leavening agents (more on the baking powder vs baking soda debate later). In bowl two, you combine your wet ingredients: milk, eggs, and melted butter. By fully incorporating the dry ingredients separately, you ensure the leavening is evenly distributed without having to stir the final batter excessively.
The Chemistry of the Well: Combining the Two
Once your two bowls are ready, you create a "well" in the center of the dry ingredients. You pour the liquid into the center and use a folding technique. This isn't a vigorous stir; it’s a gentle sweep from the bottom of the bowl to the top. I discovered that by the time you see only a few streaks of flour remaining, you should stop. Those small lumps in the batter? They are your best friend. They will hydrate and disappear during the baking process, leaving behind a tender crumb rather than a rubbery one.
The Golden Rule: Why You Must Never Over-Mix
If there is one hill I will die on as a food writer, it is this: over-mixing is the primary reason for muffin failure. I once conducted a side-by-side test in my kitchen. Batch A was folded exactly 15 times until just combined. Batch B was stirred 50 times with a wooden spoon. The difference was staggering.
What Happens to Gluten When You Over-Stir
When you over-mix, you create a strong, elastic gluten network. As the leavening agents release carbon dioxide gas in the oven, the gas gets trapped by the tough gluten. Instead of the batter rising evenly, the gas forces its way up through the center, creating what we call the consequences of over-mixing batter: tunnels and peaks.
The 'Tunnels and Peaks' Phenomenon
Have you ever cut a muffin in half and seen long, vertical holes (tunnels) and a pointy, cone-shaped top (peaks)? That is the visual signature of an over-mixed batter. The texture of these muffins is often described as "rubbery" or "tough." By keeping your mixing to a minimum, you ensure the gas bubbles can expand gently, creating a uniform, soft crumb structure.
Visual Cues: When to Stop Mixing
Stop mixing when you still see a few small patches of dry flour. As you portion the batter into your standard muffin tin, those last bits of flour will naturally incorporate. Trust the process. If your batter looks like smooth cake batter, you have already gone too far.
Master Muffin Recipe from Scratch
This is the "Little Black Dress" of recipes. It is designed to be a sturdy, delicious base that you can customize with any add-ins you desire.
Ingredients
- 2 cups (250g) All-purpose flour: Provides the structure.
- 1/2 cup (100g) Granulated sugar: For sweetness and browning.
- 1 tablespoon Baking powder: Our primary leavening agent.
- 1/2 teaspoon Salt: To balance the flavors.
- 1 cup (240ml) Whole milk: Room temperature is vital for emulsification.
- 1/2 cup (115g) Unsalted butter, melted and cooled: For flavor and a rich mouthfeel.
- 1 Large egg: Room temperature.
- 1 teaspoon Vanilla extract: Pure extract is best.
Instructions
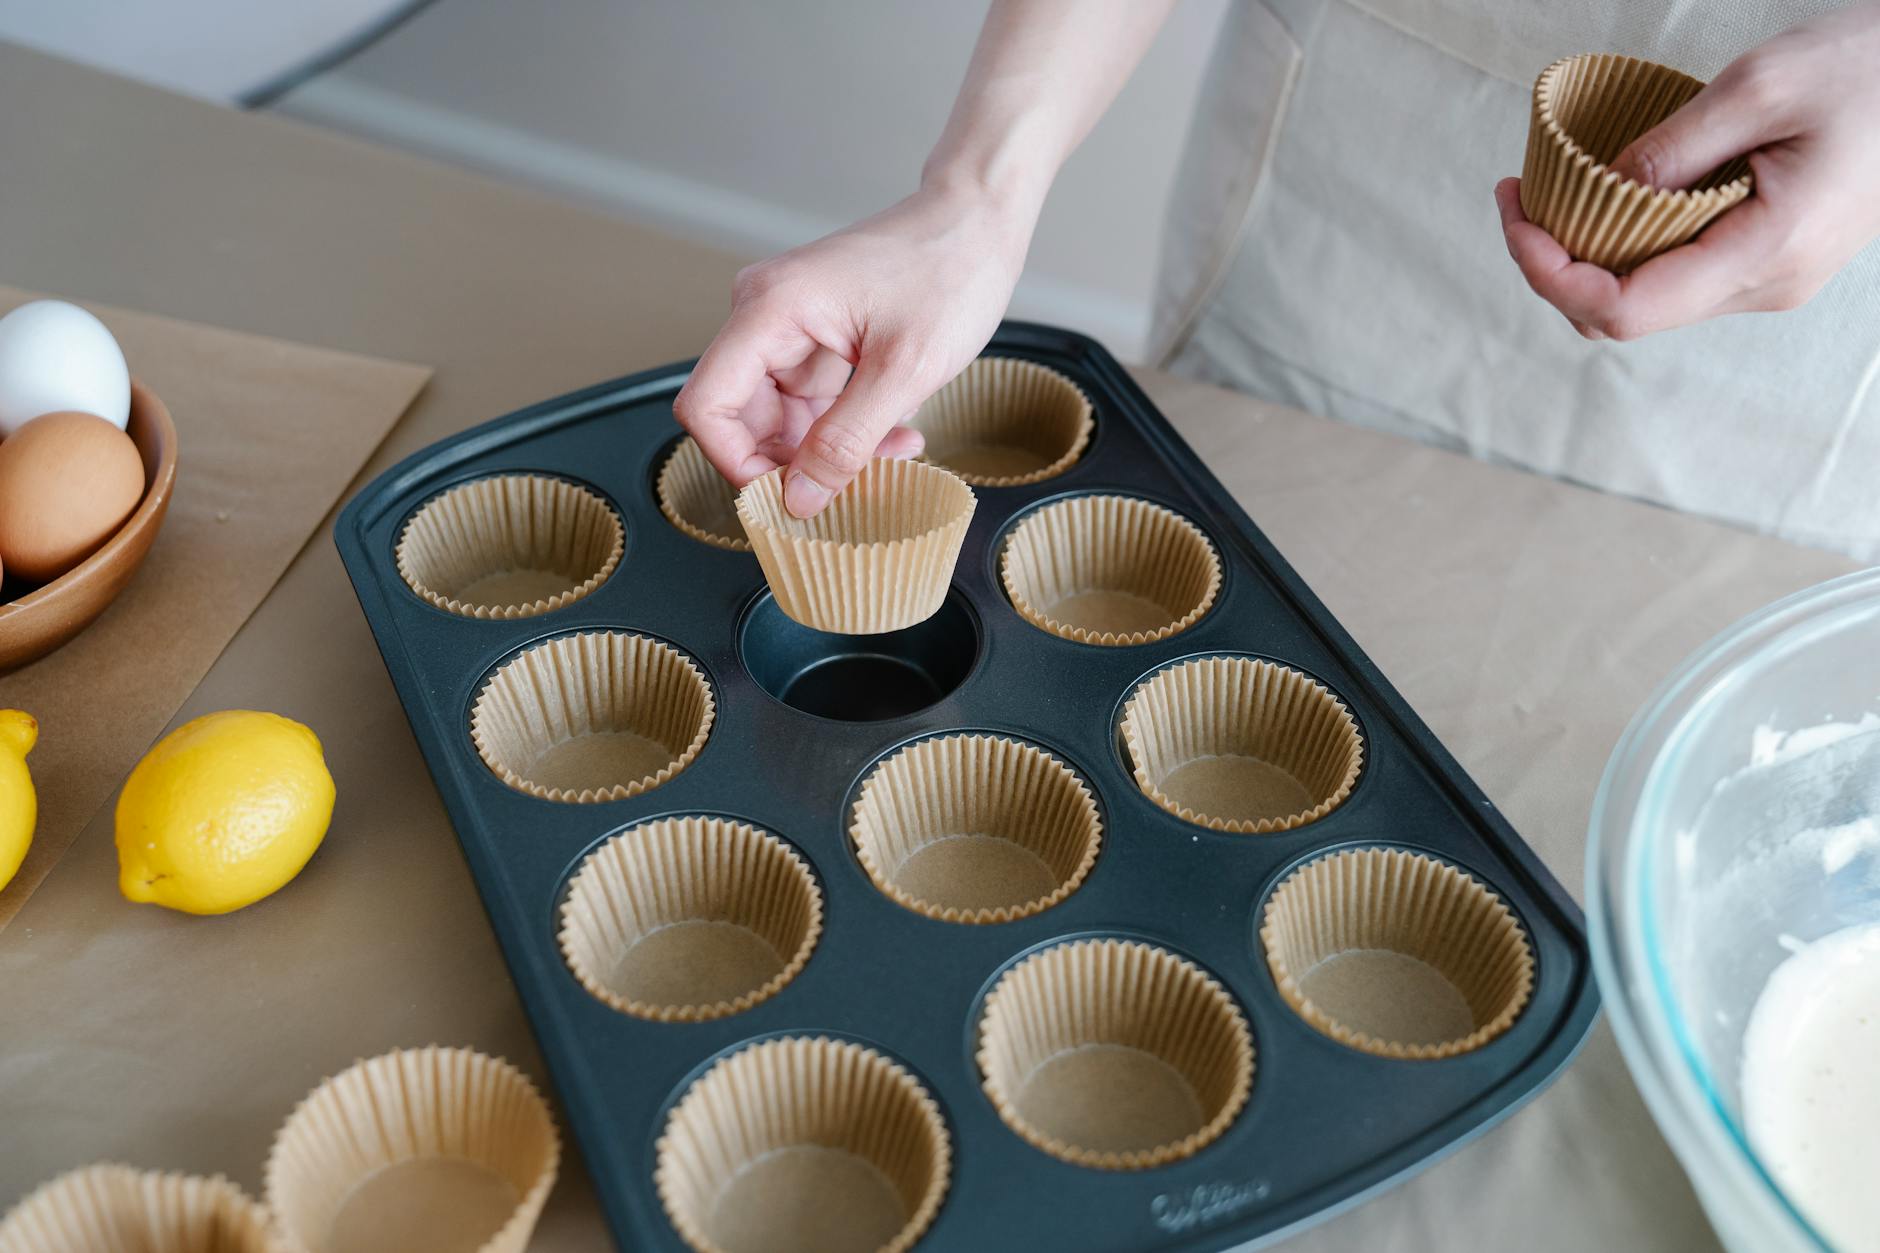
- Preheat and Prep: Preheat your oven to 425°F (218°C). Line a standard muffin tin with paper liners or grease well with butter.
- Whisk Dry: In a large bowl, whisk together the flour, sugar, baking powder, and salt. Ensure there are no large clumps of leavening.
- Mix Wet: In a separate medium bowl, whisk the milk, melted butter, egg, and vanilla until smooth.
- The Combine: Create a well in the dry ingredients. Pour in the wet mixture. Using a spatula, use the folding technique to combine. Stop when just a few streaks of flour remain (about 12-15 folds).
- The Rest: Let the batter sit at room temperature for 20 minutes (see the "Secrets" section below for why!).
- Fill: Scoop the batter into the prepared tin, filling each cup nearly to the top.
- Bake: Place in the oven and immediately reduce the heat to 375°F (190°C). Bake for 18-22 minutes.
- Test: Use the toothpick test; it should come out clean or with a few moist crumbs. The tops should be golden brown.
- Cool: Let muffins sit in the tin for 5 minutes, then transfer to a cooling rack to prevent soggy bottoms.
Pro Tip: Butter vs. Oil
After making this 20+ times, I’ve found that butter provides the best flavor, but oil (like canola or vegetable) provides a more consistent moisture level, especially if you plan to eat the muffins over several days. For the best of both worlds, use 1/4 cup melted butter and 1/4 cup oil.
Secrets to Bakery-Style Domed Tops
We’ve all envied those massive, "mushroom-top" muffins at high-end bakeries. Achieving that at home isn't about a special pan; it's about temperature and hydration.
The High-Heat Burst Technique
The first secret to achieving bakery-style domed tops is starting with a very hot oven. By preheating to 425°F and then dropping the temperature once the muffins are inside, you create a "burst" of steam. This steam acts with the baking powder vs baking soda to rapidly lift the batter before the crust sets. If you have a convection baking setting, use it; the circulating air helps the heat reach the muffins more efficiently, encouraging a higher rise.
The Magic of Resting Your Batter
In my early years of baking, I used to rush the batter into the oven. Then I read about the benefits of resting batter. Allowing the batter to sit for 20 minutes allows the starch granules in the all-purpose flour to fully hydrate. This thickens the batter, making it strong enough to hold the air bubbles produced by the leavening agents. A thicker batter translates to a more dramatic dome.
Filling the Tins: The 3/4 Rule vs. The Full Scoop
Most recipes tell you to fill the tin 2/3 full. If you want those big domes, ignore that. Fill them nearly to the brim. Because we have rested the batter and are using the high-heat burst, the batter will grow upward rather than spilling over the sides. This technique is a game-changer for easy breakfast meal prep because it makes the muffins feel like a substantial, professional meal.
5 Essential Variations from One Base Recipe
Once you have mastered the base, you can adapt it to suit your family's tastes. Here are five variations I’ve perfected over the years.
1. Classic Bursting Blueberry Muffins
Add 1.5 cups of fresh or frozen blueberries to the dry ingredients before adding the wet. Pro tip: Toss the berries in a tablespoon of flour first (the "flour toss"). This prevents them from sinking to the bottom. Add 1/2 teaspoon of lemon zest to the wet ingredients for a bright pop of flavor.
2. Banana Chocolate Chip Bliss
Reduce the milk to 1/2 cup and add 1 cup of mashed overripe bananas (about 2 medium bananas). Fold in 3/4 cup of semi-sweet chocolate chips. These are a massive hit for toddler dinner ideas—sometimes, "breakfast for dinner" is the only way to get a toddler to eat!
3. Zesty Lemon Poppy Seed
Add 2 tablespoons of poppy seeds to the dry ingredients. Replace the vanilla extract with 1 tablespoon of fresh lemon juice and the zest of two large lemons. For an extra professional touch, whisk together 1/2 cup powdered sugar and 1 tablespoon lemon juice to drizzle over the golden brown tops while they are still warm.
4. Hearty Morning Bran Muffins
Replace 1 cup of the all-purpose flour with 1.5 cups of wheat bran. Increase the milk by 1/4 cup to account for the extra absorption. Bran muffins are excellent for those focusing on the health benefits of fiber. I like to add 1/2 cup of raisins or chopped walnuts for texture.
5. Decadent Double Chocolate
Replace 1/2 cup of the flour with 1/2 cup of high-quality unsweetened cocoa powder. Increase the sugar to 3/4 cup to balance the bitterness of the cocoa. Fold in 1 cup of dark chocolate chunks. These muffins rely heavily on the Maillard reaction for their deep, complex flavor profile.
Troubleshooting Common Muffin Mistakes
This is usually due to over-baking or using too much flour. Always measure your flour using the "spoon and level" method rather than scooping directly with the measuring cup, which packs the flour down. Also, ensure your toothpick test happens at the minimum suggested time.
Low-fat muffins tend to stick more. If you are using a recipe with less butter, try spraying the paper liners with a bit of non-stick spray. Also, let the muffins cool for at least 5 minutes; as they cool, they naturally pull away from the paper.
Check the expiration date on your baking powder vs baking soda. Leavening agents lose their potency after 6 months. To test baking powder, drop a teaspoon into hot water; if it bubbles vigorously, it’s still good.
This happens when the emulsification fails. Ensure your milk and eggs are at room temperature. Cold liquids can cause the melted butter to solidify into small clumps, leading to an uneven, greasy texture.
Storage, Freezing, and Reheating
Muffins are the ultimate breakfast meal prep item, but only if you store them correctly. If left out on the counter, they will dry out within 24 hours.
Keeping Muffins Fresh for 3 Days
Store your cooled muffins in an airtight container. To prevent them from getting "sticky" tops (caused by moisture migrating to the surface), place a paper towel at the bottom of the container and another one on top of the muffins. The paper towel absorbs the excess moisture while keeping the crumb structure soft.
The Best Way to Freeze and Thaw
Muffins freeze beautifully. I recommend "flash freezing": place the muffins on a baking sheet in the freezer for one hour until the outsides are firm, then transfer them to a heavy-duty freezer bag. They will stay fresh for up to 3 months. This is a lifesaver for busy mornings when you need a quick toddler friendly meal idea.
The 10-Second Microwave Trick
To bring a frozen or day-old muffin back to life, wrap it in a damp paper towel and microwave it for 10-15 seconds. This creates a small amount of steam that softens the starches, making the muffin taste like it just came out of the oven.
Final Thoughts: Your Journey to Muffin Mastery
Learning how to make muffins is a rite of passage for any home cook. It teaches you the value of restraint—learning that sometimes, the less you do (or stir!), the better the result will be. By understanding the muffin recipe from scratch and the science behind it, you are no longer at the mercy of a recipe; you are in control of the kitchen.
The next time you wake up on a slow Saturday morning, I challenge you to try this master recipe. Rest the batter, crank up the heat for that initial burst, and watch as those glorious, golden brown domes emerge from your oven. Your kitchen will smell like a professional bakery, and your family will thank you. Happy baking!
For more kitchen guides and time-saving tips, check out our latest post on Breakfast Meal Prep Ideas or explore our Toddler Dinner Ideas for more family-friendly inspiration.