Quick Answer
How to Deglaze a Pan is built around practical home-kitchen ratios and simple texture checks. Follow the main method first, then use the variation and troubleshooting notes to adjust sweetness, salt, moisture, or cook time.
CookBuddy Kitchen Note
For How to Deglaze a Pan, the practical test is to change one pan variable at a time. Pan temperature, surface moisture, oil timing, and when you move the food are easier to judge separately than all at once.
Decision table
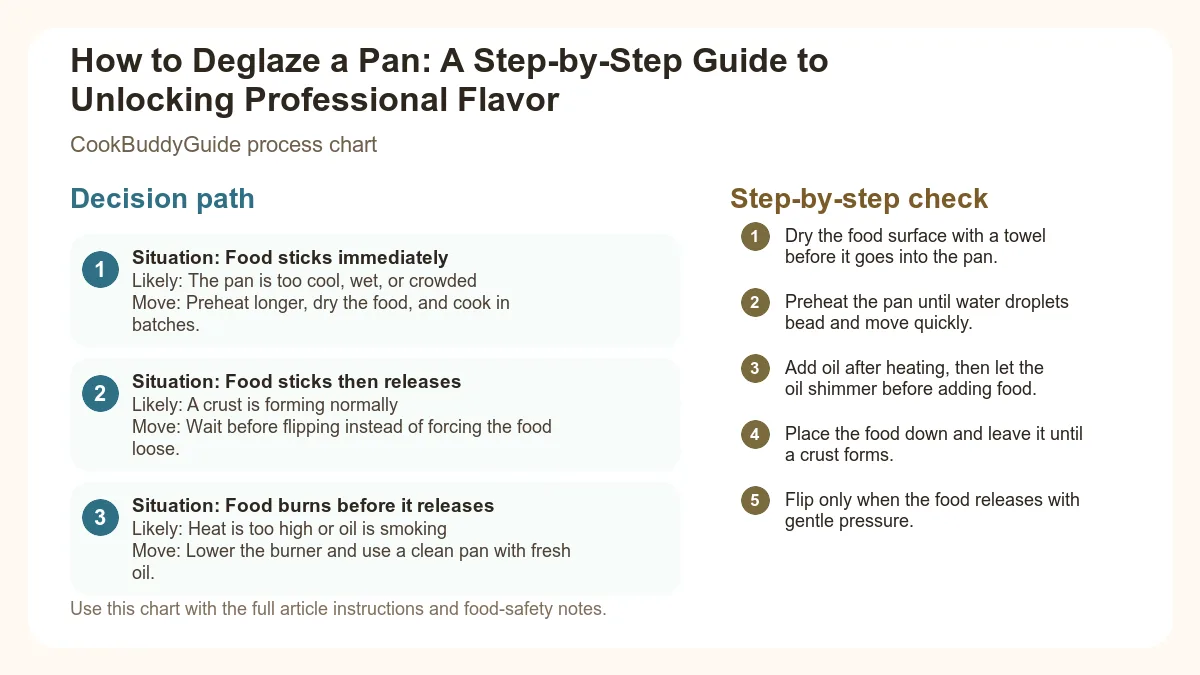
| Situation | Likely cause or meaning | Best move |
|---|---|---|
| Food sticks immediately | The pan is too cool, wet, or crowded | Preheat longer, dry the food, and cook in batches. |
| Food sticks then releases | A crust is forming normally | Wait before flipping instead of forcing the food loose. |
| Food burns before it releases | Heat is too high or oil is smoking | Lower the burner and use a clean pan with fresh oil. |
Step-by-step fix
- Dry the food surface with a towel before it goes into the pan.
- Preheat the pan until water droplets bead and move quickly.
- Add oil after heating, then let the oil shimmer before adding food.
- Place the food down and leave it until a crust forms.
- Flip only when the food releases with gentle pressure.
Common mistakes
- Adding food before the pan is fully preheated.
- Putting wet protein or vegetables straight into hot oil.
- Moving food before a crust has time to form.
- Crowding the pan until food steams instead of browns.
Useful next reads
Helpful tools for this guide
- stainless steel spatula
- instant-read thermometer
- neutral cooking oil
- splatter screen
Related topic hubs
I remember the exact moment my home cooking transformed from "fine" to "restaurant-quality." It was a Tuesday night in my first apartment, and I was making a simple pan-seared chicken breast. For years, I had been searing my meat, moving it to a plate, and then immediately carrying the hot pan to the sink. I’d watch with a sense of accomplishment as the water hissed and steam rose, scrubbing away those stubborn, dark brown crusty bits stuck to the bottom of the skillet. I thought I was being a diligent cleaner. In reality, I was washing the most expensive part of the meal—the concentrated flavor—straight down the drain.
Learning how to deglaze a pan is the single most important skill you can acquire to elevate your savory cooking. It is the bridge between a dry piece of protein and a luxurious, glossy sauce that ties a whole meal together. In this guide, I’m going to walk you through the pan deglazing technique I’ve perfected over 15 years in the kitchen, ensuring you never leave flavor behind again.
Table of Contents
- Understanding the Fond: The Foundation of Flavor
- Essential Tools for the Pan Deglazing Technique
- Step-by-Step: How to Deglaze a Pan Like a Chef
- Choosing Your Liquid: From Wine to Vinegar
- Building a Quick Pan Sauce from Drippings
- Deglazing in Practice: Steaks, Chicken, and Vegetables
- Common Deglazing Mistakes to Avoid
- Cleaning Benefits: Deglazing as a Cleanup Hack
- Frequently Asked Questions
Understanding the Fond: The Foundation of Flavor
Before we pick up a wooden spoon, we need to understand what we are actually looking at. When you sear meat or sauté vegetables over high heat, a chemical transformation occurs called the Maillard reaction. This isn't just "browning"; it’s a complex reaction between amino acids and reducing sugars that creates hundreds of different flavor compounds.
The Magic of the "Fond"
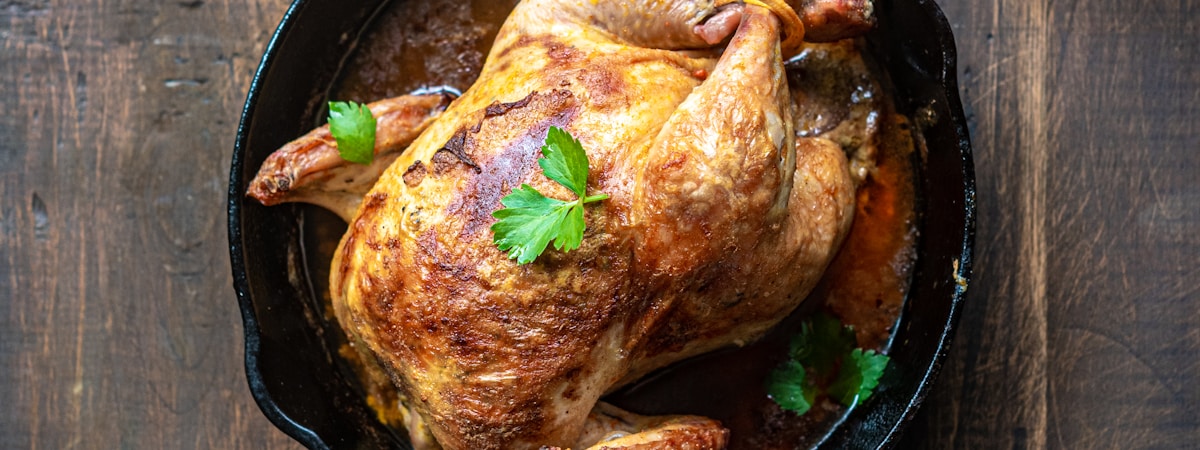
As you are searing meat, proteins and sugars caramelize and stick to the surface of the pan. In French culinary terms, these browned bits are called fond, which literally translates to "base" or "foundation." This is exactly what it is: the foundation of your sauce. Understanding the role of fond is essential because it contains a concentration of savory, umami-rich flavors that cannot be replicated by store-bought stocks alone.
Fond vs. Burnt: How to Tell the Difference
One of the most frequent questions I get from students in my cooking classes is, "How do I know if it's fond or if I've just burnt the pan?" The distinction is vital.
- Good Fond: This should be a deep, rich cognac or chocolate brown. It will smell savory, meaty, and slightly sweet.
- Burnt Bits: If the bits are black and the pan is smoking excessively, you have crossed the line. Burnt residue is bitter and acrid; deglazing a burnt pan will only result in a sauce that tastes like an ash tray. If you've burnt your pan drippings, it's better to wipe the pan out and start over.
In my testing, I've found that stainless steel skillet surfaces are the gold standard for creating fond. While non-stick pans are great for eggs, they are designed to prevent sticking, which means you won't get that beautiful buildup of flavor necessary for a proper pan deglazing technique.
Essential Tools for the Pan Deglazing Technique
You don't need a kitchen full of gadgets to master this, but the right tools make the process safer and more effective. After testing dozens of pan and utensil combinations, here is what I recommend for the best results.
Stainless Steel vs. Cast Iron
A high-quality, tri-ply stainless steel skillet is the professional's choice. The light-colored surface allows you to monitor the color of the fond easily, and the material is highly reactive to temperature changes. Cast iron is a close second; it holds heat beautifully for a great sear, though it can be harder to see the color of the browned bits against the black seasoning. Avoid non-stick pans for this specific task.
The Best Utensils for Scraping
When it comes to scraping the bottom of the pan, you want something with a flat edge. A wooden spoon with a flat top or a high-heat resistant silicone spatula works best. These tools allow you to apply firm pressure to lift the fond without scratching your expensive cookware. While a metal whisk is great for the final emulsification of the sauce, it isn't the best tool for the initial scrape.
Pro Tip: The "Sizzle" Safety Check
Deglazing involves adding liquid to a very hot pan, which creates an immediate burst of steam. Always stand back slightly when pouring, and ensure your sleeves are rolled up. If you are using alcohol, such as brandy or wine, turn off the gas flame for a split second while pouring to prevent a "flambé" situation unless you are prepared for it!
Step-by-Step: How to Deglaze a Pan Like a Chef
Now that we have our tools and our fond, let's get into the mechanics of how to deglaze a pan. This process happens quickly, so have your deglazing liquid measured and ready before you start.
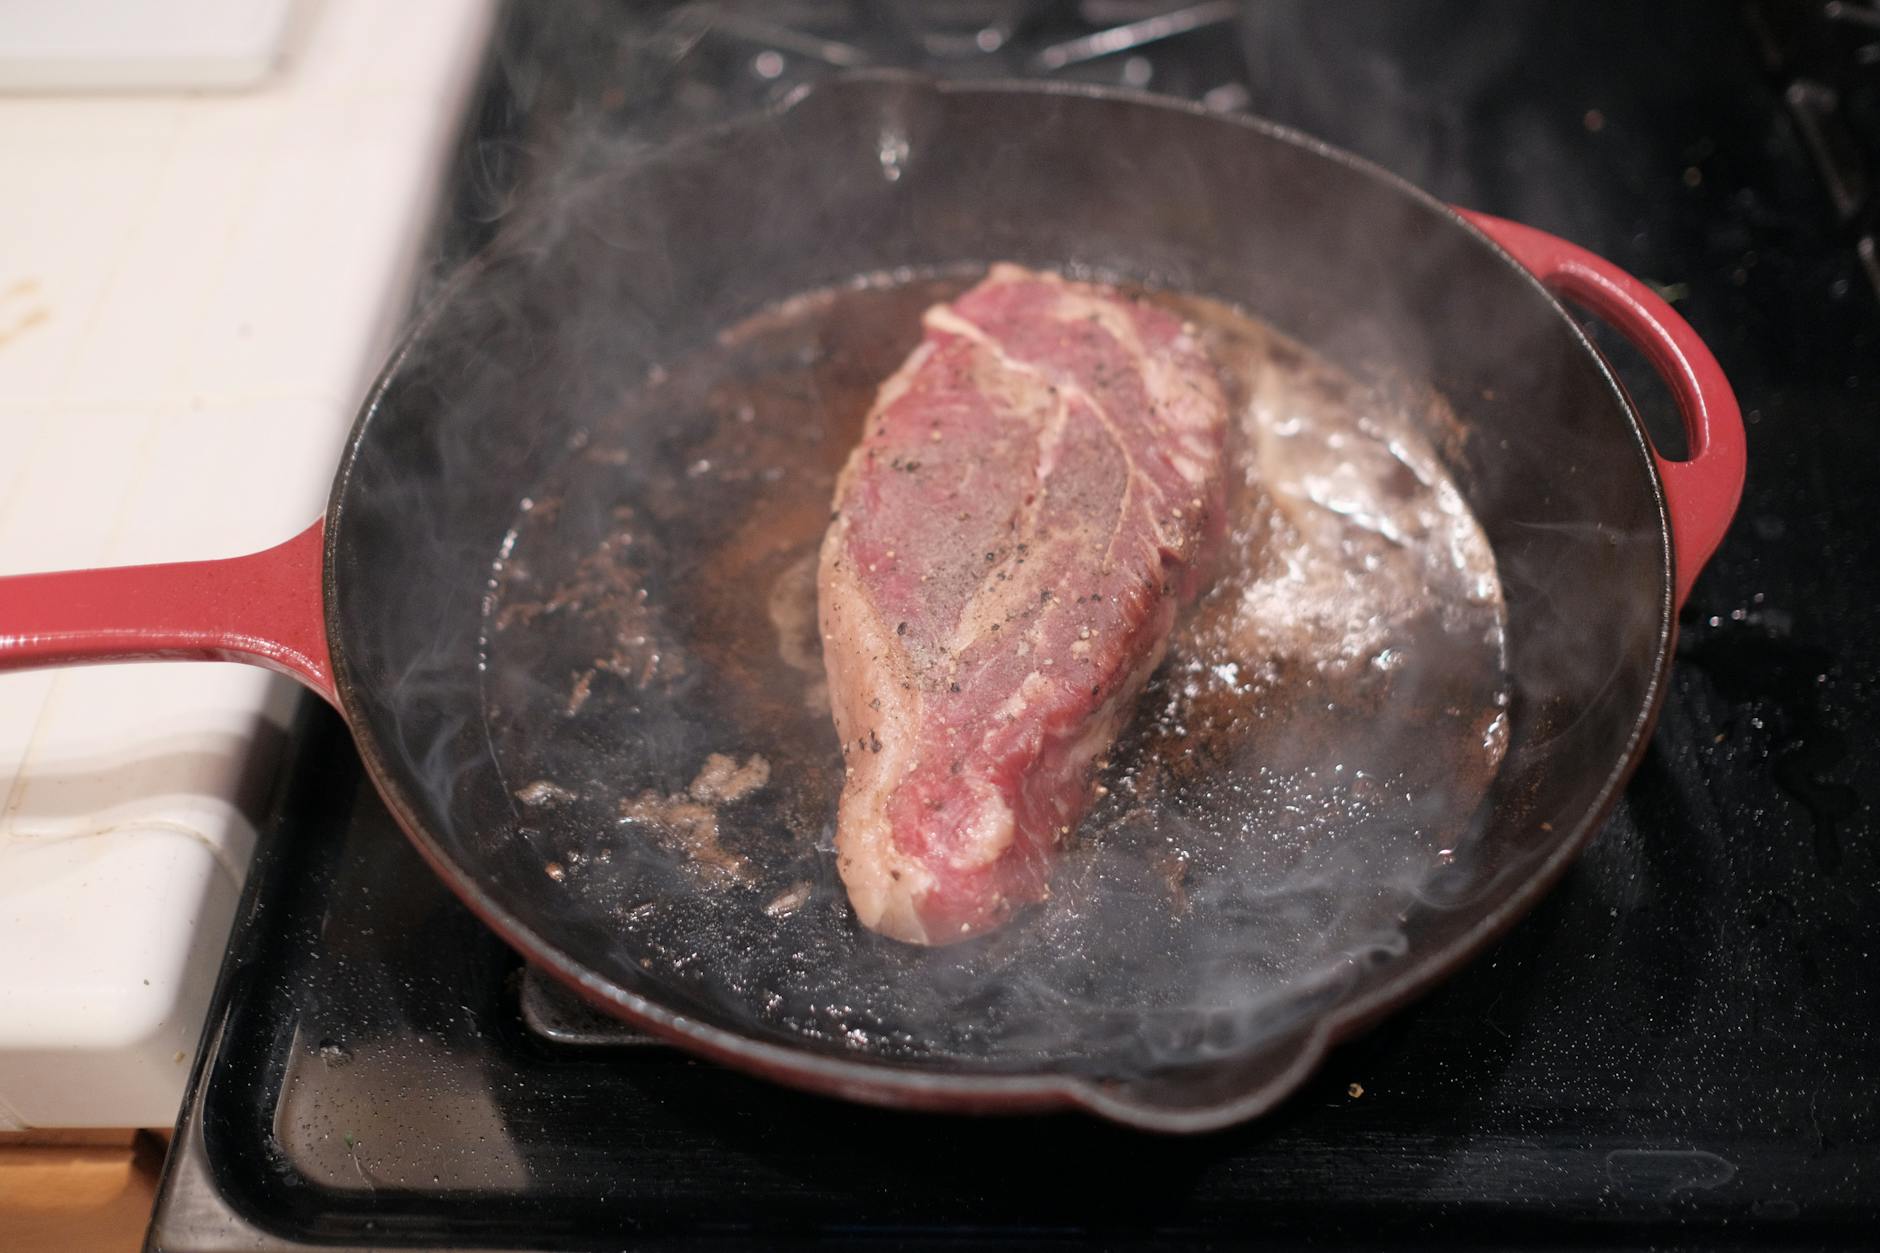
Step 1: Sear and Remove
Whether you are making 15-minute chicken breast recipes or a thick ribeye, the first step is the sear. Once the meat has reached its internal temperature or developed a deep crust, remove it from the pan and set it aside on a plate to rest. This is crucial; if you leave the meat in the pan while deglazing, the steam will ruin the crispy skin or crust you just worked so hard to create.
Step 2: Manage Your Fat
Take a look at your pan. You likely have a mix of rendered fat and pan drippings. If there is more than a tablespoon of liquid fat, carefully pour the excess into a heat-safe jar. You want just enough fat left to sauté your aromatics (like shallots or garlic), but not so much that your final pan sauce is greasy.
Step 3: The Deglazing Pour
With the pan still over medium-high heat, pour in about 1/2 to 3/4 cup of your chosen liquid. You should hear a loud, satisfying hiss. This is the liquid reaching the boiling point instantly and beginning to loosen the chemical bonds of the fond. How to deglaze a pan effectively depends on this thermal shock.
Step 4: The Scrape and Simmer
Immediately use your wooden spoon to begin scraping the bottom of the pan. You will see the dark bits dissolve into the liquid, turning it a rich, deep color. Continue scraping until the bottom of the pan feels smooth. Allow the liquid to simmer and undergo a reduction—usually by half—to concentrate the flavors.
Choosing Your Liquid: From Wine to Vinegar
The liquid you choose dictates the personality of your sauce. While water works in a pinch for cleaning, it adds zero flavor. To truly master the pan deglazing technique, you want to use a liquid that offers acidity or depth.
Deglazing with Wine
Wine is the classic choice because its acidity cuts through the richness of the meat fats.
- White Wine: Use a dry white like Sauvignon Blanc or Pinot Grigio for chicken, pork, or seafood.
- Red Wine: Use a bold red like Cabernet Sauvignon or Malbec for beef, lamb, or venison.
Using Broths and Stocks
If you prefer to cook without alcohol, high-quality chicken or beef stock is your best friend. In my experience, using a low-sodium stock is better because the reduction process concentrates salt. You can always add salt later, but you can't take it out. For a more modern approach, you can even use these techniques in Instant Pot recipes for beginners by using the "Sauté" function to deglaze before pressure cooking.
Acidic Hits: Vinegar and Citrus
For a punchy, bright sauce, try deglazing with a splash of balsamic vinegar or apple cider vinegar mixed with a little water or broth. Citrus juices like lemon or orange are also excellent for Mediterranean-style dishes. According to Bon Appétit's guide on best liquids for deglazing, the acidity is what helps balance the heavy proteins and fats left in the pan.
Building a Quick Pan Sauce from Drippings
Deglazing is the first step, but building a full pan sauce is the ultimate goal. This is where you transform a simple liquid into a velvety, restaurant-style coating.
Adding Aromatics
Before you add your liquid, I recommend tossing in some finely minced shallots or garlic. Sauté them in the remaining pan drippings for about 30-60 seconds until fragrant. Then, proceed with the deglazing liquid. This layers the flavor from the very beginning.
The Power of Cold Butter (Monter au Beurre)
Once your liquid has reduced by half and the browned bits are fully integrated, turn the heat to low. Whisk in 1-2 tablespoons of cold butter, one small piece at a time. This technique, known as monter au beurre, creates an emulsification. The cold butter melts slowly, allowing the milk solids to thicken the sauce into a glossy, opaque glaze rather than just melting into a puddle of oil.
The Ultimate 5-Minute Pan Sauce Template
- Sauté: Add 1 minced shallot to the pan after removing the meat. Cook for 1 minute.
- Deglaze: Pour in 1/2 cup dry white wine or broth. Scrape the bottom.
- Reduce: Simmer until the liquid looks syrupy (about 3 minutes).
- Finish: Turn off heat. Whisk in 1 tbsp cold butter and 1 tsp fresh herbs (parsley or thyme).
For a deeper dive into the science of this process, I highly recommend checking out this guide on building a flavorful pan sauce by Serious Eats.
Deglazing in Practice: Steaks, Chicken, and Vegetables
How to deglaze a pan varies slightly depending on what you are cooking. Here is how I apply this technique to different ingredients in my own kitchen.
The Perfect Steak Au Poivre
After searing a peppercorn-crusted steak, the pan is filled with spicy, beefy fond. I deglaze with a splash of cognac (carefully!) and a bit of heavy cream. The cream acts as the liquid and the thickener simultaneously, picking up every bit of that peppery goodness. This is the pinnacle of capturing flavor from pan drippings.
Crispy Chicken Thighs with Lemon-Garlic Sauce
Chicken thighs release a lot of fat. I always pour off most of it, leaving just a thin coating. I deglaze with chicken stock and a squeeze of fresh lemon. The result is a bright, savory sauce that cuts right through the richness of the dark meat.
Glazing Sautéed Vegetables
Don't limit yourself to meat! When I sauté mushrooms or onions for a long time, they leave behind a sugary, earthy fond. Deglazing with a tablespoon of balsamic vinegar at the very end of cooking "glazes" the vegetables, making them incredibly savory and professional-looking.
Common Deglazing Mistakes to Avoid
Even after 15 years, I still have to remind myself of these rules. Avoid these pitfalls to ensure your sauce is perfect every time.
- Using Too Much Liquid: If you flood the pan with 2 cups of broth for one steak, you aren't making a sauce; you're making soup. Start with a small amount (1/2 cup) so the reduction happens quickly.
- Deglazing a Cold Pan: If you let the pan cool down before adding liquid, the fond won't release as easily. You need that initial "shock" of heat to lift the browned bits effectively.
- Ignoring the Heat Level: Keep the heat at medium-high during the reduction, but always drop it to low or turn it off before adding cold butter. High heat will break the emulsion, leaving you with a broken, oily sauce.
Cleaning Benefits: Deglazing as a Cleanup Hack
One of the best "secrets" of professional chefs is that we rarely have to scrub our pans. Why? Because deglazing does the work for us. Even if I'm not making a sauce, I will often "deglaze" with a half-cup of water at the end of cooking just to lift the stuck-on bits.
By the time I'm ready to do the dishes, the pan is essentially clean. The water and the wooden spoon have done 90% of the labor. It’s a win-win: you get better-tasting food and a kitchen that’s easier to clean. This works exceptionally well on stainless steel skillet surfaces which are notorious for being "hard to clean" if you don't know this trick.
Frequently Asked Questions
A: Yes, you can. It will lift the fond and help with cleaning, but it won't add any flavor or acidity to your sauce. If you use water, consider adding a squeeze of lemon or a dash of Worcestershire sauce to compensate.
A: It can be dangerous. If you use brandy, cognac, or bourbon, always turn off the burner before pouring. The vapors can ignite instantly. Once the liquid is in, you can turn the heat back on.
A: If it's black, it's burnt. Do not deglaze it. Your sauce will taste bitter. Wipe the pan out with a paper towel, add a fresh bit of oil, and move on.
A: It is highly recommended. The flat edge of a wooden spoon provides more surface area for scraping the bottom than a round spoon or a fork, and it won't damage your pan.
Conclusion: Your Journey to Better Flavor Starts Now
Mastering how to deglaze a pan is a rite of passage for every home cook. It takes you away from following recipes blindly and moves you toward understanding the fundamental chemistry of flavor. The next time you sear a piece of meat, don't look at those browned bits as a cleanup chore. Look at them as the concentrated essence of your meal.
Grab your stainless steel skillet, prep your shallots and cold butter, and give the pan deglazing technique a try. I promise that once you taste the difference a real pan sauce makes, you’ll never look at a "dirty" pan the same way again. Happy cooking!