Quick Answer
The Ultimate Air Fryer Conversion Chart works best when the food is spaced well, lightly coated, and checked before the final minutes. Use the timing in this guide as a starting point, then adjust for food size, basket crowding, and how crisp you want the result.
CookBuddy Kitchen Note
For The Ultimate Air Fryer Conversion Chart, basket crowding and food size usually change the result more than the brand of air fryer. Check early, shake or flip when needed, and record the timing that works for your basket.
Decision table
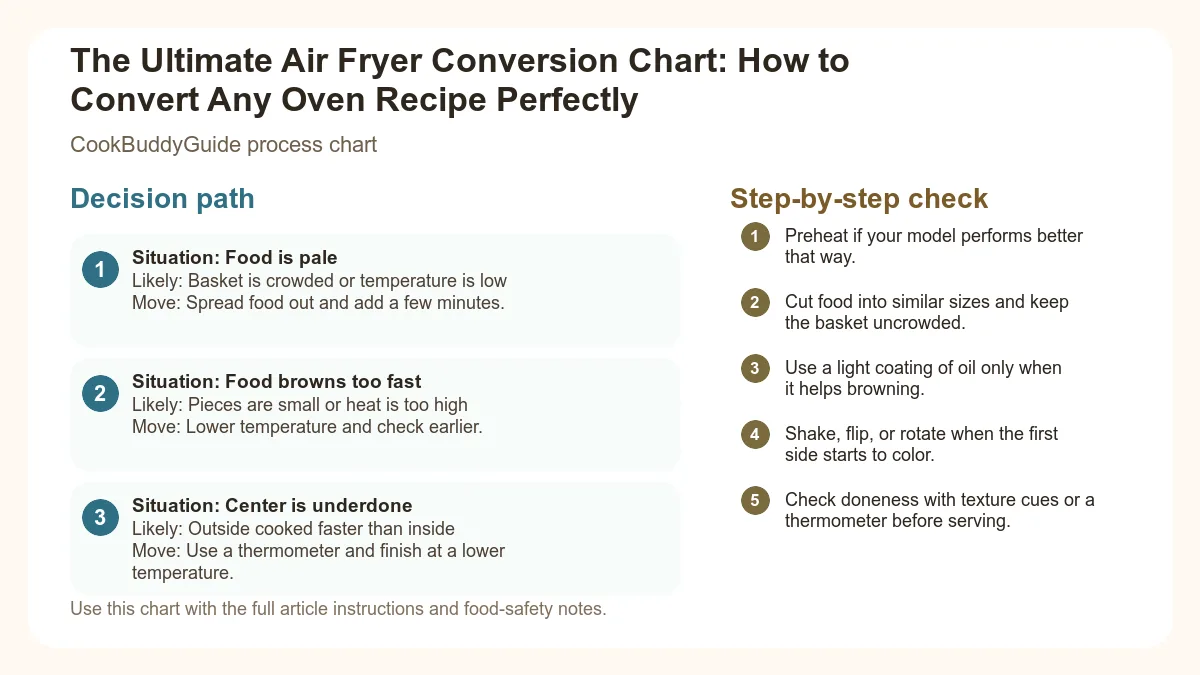
| Situation | Likely cause or meaning | Best move |
|---|---|---|
| Food is pale | Basket is crowded or temperature is low | Spread food out and add a few minutes. |
| Food browns too fast | Pieces are small or heat is too high | Lower temperature and check earlier. |
| Center is underdone | Outside cooked faster than inside | Use a thermometer and finish at a lower temperature. |
Step-by-step fix
- Preheat if your model performs better that way.
- Cut food into similar sizes and keep the basket uncrowded.
- Use a light coating of oil only when it helps browning.
- Shake, flip, or rotate when the first side starts to color.
- Check doneness with texture cues or a thermometer before serving.
Common mistakes
- Crowding the basket until food steams instead of browns.
- Using too much oil and making the surface heavy.
- Following time charts without checking piece size.
- Skipping a thermometer for foods where doneness matters.
Useful next reads
Helpful tools for this guide
- instant-read thermometer
- silicone-tipped tongs
- oil mister
- air fryer parchment liners
Related topic hubs
The Ultimate Air Fryer Conversion Chart: How to Convert Any Oven Recipe Perfectly
We’ve all been there. It’s 6:15 PM on a Tuesday, the kids are asking when dinner will be ready, and you’re staring at a beautiful piece of salmon and a recipe that calls for 20 minutes in a 400°F oven. You want to use your air fryer because you know it delivers that superior crispy texture without the grease of a deep frying alternative, but you’re paralyzed by the math. If you put it in at 400°F for 20 minutes, you’ll likely end up with a charred piece of driftwood. Over the last 15 years of testing recipes in my kitchen for CookBuddyGuide.com, I’ve ruined more "experimental" dinners than I care to admit. But those failures led me to create the definitive air fryer conversion chart.
Converting oven recipes isn't just about guessing; it’s about understanding the physics of your kitchen appliance. An air fryer is essentially a high-powered, compact convection oven. Because the heat is so concentrated and the fan is so powerful, food cooks significantly faster and browns more intensely through the Maillard reaction. In this guide, I will walk you through the "Golden Rule" of oven to air fryer temperature conversion, provide a massive category-by-category chart, and share the hard-won secrets from my testing bench to ensure your meal prep is always a success.
Table of Contents
- Why You Need a Reliable Air Fryer Conversion Chart
- The Science of Air Frying: Why It’s Not Just a Small Oven
- The Golden Rule: The 25/25 Formula
- The Ultimate Air Fryer Conversion Chart (By Category)
- Testing Notes from the CookBuddy Kitchen
- 5 Pro Tips for Perfect Conversions Every Time
- Common Mistakes When Converting Oven Recipes
- Essential Tools to Pair with Your Conversion Chart
Why You Need a Reliable Air Fryer Conversion Chart
The Frustration of Soggy Results
One of the most common complaints I hear from readers is that their air-fried food comes out either burnt on the outside and raw in the middle, or surprisingly soggy. This usually happens because they followed an oven recipe to the letter. Traditional ovens rely on radiant heat, which is relatively slow. In an air fryer, the air fryer basket allows air to circulate 360 degrees around the food. If you don't adjust your settings, that intense airflow will wick away moisture too quickly, or worse, skip the crisping phase entirely because the temperature was too low to compensate for the shorter time.
Saving Time and Energy in a Busy Kitchen
In my experience, the air fryer is the ultimate tool for the modern, busy family. Beyond the health benefits, the efficiency is unmatched. A standard oven can take 15 minutes just to reach 400°F. Most air fryers are ready to go in under 3 minutes. By using a proper air fryer conversion chart, you aren't just getting better food; you're reclaiming 20 to 30 minutes of your evening. Whether you are making beginner air fryer chicken recipes or complex roasted vegetables, the time savings add up over a week of meal prep.
The Science of Air Frying: Why It’s Not Just a Small Oven
Convection vs. Concentrated Heat
To understand why we need to convert recipes, we have to look at how air fryers actually work. While both a standard oven and an air fryer use heating elements, the air fryer utilizes a powerful fan located directly above the element. This creates a "wind tunnel" effect. In a large oven, even a convection one, the air has a vast space to travel, losing velocity and heat intensity. In the small cavity of an air fryer, that air moves at high speeds, stripping away the "boundary layer" of cool air and moisture that surrounds food. This leads to incredibly rapid evaporation and browning.
The Maillard Reaction in Record Time
The Maillard reaction is the chemical process between amino acids and reducing sugars that gives browned food its distinctive flavor. Because the air fryer excels at removing surface moisture, this reaction happens much sooner than it would in a conventional oven. This is why cooking times are so much shorter. However, if the temperature is too high, the exterior will undergo this reaction (and then burn) before the internal temperature of the food has reached a safe level. This is why the oven to air fryer temperature conversion is the most critical step in your process.
The Golden Rule: The 25/25 Formula
After testing hundreds of recipes—from frozen mozzarella sticks to elaborate prime rib roasts—I’ve found that almost every oven recipe can be adapted using what I call the 25/25 Formula. This is the baseline for any air fryer conversion chart.
Reducing the Temperature by 25°F
The first step is to lower the suggested oven temperature by 25°F (about 15°C). If a recipe for roasted potatoes calls for 400°F in the oven, you should set your air fryer to 375°F. This prevents the outside from scorching before the inside is tender. This rule is backed by culinary experts who suggest you should always convert oven recipes for air fryers by lowering the heat to account for the intense convection.
Cutting the Cooking Time by 20-25%
The second part of the formula involves the clock. Generally, you should reduce the cooking times by at least 20%. For example, if a recipe says to bake for 20 minutes, start checking your food at the 15-minute mark. In my kitchen, I’ve found that for smaller items like wings or sliced veggies, the reduction can be as high as 30-40%. Always err on the side of caution and check early!
The Ultimate Air Fryer Conversion Chart (By Category)
Below is the comprehensive air fryer conversion chart we use at CookBuddyGuide.com. Note that these are estimates; factors like the wattage of your machine and how much you crowd the air fryer basket will affect the final result.
Poultry: Chicken Breasts, Wings, and Thighs
- Chicken Breast (6-8 oz): Oven: 400°F (25 mins) -> Air Fryer: 375°F (15-18 mins)
- Chicken Wings: Oven: 425°F (45 mins) -> Air Fryer: 400°F (20-25 mins)
- Chicken Thighs (Bone-in): Oven: 400°F (35 mins) -> Air Fryer: 375°F (22-25 mins)
CookBuddy Note: To ensure food safety, always check the internal temperature with a food thermometer. Chicken must reach 165°F. For the crispiest skin, pat the meat bone-dry with paper towels before adding a light spritz of oil.
Meat: Steaks, Pork Chops, and Roasts
- Steak (1-inch thick): Oven: 400°F (12-15 mins) -> Air Fryer: 400°F (8-10 mins)
- Pork Chops (Center cut): Oven: 375°F (20 mins) -> Air Fryer: 360°F (12-15 mins)
- Bacon: Oven: 400°F (15-20 mins) -> Air Fryer: 350°F (8-10 mins)
CookBuddy Note: When air frying steak, I actually prefer not to lower the temperature. Keeping it at 400°F allows for a better sear while keeping the inside medium-rare. Consult the safe minimum internal temperature chart for all red meats.
Seafood: Salmon, Shrimp, and White Fish
- Salmon Fillet: Oven: 400°F (15 mins) -> Air Fryer: 380°F (8-10 mins)
- Shrimp (Large): Oven: 400°F (10 mins) -> Air Fryer: 400°F (5-7 mins)
- White Fish (Cod/Tilapia): Oven: 375°F (15-20 mins) -> Air Fryer: 350°F (10-12 mins)
CookBuddy Note: Fish is delicate. I recommend using a piece of parchment paper (perforated for air fryers) to prevent the skin from sticking to the basket.
Vegetables: Root Veggies, Broccoli, and Brussels Sprouts
- Brussels Sprouts (Halved): Oven: 400°F (30 mins) -> Air Fryer: 375°F (15 mins)
- Potato Wedges: Oven: 425°F (35 mins) -> Air Fryer: 380°F (20-22 mins)
- Broccoli Florets: Oven: 400°F (20 mins) -> Air Fryer: 375°F (8-10 mins)
CookBuddy Note: Vegetables need room to breathe. If you overcrowd the basket, they will steam rather than roast. Shake the basket every 5 minutes for even browning.
Frozen Foods: The Ultimate Convenience Guide
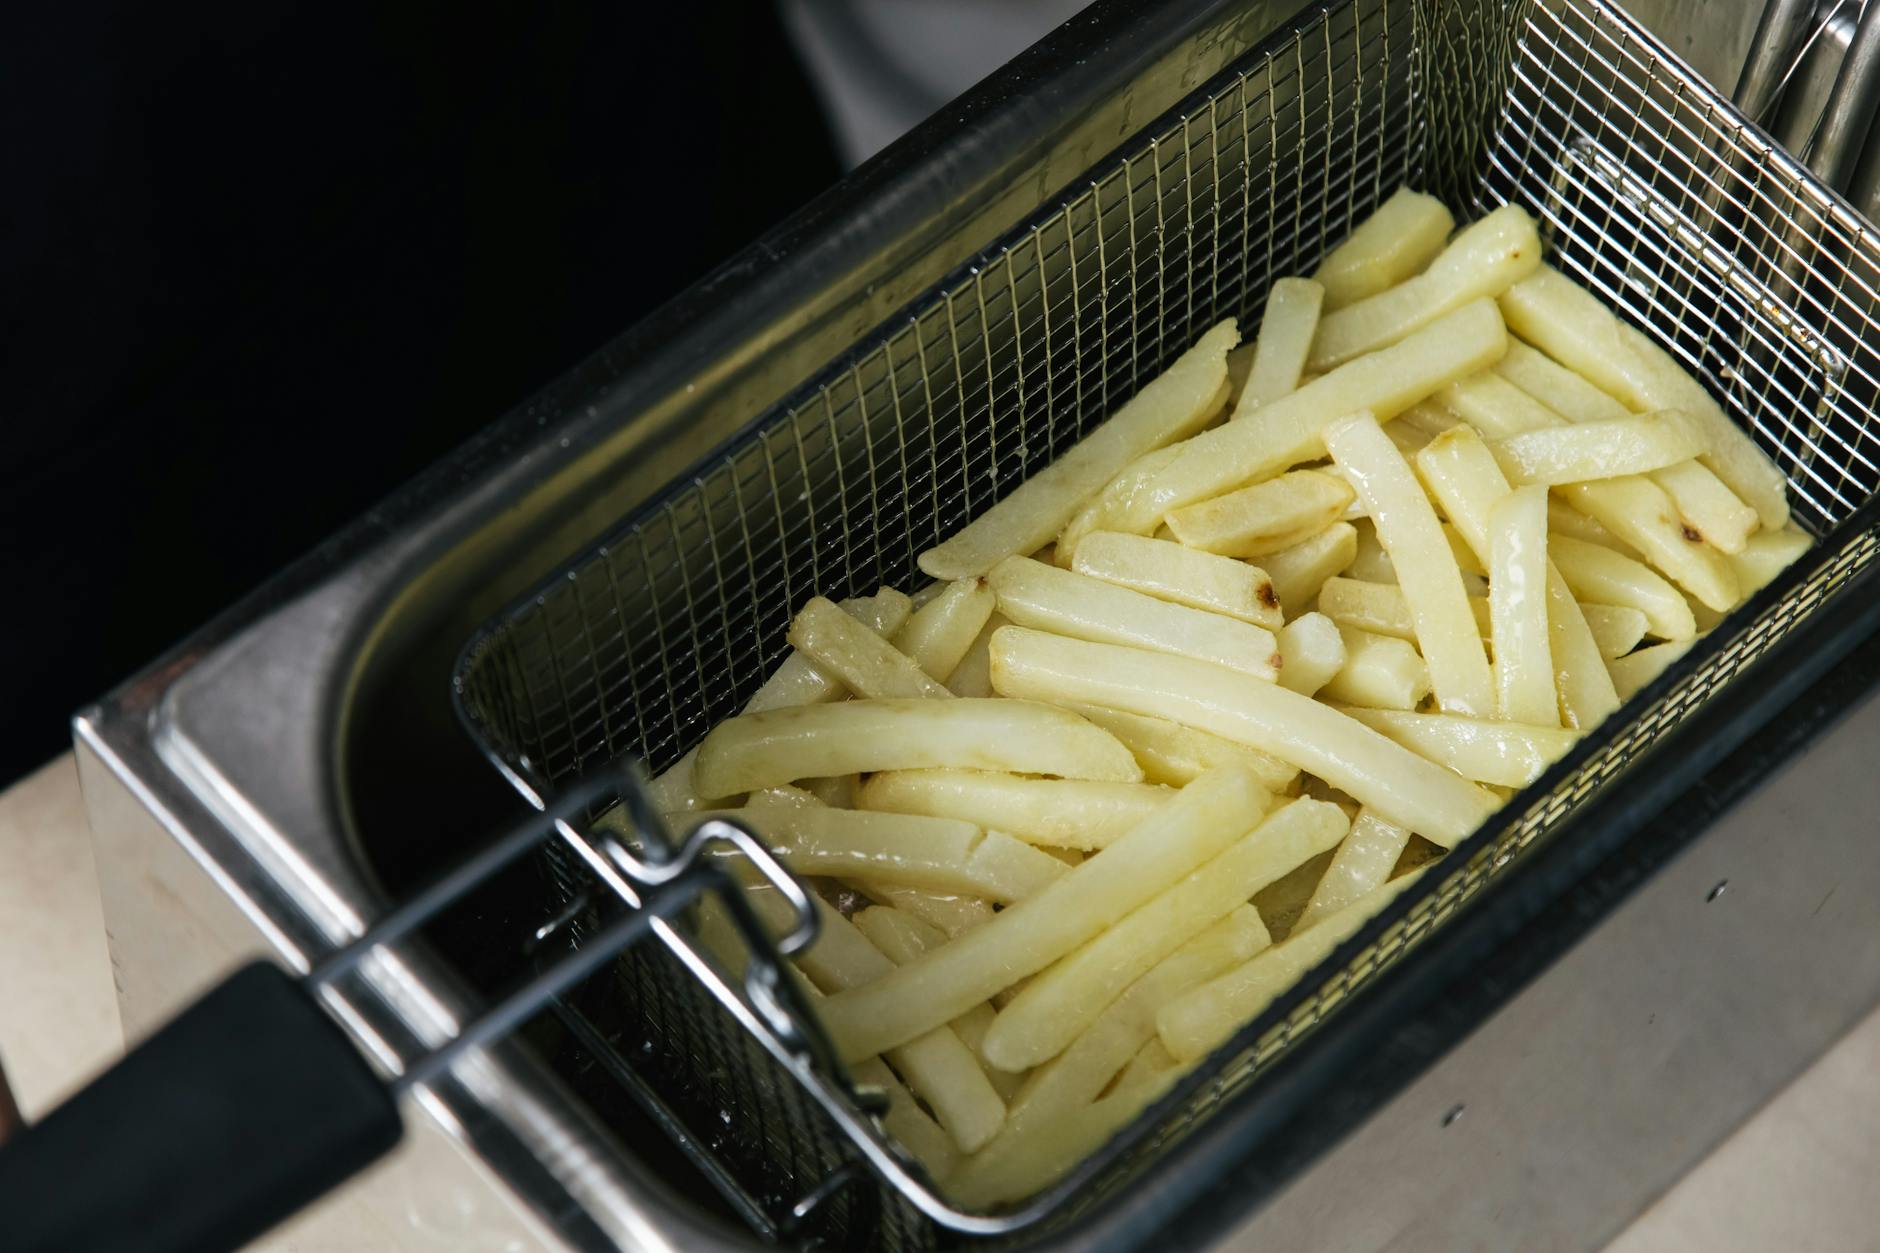
- Frozen Fries: Oven: 425°F (20 mins) -> Air Fryer: 400°F (12-15 mins)
- Chicken Nuggets: Oven: 400°F (15 mins) -> Air Fryer: 400°F (8-10 mins)
- Mozzarella Sticks: Oven: 400°F (10 mins) -> Air Fryer: 375°F (5-6 mins)
CookBuddy Note: Most frozen foods are already par-fried. You don't usually need extra oil, but a quick shake is essential to prevent them from sticking together.
Baking: Cookies, Muffins, and Small Cakes
- Chocolate Chip Cookies: Oven: 350°F (10-12 mins) -> Air Fryer: 325°F (6-8 mins)
- Muffins: Oven: 375°F (20 mins) -> Air Fryer: 330°F (12-15 mins)
- Cake (Small round): Oven: 350°F (30 mins) -> Air Fryer: 320°F (20 mins)
CookBuddy Note: Baking is the trickiest conversion. The high airflow can cause the tops of cakes to "drift" or brown too quickly. Cover with foil if the top is darkening too fast. For more depth, check out these tips on baking successfully in an air fryer.
CookBuddy Featured Conversion: Crispy Air Fryer Potatoes
This recipe demonstrates the 25/25 rule perfectly. An oven recipe for these would take 35 minutes at 400°F.
Ingredients:- 1 lb Yukon Gold potatoes, cubed (1/2 inch)
- 1 tbsp Avocado oil (high smoke point)
- 1 tsp Garlic powder
- 1/2 tsp Smoked paprika
- Salt and pepper to taste
- Preheat air fryer to 375°F.
- Toss potatoes in a bowl with oil and spices until evenly coated.
- Place in a single layer in the air fryer basket.
- Cook for 18 minutes, shaking the basket vigorously at the 6 and 12-minute marks.
- Check for a deep golden crispy texture and serve immediately.
Testing Notes from the CookBuddy Kitchen
Basket Style vs. Toaster Oven Style Air Fryers
During my 15 years of testing, I’ve noticed a significant difference between basket-style units (like Ninja or Cosori) and toaster oven styles (like Breville or Cuisinart). Basket styles are generally more efficient because the food is closer to the fan and heating element. If you are using a toaster oven style, you might not need to reduce the temperature as much, but you should still follow the essential air fryer cooking tips regarding rack placement. Always use the middle or lower rack to prevent the top of your food from burning.
The Importance of Airflow and Overcrowding
The biggest mistake I made in my early air frying days was trying to cook too much at once. I once tried to air fry two pounds of wings in a 4-quart basket. The result? A soggy, grey mess. For the air fryer conversion chart to work, the air must be able to touch all surfaces of the food. If you’re cooking for a crowd, it is always better to cook in batches. You can keep the first batch warm in a low oven while the second batch finishes.
5 Pro Tips for Perfect Conversions Every Time
1. Invest in an Instant-Read Thermometer
I cannot stress this enough: your food thermometer is your best friend. Because air fryers cook so quickly, the window between "perfectly juicy" and "dry as a bone" is very small. I always pull my meats about 5 degrees before they reach the target internal temperature, as carryover cooking will finish the job while the meat rests.
2. The Light Oil Spritz Technique
While the air fryer is a deep frying alternative, it isn't an "oil-free" machine if you want great results. For items like breaded chicken or fresh vegetables, a light coating of oil is necessary to facilitate the Maillard reaction. Use an oil with a high smoke point, such as avocado oil (520°F), to avoid filling your kitchen with smoke.
3. Preheating: Is It Really Necessary?
In my experience, yes. Even though air fryers heat up fast, starting with a hot basket ensures that the food begins crisping the moment it hits the surface. This is especially important for proteins like steak or salmon where you want a sear without overcooking the interior. I usually preheat for 3-5 minutes while I’m doing my final meal prep.
4. Using Parchment Paper and Foil Safely
Parchment paper is great for cleanup, but never put it in the air fryer during preheating without food on top of it. The fan will blow it into the heating element, creating a fire hazard. Also, ensure you aren't covering the entire bottom of the basket; you need those holes open for airflow.
5. Adjusting for High-Sugar Marinades
If your oven recipe uses a marinade with honey, maple syrup, or BBQ sauce, you need to be extra careful. Sugar burns quickly under concentrated heat. I recommend air frying the meat plain for the first 70% of the time, then brushing on the sauce for the final few minutes of cooking times. This gives you the flavor without the carbonized crust.
Common Mistakes When Converting Oven Recipes
Forgetting the Flip
In a traditional oven, you might get away with not flipping your food. In an air fryer, the bottom of the food is shielded by the basket or the food itself. To get that 360-degree crispy texture, you must flip your proteins or shake your vegetables halfway through. I’ve found that for thicker items like pork chops, flipping is the difference between a soggy bottom and a perfect crust.
Using Too Much Liquid Batter
If you take a recipe for beer-battered fish meant for a deep fryer and put it in an air fryer, you’re going to have a disaster. The batter will drip through the basket before it has a chance to set. For air frying, use the "Standard Breading Procedure": flour, then egg, then breadcrumbs (like Panko). This creates a dry exterior that the air fryer can crisp up beautifully.
Ignoring the 'Check Early' Rule
The most important part of any air fryer conversion chart is the suggestion to check early. Every air fryer is different. A 1500-watt unit will cook much faster than a 1200-watt unit. The first time you convert a recipe, check it 5 to 10 minutes before you think it should be done. You can always add more time, but you can't "un-burn" dinner.
Essential Tools to Pair with Your Conversion Chart
To make the most of your oven to air fryer temperature conversion, having the right gear is essential. Just like when you're mastering Instant Pot recipes for beginners, the right accessories make the process foolproof.
- Oil Sprayer: Avoid aerosol cans (like Pam), as the lecithin in them can degrade the non-stick coating of your air fryer basket. Buy a refillable glass sprayer and fill it with avocado or light olive oil.
- Silicone Liners: These are a sustainable alternative to parchment paper. They are easy to clean and protect the basket's finish.
- Stackable Racks: If you have a smaller air fryer, a rack allows you to double your surface area for things like dehydrating or making multiple layers of jerky.
- Silicone Tongs: Metal tongs can scratch the non-stick coating. A good pair of silicone-tipped tongs is essential for flipping delicate fish or steaks.
Frequently Asked Questions
A: Generally, if a dish is oven-safe, it is air fryer safe. However, avoid sudden temperature changes (like taking a glass dish from the fridge to a preheated air fryer), as the rapid heating can cause tempered glass to shatter.
A: This usually happens when fat from the food drips onto the bottom of the unit and hits the heating element, or if you're using an oil with a low smoke point. To fix this, add a tablespoon of water to the bottom drawer (under the basket) to catch the grease, or use a piece of bread to soak up the drippings.
A: Yes. In many dual-basket models, using both baskets simultaneously can slightly increase the cooking times because the power is being split between two zones. Add 2-3 minutes to your timer if both sides are running.
Conclusion: Master Your Kitchen with Confidence
Converting recipes shouldn't feel like a high-stakes math test. By using the 25/25 Formula and referring to this air fryer conversion chart, you can take any family favorite and give it a modern, healthier twist. Remember that the air fryer is a tool of speed and intensity; treat it with respect, check your internal temperature often, and don't be afraid to experiment. Whether you're a seasoned pro or just starting out with meal prep, these adjustments will ensure that every dish that comes out of your kitchen appliance is perfectly browned, incredibly crispy, and cooked to perfection. Happy frying!