Quick Answer
The Ultimate Soft Sugar Cookie Recipe is built around practical home-kitchen ratios and simple texture checks. Follow the main method first, then use the variation and troubleshooting notes to adjust sweetness, salt, moisture, or cook time.
CookBuddy Kitchen Note
For The Ultimate Soft Sugar Cookie Recipe, this guide centers on Butter, Cream Cheese, Granulated Sugar. Those are the checkpoints we would use first in a normal home kitchen before making a bigger change.
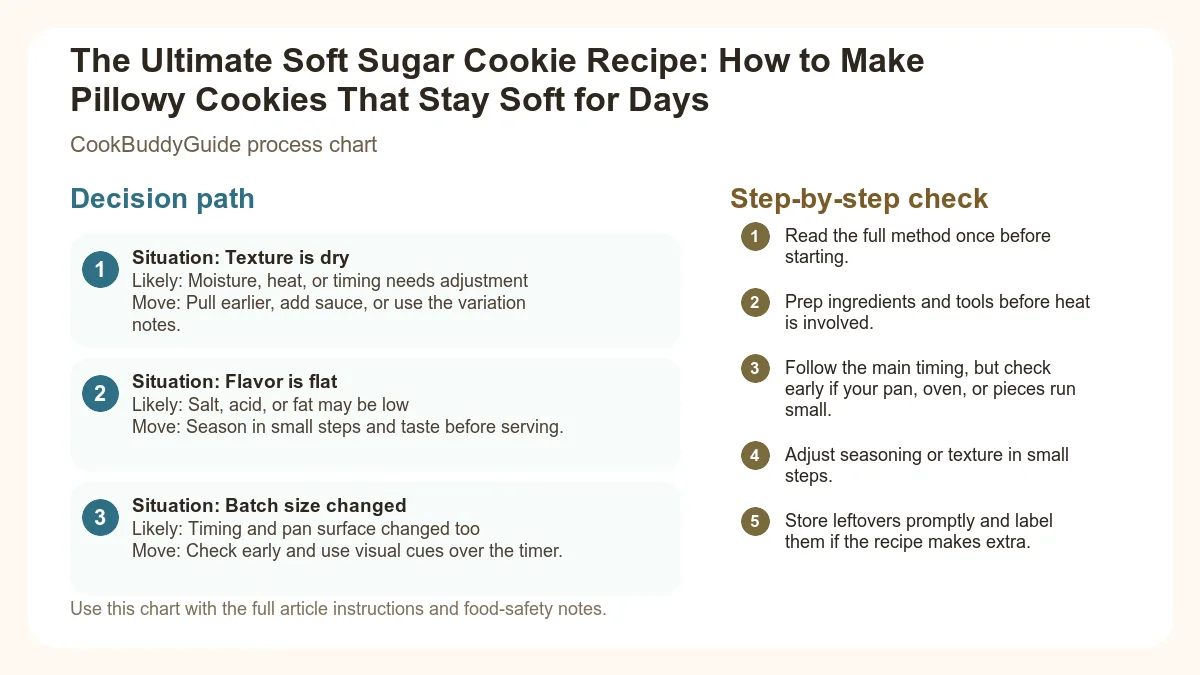
Decision table
| Situation | Likely cause or meaning | Best move |
|---|---|---|
| Texture is dry | Moisture, heat, or timing needs adjustment | Pull earlier, add sauce, or use the variation notes. |
| Flavor is flat | Salt, acid, or fat may be low | Season in small steps and taste before serving. |
| Batch size changed | Timing and pan surface changed too | Check early and use visual cues over the timer. |
Step-by-step fix
- Read the full method once before starting.
- Prep ingredients and tools before heat is involved.
- Follow the main timing, but check early if your pan, oven, or pieces run small.
- Adjust seasoning or texture in small steps.
- Store leftovers promptly and label them if the recipe makes extra.
Common mistakes
- Changing the recipe before trying the base method once.
- Measuring casually when texture depends on ratios.
- Waiting until the end to fix seasoning.
- Ignoring carryover heat or resting time.
Useful next reads
Helpful tools for this guide
- digital kitchen scale
- instant-read thermometer
- rimmed sheet pan
- silicone spatula
Related topic hubs
The Ultimate Soft Sugar Cookie Recipe: How to Make Pillowy Cookies That Stay Soft for Days
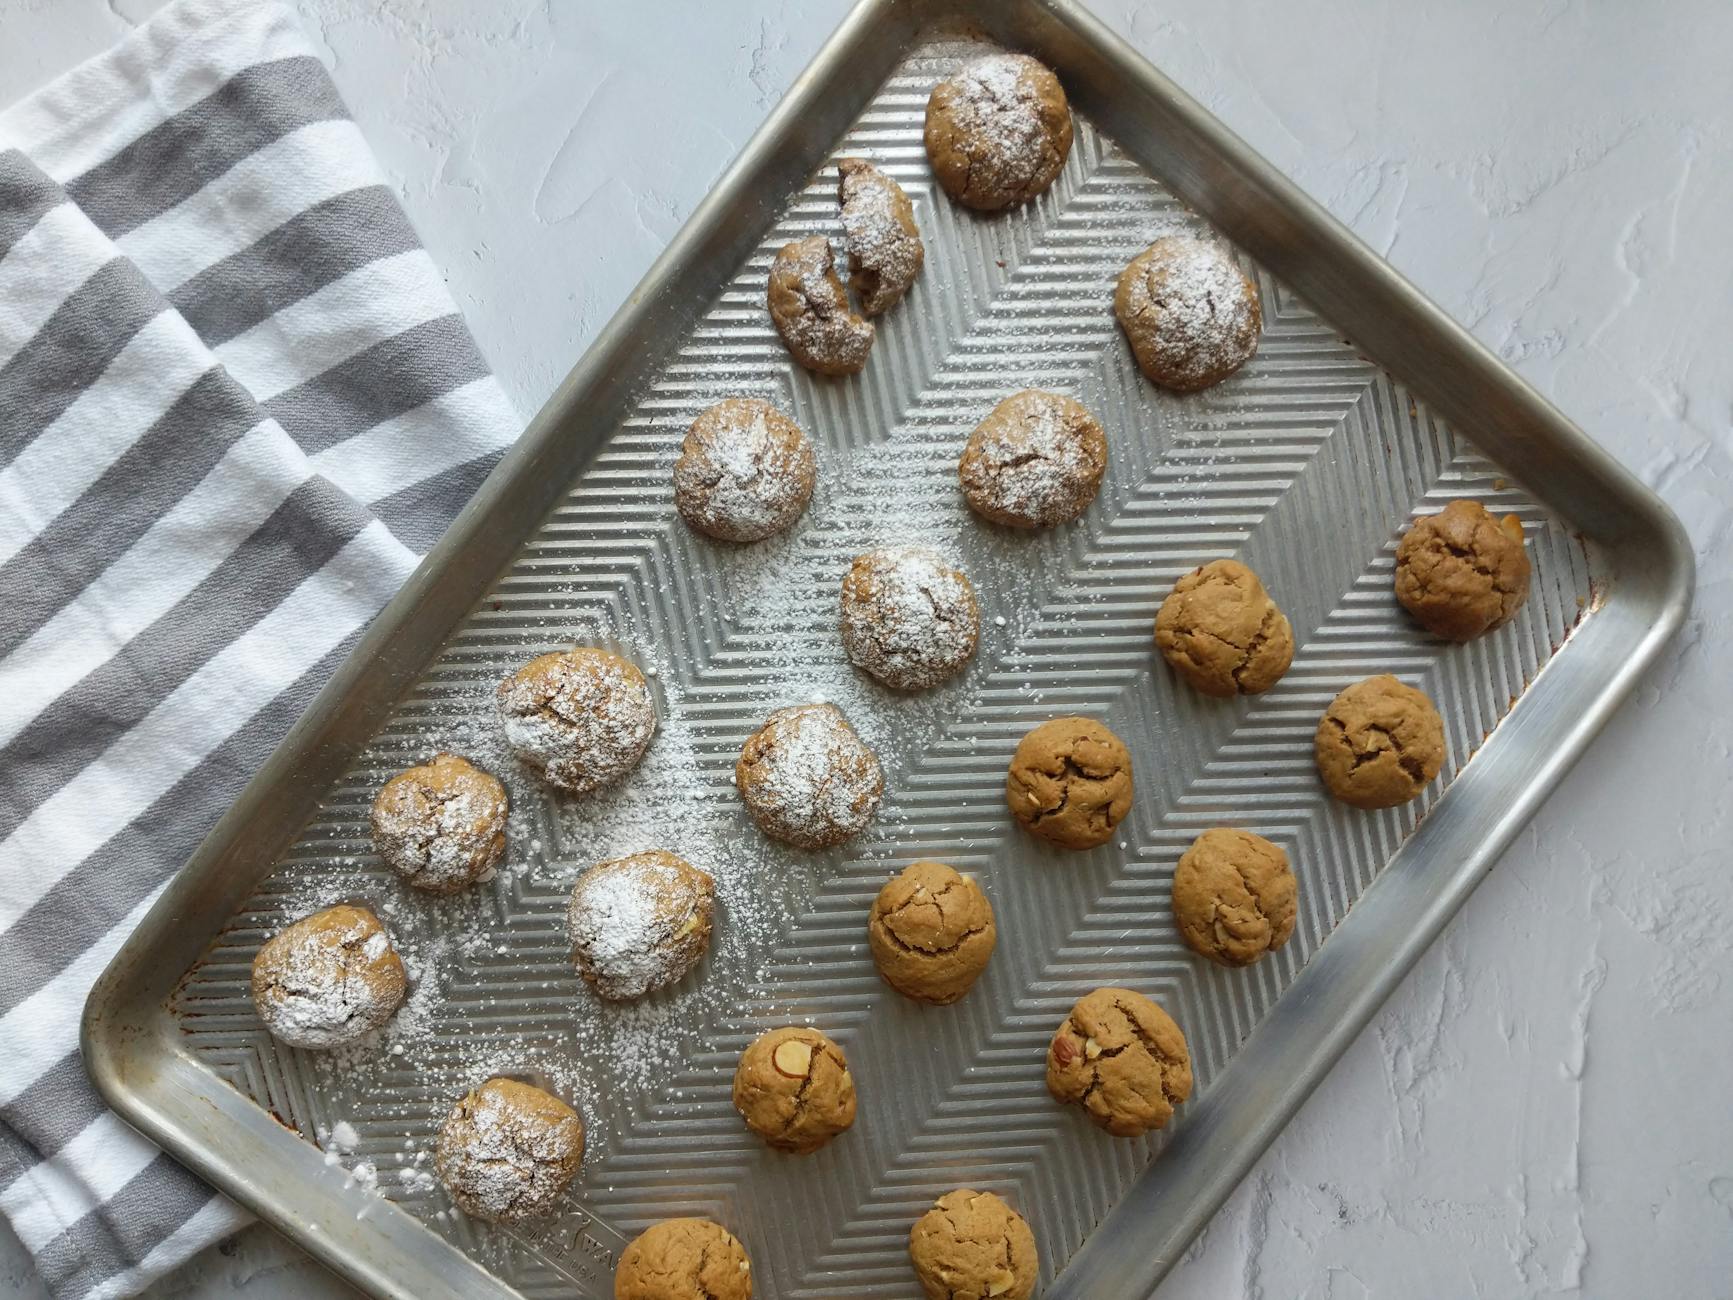
There is a specific kind of disappointment that only a home baker knows: pulling a tray of beautiful, golden-edged sugar cookies out of the oven, letting them cool, and taking a bite only to realize you’ve essentially baked a sweet hockey puck. For years, I struggled with the "crunch factor." I wanted that loft, that pillowy, melt-in-your-mouth texture you find at high-end bakeries—the kind of cookie that yields gently to your teeth and stays just as soft on day four as it was on hour one.
In my 15 years of testing recipes for CookBuddyGuide.com, I have baked thousands of cookies. I’ve tried the "no-chill" shortcuts (spoiler: they don't work for texture) and the "all-butter" purist routes. But through trial and error in my own kitchen, I discovered that the secret to a truly soft sugar cookie recipe isn't just about one ingredient; it’s about a specific chemical harmony between moisture, fat, and controlled gluten development. After making this 20+ times to perfect the ratios, I can confidently say this is the last recipe you will ever need for holiday baking or everyday treats.
Why Most Sugar Cookies Turn Out Hard
Most recipes fail because they prioritize structure over moisture. When you use only butter and granulated sugar, the cookies often crisp up as they cool. Furthermore, over-working the cookie dough leads to excess gluten, resulting in a tough, bread-like texture rather than a tender crumb. This guide is designed to solve those problems by introducing specific "softness agents" like cream cheese and cornstarch, ensuring your cut-out cookies remain tender for up to five days.
What to Expect from This Recipe
This isn't a thin, crispy wafer. This recipe produces a thick, chewy texture with a slight tang and a rich vanilla finish. We are going to focus on the "underbake" technique and the "1/4 inch rule" to ensure every bite is perfection. Whether you are a pro looking for no-spread cookies that hold their shape for royal icing or a busy parent looking for a reliable weekend project, this guide has you covered.
The Science of Softness: Key Ingredients Explained
To understand how to make soft sugar cookies, we have to look at the chemistry happening inside your baking sheet. Most people think sugar cookies are just flour, butter, and sugar. While those are the pillars, the "extras" make the difference between a "good" cookie and a "legendary" one.
The Role of Cream Cheese and Extra Egg Yolks
In my testing, I found that replacing a small portion of butter with cream cheese is a game-changer. Cream cheese provides a high fat-to-water ratio that coats the flour proteins, preventing them from bonding too tightly. This significantly inhibits gluten development. Additionally, I always add one extra egg yolk. While egg whites provide structure and leavening, they can also be drying. The yolk adds lecithin and fat, which creates a denser, more velvety crumb. This science of making chewy cookies confirms that increasing the fat content is the most reliable way to ensure a soft bite.
Why Cream of Tartar is Non-Negotiable
You might associate Cream of tartar with snickerdoodles, but it belongs in your sugar cookies too. It’s an acidic byproduct of winemaking that serves two purposes here. First, it acts as a leavening agent when paired with baking powder. Second, and more importantly, it prevents sugar from recrystallizing into a crunchy structure. This results in a "short" texture that is soft rather than crisp. To dive deeper into the chemistry, you can read more about how cream of tartar affects texture and why it’s the secret weapon of professional pastry chefs.
Cornstarch: The Secret Softener
If you want a cookie that feels like a cloud, you must use cornstarch. By replacing just a few tablespoons of all-purpose flour with cornstarch, you effectively lower the protein content of your flour. This creates a "DIY cake flour" effect, ensuring the cookies are tender and have that signature "pillowy" look. It also helps the cookies hold their shape, making them excellent no-spread cookies for intricate cutters.
Essential Tools for Baking Success
Before you even crack an egg, you need to ensure your kitchen is set up for success. After 15 years in the kitchen, I’ve learned that the wrong pan can ruin the best dough.
Why a Kitchen Scale Changes Everything
The #1 reason people end up with hard cookies is too much flour. When you use a measuring cup, you often pack the flour down, adding up to 20% more than the recipe intends. 125 grams of flour is always 125 grams, but "one cup" can vary wildly. If you don't own a scale, use the "spoon and level" method: spoon the flour into the cup and level it off with a knife. Never scoop directly from the bag!
The Best Baking Sheets for Even Heat
I strictly use light-colored, heavy-gauge aluminum baking sheets. Dark pans absorb more heat and will brown the bottoms of your cookies before the centers are set. To keep the cookies pale and soft, light pans are essential. I also prefer parchment paper over silicone mats for sugar cookies. While silicone is great for some recipes, parchment allows for a slightly better airflow, ensuring the bottoms don't get greasy or overly browned.
How to Make Soft Sugar Cookies: A Step-by-Step Guide
The process is just as important as the ingredients. You can't just throw everything in a bowl and hope for the best. Follow these steps to ensure the perfect soft sugar cookie recipe results.
Creaming Butter and Sugar Properly
Start with room temperature butter. It should be soft enough to leave an indentation when pressed, but not so soft that it's oily. Cream the butter, cream cheese, and sugar for at least 3 to 5 minutes. You are looking for a pale, fluffy mixture. This process incorporates tiny air bubbles that the baking powder will later expand, giving the cookie its "loft."
The Chilling Phase: Why You Can't Skip It
I know it's tempting to bake immediately, but the dough needs to rest. Chilling the cookie dough for at least 2 hours (or overnight) does two things: it solidifies the fats so the cookies don't spread into puddles, and it allows the flour to fully hydrate. This hydration is key to a uniform, soft texture. There are many benefits of chilling cookie dough, including a deeper flavor profile as the enzymes in the flour break down.
If you're in a rush to get dinner on the table before your baking session, you might want to check out my easy sheet pan meals to save time while your dough chills.
Rolling and Cutting for Maximum Thickness
When it comes to rolling, thickness is your best friend. Most people roll their dough to 1/8 inch. For a soft cookie, you want 1/4 inch thickness. This ensures there is enough "middle" to stay soft while the edges set. Use rolling pin rings if you have them to ensure perfectly even thickness across the entire batch.
The Master Recipe: Soft & Chewy Sugar Cookies
Ingredients
- Butter: 1 cup (226g) unsalted, room temperature
- Cream Cheese: 2 oz (56g) full-fat, softened
- Granulated Sugar: 1 cup (200g)
- Egg: 1 large, room temperature
- Egg Yolk: 1 large, room temperature
- Vanilla Extract: 2 tsp (use high-quality for best flavor)
- Almond Extract: 1/2 tsp (optional, for that bakery taste)
- All-Purpose Flour: 3 cups (375g)
- Cornstarch: 2 tbsp
- Baking Powder: 1 tsp
- Cream of Tartar: 1/2 tsp
- Salt: 1/2 tsp
Instructions
- Cream the Fats: In a large bowl or stand mixer, beat the butter and cream cheese together until smooth. Add the sugar and beat on medium-high for 3-5 minutes until very pale and fluffy.
- Add Wet Ingredients: Add the egg, extra yolk, vanilla, and almond extract. Mix until just combined. Scrape down the sides of the bowl to ensure everything is incorporated.
- Whisk Dry Ingredients: In a separate bowl, whisk together the flour, cornstarch, baking powder, cream of tartar, and salt.
- Combine: Turn the mixer to low and gradually add the dry ingredients. Mix until the dough just comes together. Do not overmix, as this develops too much gluten!
- Chill: Divide the dough into two disks, wrap tightly in plastic wrap, and refrigerate for at least 2 hours.
- Preheat & Prep: Preheat your oven to 350°F (175°C). Line your baking sheets with parchment paper.
- Roll & Cut: On a lightly floured surface, roll the dough to 1/4 inch thickness. Use your favorite cutters to create shapes. Re-roll scraps only once for the best texture.
- Bake: Bake for 8-10 minutes. The cookies should look pale and slightly puffed. They should NOT be brown.
- Cool: Let the cookies rest on the hot pan for 5 minutes before transferring them to a wire rack to cool completely.
Baker's Notes
Pro Tip: If your kitchen is warm, put the cut-out shapes back in the fridge for 10 minutes before sliding them into the oven. This ensures they are no-spread cookies with sharp edges.
The 'Underbake' Technique: The Secret to Longevity
If you wait until your sugar cookies are golden brown to pull them out of the oven, you have already overbaked them. This is the hardest lesson for many home cooks to learn. Sugar cookies continue to cook for several minutes after they leave the oven—this is called carryover cooking.
Visual Cues for Perfect Doneness
When the timer goes off, the cookies should look "matte" on top rather than shiny. They should be slightly puffed, and if you gently touch the edge, it should feel set, but the center should still look slightly soft—almost raw. This is one of the most reliable signs your cookies are done. If you see any browning on the edges, they will be crunchy once cooled.
The 5-Minute Rest Period
Leaving the cookies on the hot baking sheet for 5 minutes is crucial. This allows the centers to finish setting gently without the direct, harsh heat of the oven. After 5 minutes, move them to a wire rack. If you leave them on the pan too long, the residual heat will dry them out. If you move them too soon, they might break. Timing is everything!
Frosting Options: Royal Icing vs. Buttercream
The frosting you choose isn't just about decoration; it’s also a sealant. Frosting creates a barrier that prevents moisture from escaping the cookie, helping it stay soft for days.
Easy Vanilla Buttercream for a Classic Feel
For a "Lofthouse" style cookie, a thick layer of vanilla buttercream is the way to go. Use room temperature butter, powdered sugar, a splash of heavy cream, and plenty of vanilla extract. This frosting stays soft and creamy, making it a hit with kids. Speaking of kids, if you’re looking for more ways to keep the little ones happy at the table, check out my guide on toddler friendly dinner recipes.
Soft-Bite Royal Icing for Decorating
If you want the beautiful, flat look of royal icing but hate the rock-hard "crack" it usually has, add a tablespoon of light corn syrup to your recipe. The corn syrup keeps the icing from drying into a brittle sheet, giving it a "soft-set" that is much more pleasant to eat. It also adds a beautiful shine to your holiday baking designs.
Troubleshooting Common Sugar Cookie Failures
Even with a perfect recipe, things can go wrong. Here is how to fix the most common issues I see in my reader comments.
Why Did My Cookies Spread?
If your cut-out cookies lost their shape, it’s usually one of three things:
- Butter was too soft: If the butter is melting before it goes into the oven, the cookies will spread.
- No chilling: You skipped the 2-hour fridge rest.
- Over-creaming: While you want air, if you beat the eggs too long, you can incorporate too much air which then collapses in the oven.
Why Are My Cookies Tough and Bready?
This is almost always due to gluten development. Gluten is formed when flour meets liquid and is agitated. To prevent this:
- Mix the flour in on the lowest speed possible.
- Stop mixing as soon as no white streaks remain.
- Avoid re-rolling the dough more than twice. Each time you roll it, you strengthen the gluten bonds.
Storage and Make-Ahead Tips
The beauty of this soft sugar cookie recipe is that it actually tastes better on day two as the flavors meld. However, you must store them correctly.
How to Keep Cookies Soft for Days
Once the cookies are completely cool (and the icing has set), place them in an airtight container. My secret trick? Place a single slice of plain white bread in the container with them. The cookies will absorb the moisture from the bread, keeping them incredibly soft. Just make sure the bread isn't touching the cookies directly if they aren't frosted.
Freezing Dough vs. Freezing Baked Cookies
You can freeze the raw dough disks for up to 3 months. Just thaw in the fridge overnight before rolling. You can also freeze decorated cookies! Flash freeze them on a tray for an hour until the icing is hard, then stack them with parchment paper between layers in a freezer bag. When thawing, leave the bag closed until they reach room temperature to prevent condensation from ruining the icing.
Safety Note: While it’s tempting to snack on the cookie dough during the process, remember the risks of eating raw dough due to untreated flour and raw eggs. Always bake your treats fully!
Frequently Asked Questions
Yes, but reduce the added salt in the recipe to 1/4 teaspoon to ensure the cookies aren't overly salty.
I have tested this with high-quality 1-to-1 gluten-free flour blends. The results are good, though the cookies may be slightly more fragile. Increase the chilling time by an hour.
In an airtight container at room temperature, these will stay soft for 4-5 days. In the freezer, they last up to 3 months.
Final Thoughts: The Joy of a Perfect Cookie
Mastering the soft sugar cookie recipe is a rite of passage for any home baker. By focusing on the fat content, respecting the chill time, and embracing the "underbake," you can create a cookie that is truly world-class. These cookies have been the centerpiece of my family's holiday baking for over a decade, and I am so thrilled to share the secrets of my kitchen with yours.
Now, grab your all-purpose flour, preheat that oven, and get ready to bake the softest cookies of your life. Happy baking!