Quick Answer
The Ultimate 5-Minute Garlic Sauteed Spinach Recipe is built around practical home-kitchen ratios and simple texture checks. Follow the main method first, then use the variation and troubleshooting notes to adjust sweetness, salt, moisture, or cook time.
CookBuddy Kitchen Note
For The Ultimate 5-Minute Garlic Sauteed Spinach Recipe, this guide centers on Pan-Seared Salmon, Roasted Chicken, Steak. Those are the checkpoints we would use first in a normal home kitchen before making a bigger change.
Decision table
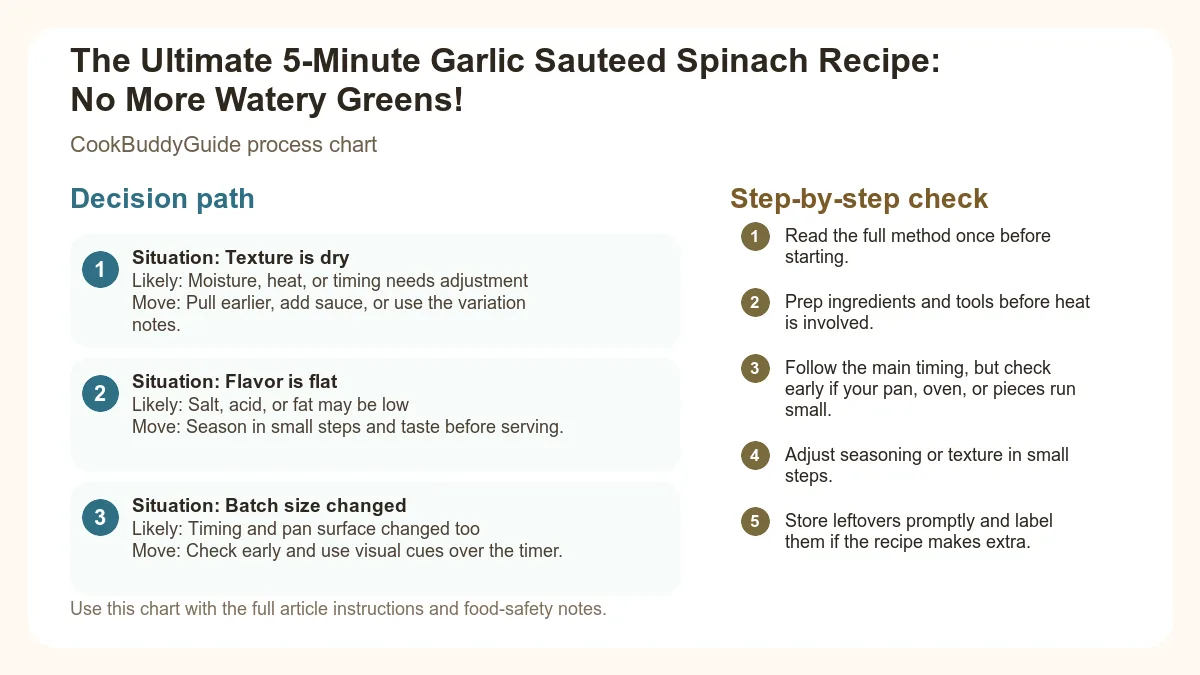
| Situation | Likely cause or meaning | Best move |
|---|---|---|
| Texture is dry | Moisture, heat, or timing needs adjustment | Pull earlier, add sauce, or use the variation notes. |
| Flavor is flat | Salt, acid, or fat may be low | Season in small steps and taste before serving. |
| Batch size changed | Timing and pan surface changed too | Check early and use visual cues over the timer. |
Step-by-step fix
- Read the full method once before starting.
- Prep ingredients and tools before heat is involved.
- Follow the main timing, but check early if your pan, oven, or pieces run small.
- Adjust seasoning or texture in small steps.
- Store leftovers promptly and label them if the recipe makes extra.
Common mistakes
- Changing the recipe before trying the base method once.
- Measuring casually when texture depends on ratios.
- Waiting until the end to fix seasoning.
- Ignoring carryover heat or resting time.
Useful next reads
Helpful tools for this guide
- instant-read thermometer
- digital kitchen scale
- cutting board
- airtight storage containers
Related topic hubs
The Ultimate 5-Minute Garlic Sauteed Spinach Recipe: No More Watery Greens!
It’s 6:15 PM on a Tuesday. You’ve got a beautiful piece of salmon resting on the counter, but your side dish game is lagging. You reach into the crisper drawer and pull out that massive, pillow-sized bag of fresh greens. You think, "Perfect, a quick sauteed spinach recipe will round this out." But then the memories of past failures haunt you: the spinach that turned into a grey, swampy puddle; the garlic that burnt to a bitter crisp; the realization that your three-pound bag of leaves has shrunk into a single, lonely tablespoon of food.
In my 15+ years of testing recipes for CookBuddyGuide.com, I have probably cooked enough spinach to fill an Olympic-sized swimming pool. I’ve made every mistake in the book, from salting too early to using a pot that was too deep. After dozens of trials, I’ve perfected the technique for garlic sauteed spinach 5 minutes style—a method that guarantees vibrant, emerald-green wilted spinach that is tender, flavorful, and, most importantly, not watery.
Table of Contents
- Why This is the Only Sauteed Spinach Recipe You Need
- The Secret to Perfect Garlic Sauteed Spinach
- Essential Ingredients for Success
- Step-by-Step: How to Make it in 5 Minutes
- Pro Tips from the CookBuddyGuide Kitchen
- Flavor Variations to Elevate Your Greens
- Common Mistakes and How to Fix Them
- Nutritional Powerhouse: Why We Love Spinach
- What to Serve with Your Spinach
- Storage and Reheating Tips
Why This is the Only Sauteed Spinach Recipe You Need
The 5-Minute Weeknight Hero
When we talk about a quick recipe, we usually mean 20 or 30 minutes. But this garlic sauteed spinach 5 minutes method is literal. Once your pan is hot, the actual cooking time is closer to 90 seconds. It is the ultimate weeknight hero because it requires zero chopping (if using baby spinach) and provides a massive hit of micronutrients with almost zero effort. It’s a vegan side dish that’s also keto-friendly and low carb, making it the perfect "bridge" dish when you're cooking for a family with diverse dietary needs.
The Science of the Shrink: Why Volume Matters
In my early years as a chef, I remember being shocked by how much spinach disappears in the pan. I discovered that spinach is roughly 90% water. When heat hits those cell walls, they collapse and release that moisture. This is why understanding how much spinach to buy is crucial. As a rule of thumb, one pound of raw spinach will yield roughly one cup of cooked greens. If you are feeding a family of four, you need at least two large bags. Expecting a small bunch to feed a crowd is the fastest way to leave your guests hungry.
The Secret to Perfect Garlic Sauteed Spinach (No More Soggy Greens)
Why Dry Spinach is Non-Negotiable
The biggest enemy of a good sauteed spinach recipe is residual water from washing. If your leaves are wet when they hit the oil, they won't sauté; they will steam. Steaming leads to that dull, olive-drab color and a mushy texture. According to culinary experts at drying spinach before cooking is the single most important step for a restaurant-quality finish. I always recommend using a salad spinner. If you don't have one, roll the leaves in a clean kitchen towel and give them a gentle squeeze. You want them bone-dry before they touch the extra virgin olive oil.
Choosing the Right Pan: Surface Area is Key
I’ve tested this in stainless steel, non-stick, and copper, but my absolute favorite tool is a large cast iron skillet. Why? Surface area and heat retention. You want a wide pan so the spinach has room to touch the hot surface immediately. If you pile 10 inches of raw spinach into a small, deep pot, the bottom layer will turn to mush before the top layer even feels the heat. A wide skillet or even a wok allows for a quick, even wilt. The cast iron also holds heat better, ensuring the temperature doesn't drop the moment the cold greens hit the pan.
Essential Ingredients for the Best Sauteed Spinach
Baby Spinach vs. Mature Bunched Spinach
In my testing, Baby spinach is the winner for weeknight convenience. It’s pre-washed, tender, and the stems are thin enough to eat. However, if you want a more "meaty" texture, mature bunched spinach is excellent. Just be prepared to spend 5-10 minutes removing the tough woody stems. For this quick recipe, stick to the bagged baby variety.
The Fat Factor: Olive Oil, Butter, or Both?
While butter adds a lovely richness, extra virgin olive oil is the gold standard here. It has a higher smoke point than butter, which is essential for the high-heat flash-cooking we’re doing. If you want that buttery flavor, I suggest a 50/50 split: start with oil to prevent burning, and toss in a small knob of butter at the very end for a glossy, decadent finish.
Fresh Garlic vs. Jarred: Why it Matters Here
Please, I beg of you, skip the jarred minced garlic for this dish. Because the ingredient list is so short, the quality of each component shines through. Jarred garlic often has a metallic, acidic aftertaste. Take 30 seconds to thinly slice three or four garlic cloves. Slicing rather than mincing is a pro trick; the larger "chips" of garlic are less likely to burn and provide a mellow, sweet garlic flavor rather than a sharp, pungent one.
The Master 5-Minute Garlic Sauteed Spinach
Ingredients:
- 1 lb (16 oz) Baby spinach, thoroughly dried
- 2 tbsp Extra virgin olive oil
- 3 Garlic cloves, thinly sliced
- 1/2 tsp Kosher salt
- 1/4 tsp Freshly cracked black pepper
- 1/2 Lemon (for zest and juice)
- Optional: Pinch of red pepper flakes
Instructions:
- Place a large cast iron skillet over medium-high heat.
- Add the olive oil and sliced garlic. Sauté for about 30-45 seconds until the garlic is fragrant and just starting to turn golden around the edges.
- Add the spinach all at once (it will look like a mountain!). Use tongs to toss the leaves in the garlic oil.
- Continue tossing for 60-90 seconds. As soon as the leaves are 90% wilted and bright green, remove from heat.
- Season with kosher salt, black pepper, and lemon zest. Squeeze the lemon juice over the top just before serving.
Step-by-Step: How to Make Garlic Sauteed Spinach in 5 Minutes
Step 1: Infusing the Oil Without Burning the Garlic
One of the most common complaints I hear is that the garlic tastes burnt. To avoid this, I use a "modified cold start." Add your oil and garlic to the pan while it’s still heating up. This allows the garlic to gently infuse the oil as the temperature rises. If you drop thin slices of garlic into a screaming hot pan, they will turn brown and bitter in three seconds. You’re looking for a "blonde" garlic—pale gold and soft. For more technical tips on this, check out this guide on preventing garlic from burning.
Step 2: The High-Heat Toss
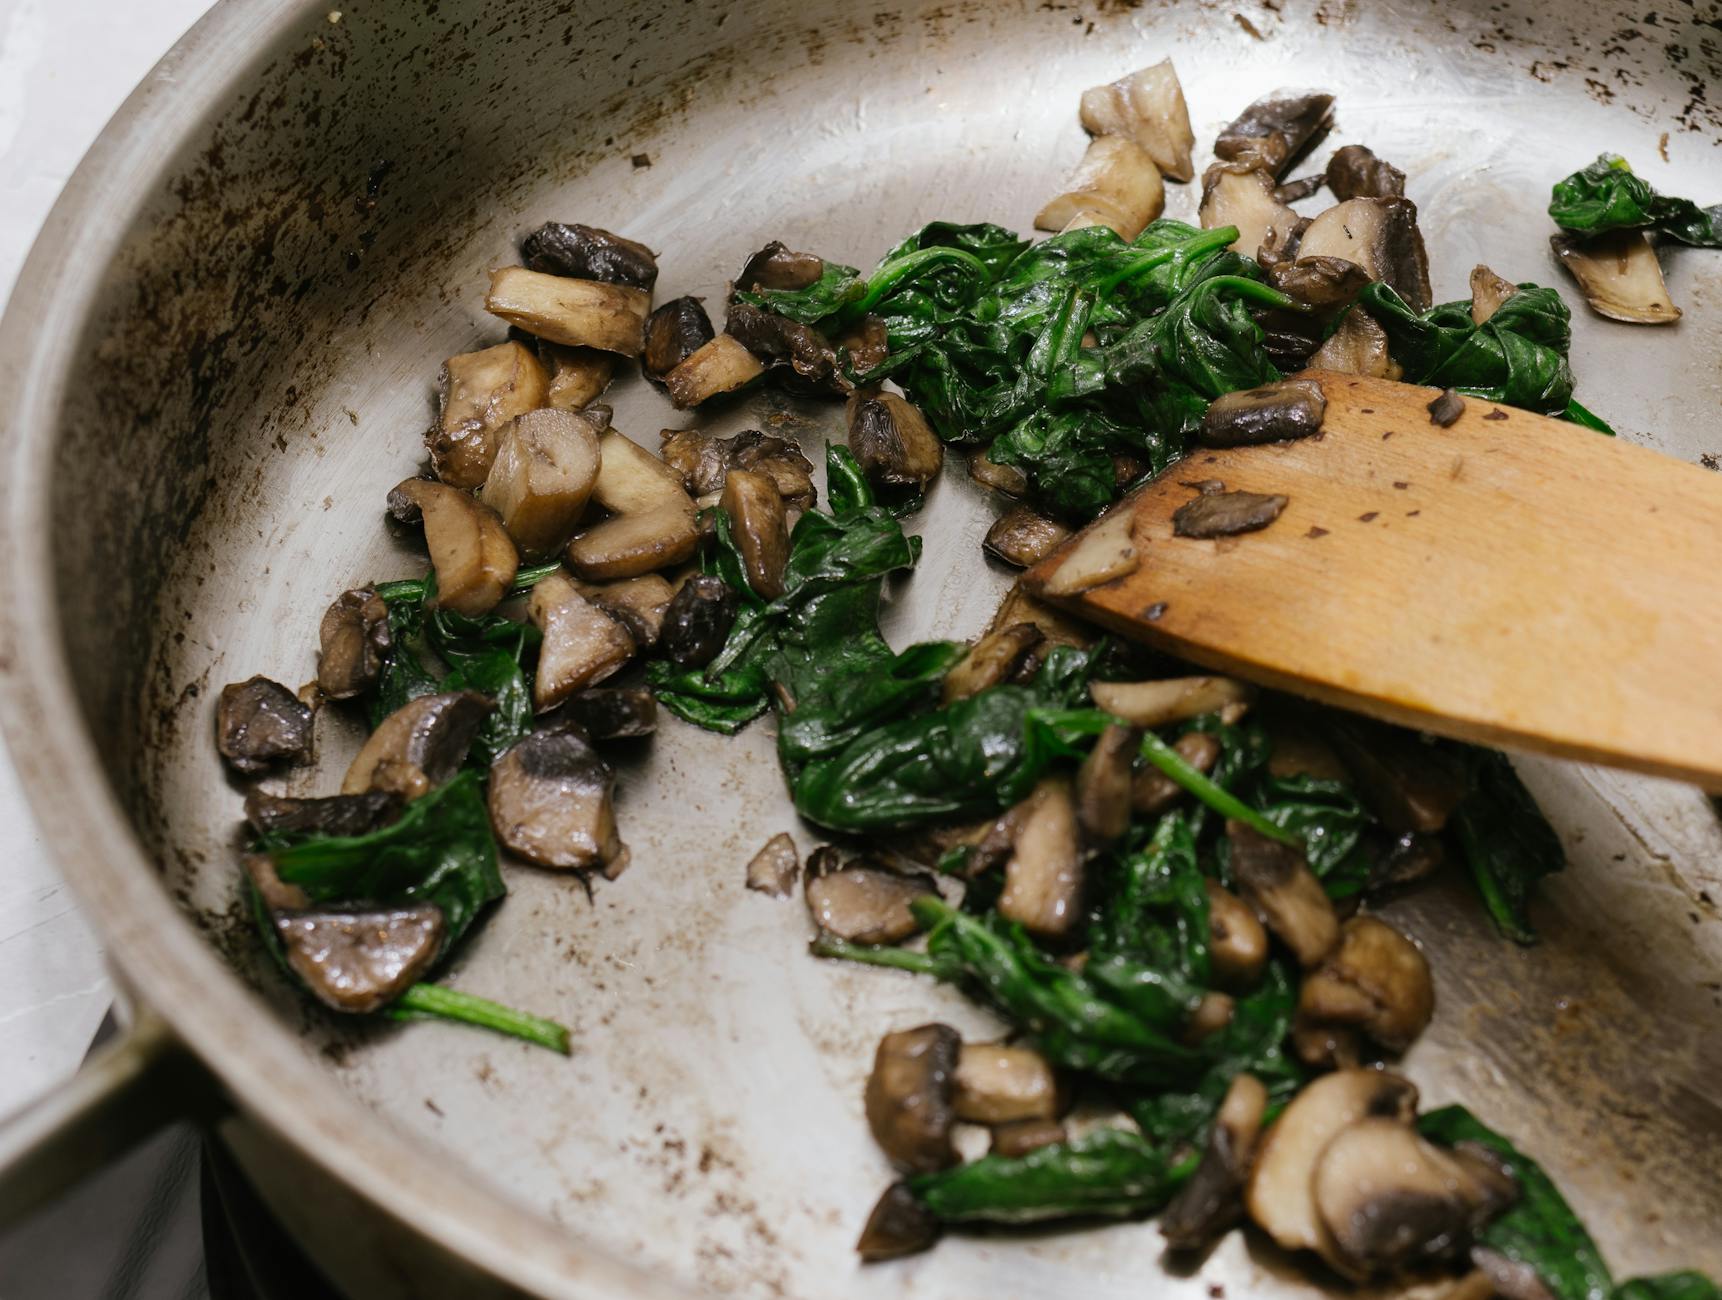
Once the garlic is fragrant, crank the heat to high and dump in the fresh greens. This is where the action happens. Don't walk away! Use a pair of long-handled tongs to constantly lift the bottom leaves to the top. You are essentially "stir-frying" the spinach. The goal is to hit every leaf with the hot oil and the hot pan surface. This rapid sautéing technique ensures the water evaporates instantly rather than pooling at the bottom.
Step 3: The Finishing Touch
The moment the spinach looks wilted but still holds some structure, kill the heat. The residual heat of the cast iron skillet will finish the job. Now is the time for your acids. I love using lemon zest for an aromatic punch and a squeeze of fresh juice to brighten the flavor. Using citrus is a fantastic way to brighten flavors with lemon juice while reducing the need for excess sodium.
Pro Tips from the CookBuddyGuide Kitchen
The Salt Timing Secret
In my 15 years of cooking, this is the rule I live by: Never salt spinach before it wilts. Salt is a desiccant; it draws moisture out of whatever it touches. If you salt the raw leaves, they will start weeping water immediately, leading to a soggy mess. Wait until the very end, once the heat is off, to sprinkle your kosher salt. This keeps the leaves plump and the texture crisp-tender.
Don't Overcrowd the Pan
If you are making a double batch (2 lbs or more), do not try to squeeze it all into one pan at once. Cook it in two batches. It only takes 90 seconds per batch, so you won't lose much time. Overcrowding creates a "cap" of cold leaves that traps steam underneath, which—you guessed it—leads to watery spinach. If you're looking for other fast meals to pair this with, check out our quick chicken breast recipes.
Testing for Doneness
Perfectly wilted greens should be vibrant, almost neon green. If they turn a dark, forest green or brownish-grey, they are overcooked. The stems should still have a very slight "snap" to them. I usually pull my spinach off the burner when there are still a few raw-looking leaves in the mix; they will wilt perfectly on the way to the table.
Flavor Variations to Elevate Your Greens
The Spicy Kick: Red Pepper Flakes
If you like a little heat, add a half-teaspoon of red pepper flakes to the oil at the same time as the garlic. The heat "blooms" in the fat, distributing a consistent spicy undertone throughout the entire sauteed spinach recipe. This is particularly good when serving alongside a rich steak or creamy pasta.
The Mediterranean: Pine Nuts and Golden Raisins
This is a classic Sicilian preparation. Toast a tablespoon of pine nuts in the dry skillet first until golden, then set them aside. Sauté the spinach as usual, but add a tablespoon of golden raisins in the last 30 seconds. The raisins plump up from the heat, and the combination of salty spinach, sweet raisins, and crunchy nuts is world-class.
The Steakhouse Classic: Parmesan and Nutmeg
For a more indulgent healthy side dish, skip the lemon. Instead, grate a tiny bit of fresh nutmeg over the wilted spinach. Nutmeg has a chemical affinity for greens and cream. Finish with a generous dusting of freshly grated Parmesan cheese using a microplane. It’s a low carb way to get that "creamed spinach" flavor without the heavy cream.
Common Mistakes and How to Fix Them
If you followed the steps but still ended up with liquid, don't panic. Use your tongs to lift the spinach out of the pan and onto a serving plate, leaving the liquid behind. Alternatively, you can tilt the pan and use a spoon to bail out the excess water. Next time, ensure the pan is hotter and the spinach is drier!
Garlic turns bitter the moment it crosses from golden to dark brown. If this happens, the best thing to do is wipe the pan out and start over. Since the garlic only takes 45 seconds, it's worth the "reset" to save the whole dish.
This is caused by oxalic acid, a natural compound in spinach. The fix is acid! The lemon juice or a splash of balsamic vinegar neutralizes that "chalky" feeling on your teeth and balances the mineral flavor of the greens.
Nutritional Powerhouse: Why We Love Spinach
Bioavailability: Cooked vs. Raw
While raw spinach is great for salads, cooking it actually unlocks more nutrients. The heat breaks down the oxalic acid (mentioned above), which otherwise binds to calcium and iron, preventing your body from absorbing them. By eating wilted spinach, you're actually getting more bioavailable iron and calcium than you would from a raw salad. This makes it an essential component of healthy weight loss meals.
Key Vitamins and Minerals
According to the USDA's nutritional profile of raw spinach, this leaf is an absolute titan of health. It is packed with Vitamin K (essential for bone health), Vitamin A (for vision), and folate. Plus, at only about 7 calories per cup of raw leaves, it’s one of the most nutrient-dense foods on the planet.
What to Serve with Your 5-Minute Sauteed Spinach
Perfect Protein Pairings
This sauteed spinach recipe is incredibly versatile. I love it with:
- Pan-Seared Salmon: The acidity of the lemon in the spinach cuts through the fatty fish perfectly.
- Roasted Chicken: It adds a pop of color to a traditional Sunday roast.
- Steak: The garlic and black pepper notes are a natural match for beef.
Vegetarian Feast Ideas
If you’re keeping it meat-free, try serving this over a bed of creamy polenta or alongside a rich mushroom risotto. The "brightness" of the fresh greens provides a necessary contrast to earthy, heavy grains. It’s also a great addition to a grain bowl with quinoa, chickpeas, and a tahini dressing.
Storage and Reheating Tips
How Long Does Sauteed Spinach Last?
In my experience, sauteed spinach is best eaten immediately. However, it will stay safe in the fridge for 3-4 days in an airtight container. Be aware that it will continue to release a bit of liquid as it sits, so you may need to drain it again before reheating.
The Best Way to Reheat Without Getting Slimy
Avoid the microwave if you can! The microwave will turn your beautiful greens into a soggy, limp mess. Instead, toss them back into a hot, dry skillet for about 30-60 seconds. You just want to knock the chill off and evaporate any residual moisture. This "flash-reheat" preserves the texture and the vibrant garlic flavor much better than any other method.
Final Thoughts
Mastering the sauteed spinach recipe is a rite of passage for any home cook. It’s the difference between a sad, watery side dish and a vibrant, restaurant-quality accompaniment that people actually want to eat. Remember the golden rules: dry your leaves, use a wide pan, and don't salt until the very end. Once you nail this garlic sauteed spinach 5 minutes method, you'll find yourself reaching for that big bag of greens every single week. Happy cooking!