Quick Answer
Convection vs Regular Oven is built around practical home-kitchen ratios and simple texture checks. Follow the main method first, then use the variation and troubleshooting notes to adjust sweetness, salt, moisture, or cook time.
CookBuddy Kitchen Note
For Convection vs Regular Oven, this guide centers on Convection Bake, Convection Roast, convection oven vs conventional oven. Those are the checkpoints we would use first in a normal home kitchen before making a bigger change.
Decision table
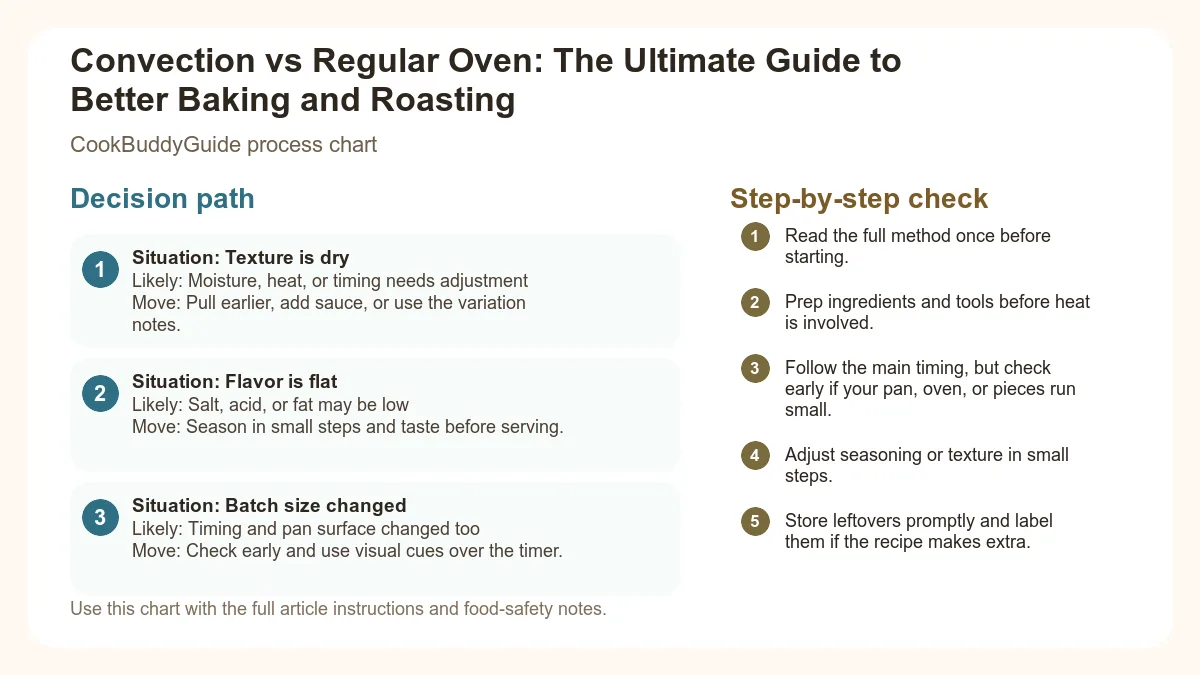
| Situation | Likely cause or meaning | Best move |
|---|---|---|
| Texture is dry | Moisture, heat, or timing needs adjustment | Pull earlier, add sauce, or use the variation notes. |
| Flavor is flat | Salt, acid, or fat may be low | Season in small steps and taste before serving. |
| Batch size changed | Timing and pan surface changed too | Check early and use visual cues over the timer. |
Step-by-step fix
- Read the full method once before starting.
- Prep ingredients and tools before heat is involved.
- Follow the main timing, but check early if your pan, oven, or pieces run small.
- Adjust seasoning or texture in small steps.
- Store leftovers promptly and label them if the recipe makes extra.
Common mistakes
- Changing the recipe before trying the base method once.
- Measuring casually when texture depends on ratios.
- Waiting until the end to fix seasoning.
- Ignoring carryover heat or resting time.
Useful next reads
Helpful tools for this guide
- digital kitchen scale
- instant-read thermometer
- rimmed sheet pan
- silicone spatula
Related topic hubs
Convection vs Regular Oven: The Ultimate Guide to Better Baking and Roasting
I still remember the Thanksgiving of 2009. I had just moved into a new home with a professional-grade range, and I was eager to show off my culinary skills. I popped my perfectly seasoned 14-pound turkey into the oven, set it to 325°F, and toggled a switch labeled "Convection" because it sounded fancy. Two hours later, the skin was a deep, mahogany brown, but when I checked the internal temperature, the thighs were still dangerously undercooked. I had the "burnt outside, raw inside" syndrome—a classic mistake that happens when you don't understand the nuances of convection vs regular oven settings.
After 15 years of testing recipes in my own kitchen and writing for CookBuddyGuide.com, I’ve learned that the convection fan is your greatest ally—if you know how to tame it. Whether you are a busy parent trying to get a sheet pan dinner on the table in record time or a weekend baker striving for the perfect puff pastry, understanding how heat moves in your oven is the secret to consistent results. In this guide, we will dive deep into the science of airflow, the "Golden Rules" of temperature adjustment, and exactly when to flip that fan switch.
Table of Contents
- Understanding the Basics: Convection vs Regular Oven
- The Science of Airflow: Why Convection Cooks Differently
- The Golden Rule: How to Adjust Temperature and Time
- When to Use Convection for Best Results
- When to Stick with the Regular Setting
- Energy Efficiency and Practical Kitchen Benefits
- Pro Tips for Mastering Your Convection Oven
- Common Mistakes to Avoid
- Frequently Asked Questions
Understanding the Basics: Convection vs Regular Oven
To master your kitchen, you first need to understand the hardware. While they may look identical from the outside, the way a convection oven vs conventional oven handles heat is fundamentally different.
What is a Conventional Oven?
A conventional (or regular) oven relies on radiant heat. Most electric ovens have a heating element at the bottom and sometimes one at the top (the broiler). The air inside the oven stays relatively still. As the bottom element heats up, the air warms and rises, but it doesn't move with much force. This often leads to hot spots—areas near the elements or corners where the temperature is significantly higher than the center. In my testing, I've found that regular ovens can vary by as much as 25 to 30 degrees from the top rack to the bottom rack.
What is a Convection Oven?
A convection oven is essentially a regular oven with a fan-assisted system and an exhaust. The fan, usually located at the back of the oven cavity, circulates the hot air around the food. Some high-end models feature "True Convection" or "European Convection," which includes a third heating element located right next to the fan. This ensures that the air being blown onto your food is already heated to the precise temperature you've set, maintaining a state of thermal equilibrium throughout the entire cavity.
The Role of the Convection Fan
The fan is the game-changer. By moving the air, the oven eliminates the pockets of cold air that naturally surround food. Think of it like wind chill in the winter. A 30°F day feels much colder if the wind is blowing at 20 mph because the wind strips away the thin layer of warmth your body generates. In an oven, the fan strips away the "cold" boundary layer of air around a chicken or a tray of cookies, allowing the heat to penetrate much faster. You can learn more about how convection ovens work through the science of heat transfer.
The Science of Airflow: Why Convection Cooks Differently
Why does moving air make such a difference? It comes down to three scientific principles: heat transfer, moisture evaporation, and the Maillard reaction.
The Maillard Reaction and Browning
The Maillard reaction is the chemical reaction between amino acids and reducing sugars that gives browned food its distinctive flavor. Because convection air is constantly moving, it delivers more energy to the surface of the food than still air. This accelerates browning and caramelization. When I roast a chicken on convection, I notice the skin turns golden and crispy much faster than in a regular oven, creating that savory "umami" crust we all crave.
Heat Transfer Efficiency
In a regular oven, heat transfer is relatively slow. In a convection oven, the fan-forced heating creates a more efficient environment. Because the hot air is forced directly onto the food, the internal temperature of a roast will rise more quickly. This is why convection is the preferred method for professional chefs who need to turn out high volumes of food without sacrificing quality.
Moisture Removal for Crispiness
Regular ovens tend to trap moisture, which is released from the food as it cooks. This creates a humid environment—great for some things, but terrible for crisping. The exhaust system in a convection oven vents that moisture out. This drier atmosphere is the secret to why convection-roasted potatoes have that glass-like crunch on the outside while remaining fluffy inside. If you've ever wondered the benefits of convection roasting, it's almost entirely due to this moisture-wicking capability.
The Golden Rule: How to Adjust Temperature and Time
If you take a recipe designed for a regular oven and run it on convection without adjustments, you will likely end up with a kitchen disaster. Because convection is so much more efficient, you must follow the "25/25 Rule."
The 25-Degree Reduction Rule
The industry standard for a convection convert is to reduce the suggested temperature by 25°F (15°C). If a recipe for chocolate chip cookies calls for 350°F in a conventional oven, you should set your convection oven to 325°F. Many modern ovens actually have an "Auto-Convert" feature that does this for you, but I always recommend double-checking the display. I've found that even a 25-degree drop isn't always enough for delicate items, which is why monitoring is key.
The 25% Faster Cooking Rule
In addition to lowering the temperature, you should expect your food to cook about 25% faster. For a roast that usually takes 60 minutes, start checking it at the 45-minute mark. This accelerated timing is why convection is a lifesaver for air fryer chicken recipes (since air fryers are essentially powerful, compact convection ovens).
When to Check for Doneness
Always use a reliable digital thermometer. For meats, don't rely on the clock; rely on the internal temperature. For baked goods, use the "visual and tactile" method. Are the edges set? Is the top golden? Because convection browns so effectively, the food might *look* done before it actually is, so the "toothpick test" remains a baker's best friend. You can find more detailed convection oven temperature adjustment tips from America's Test Kitchen.
Pro-Level Convection Roasted Chicken
This recipe utilizes the dry, moving air of convection to achieve the ultimate crispy skin without overcooking the breast meat.
Ingredients:- 1 whole chicken (4 lbs), patted extremely dry
- 2 tbsp unsalted butter, softened
- 1 tbsp kosher salt
- 1 tsp cracked black pepper
- Fresh thyme and rosemary
- Preheat your oven to 375°F on the Convection Roast setting.
- Rub the butter under the skin and all over the outside. Season generously with salt and pepper.
- Place the chicken on a V-rack inside a low-sided roasting pan. This allows air circulation under the bird.
- Roast for 50-60 minutes, or until the thickest part of the thigh reaches 165°F.
- Let rest for 15 minutes before carving. The skin will be crackly and the meat incredibly juicy.
When to Use Convection for Best Results
Not every dish belongs in a wind tunnel. However, for certain categories of cooking, the convection setting is non-negotiable if you want professional results.
Roasting Meats and Vegetables
This is where convection shines. Whether it's a rib roast, a tray of Brussels sprouts, or a whole turkey, the moving air ensures that every surface is exposed to heat. This leads to better fat rendering in meats and superior caramelization in vegetables. I've found that when I use a baking sheet for roasted broccoli on convection, I don't even need to toss them halfway through; the fan-assisted heat reaches the bottom of the florets perfectly.
Baking Cookies and Biscuits
Have you ever baked two trays of cookies and had to swap them halfway through because the bottom tray wasn't browning? With convection, you can load up every oven rack placement available. Because the fan creates a uniform temperature, you can bake three sheets of cookies at once with perfectly even results. The cookies also tend to have a better "snap" because the fan dries the exterior slightly faster, creating a crisp edge and a chewy center.
Dehydrating and Toasting
If you enjoy making your own beef jerky or dried fruit, the convection setting is your best friend. The low-moisture environment and constant airflow mimic a professional dehydrator. It’s also the fastest way to toast a large batch of nuts or breadcrumbs for a crowd.
Perfecting Puff Pastry and Pies
Puff pastry relies on the rapid evaporation of water in the butter layers to "puff." The intense, moving heat of a convection oven triggers this reaction more violently, leading to higher rise and flakier layers. For fruit pies, the convection setting helps brown the bottom crust (preventing the dreaded "soggy bottom") while beautifully caramelizing the lattice top.
When to Stick with the Regular (Conventional) Setting
Despite its benefits, the convection fan can be a bully to delicate foods. There are times when the "still" heat of a conventional oven is exactly what you need. As noted in this guide on baking with convection settings, some items just don't handle the wind well.
Delicate Cakes and Soufflés
The force of the fan can actually blow the batter of a delicate sponge cake or a soufflé to one side, causing it to rise unevenly or even collapse. I once tested a chiffon cake on convection and it ended up looking like a leaning tower of Pisa. For any cake that relies on air bubbles for structure, stick to the regular setting.
Quick Breads and Muffins
Quick breads (like banana bread) and muffins can develop a "blown" look on convection, where the top crust sets too quickly and then rips as the interior continues to rise. A regular oven allows for a slower, more even expansion, resulting in a beautiful, rounded dome.
Custards and Cheesecakes
Custards, flans, and cheesecakes require a moist environment to prevent cracking. The convection oven's tendency to remove moisture is the enemy here. Furthermore, the moving air can create "waves" or ripples on the surface of a delicate custard before it sets. Always use a regular oven and a water bath for these items.
Bread Baking with Steam
While convection is great for some crusty loaves, many artisanal bread recipes require steam during the first 10 minutes of baking to achieve a massive "oven spring." A convection fan will quickly vent out any steam you try to introduce, leading to a dull, thick crust rather than a shiny, thin, crackly one.
Energy Efficiency and Practical Kitchen Benefits
Beyond the quality of the food, there are practical reasons to embrace the convection oven vs conventional oven debate in favor of the fan.
Lowering Your Utility Bill
Because you are cooking at a lower temperature (by 25°F) and for a shorter duration (by 25%), you are using significantly less energy. Over the course of a year, if you roast and bake frequently, this can lead to noticeable savings on your electricity or gas bill. It’s a win for your wallet and the environment.
Saving Time on Busy Weeknights
When it’s 6:00 PM and you still need to roast chicken thighs and potatoes, those 10-15 minutes you save with convection are gold. It reduces the preheating time slightly in some models and certainly gets the food to the table faster. This efficiency is why I always recommend convection for "emergency" dinners.
Maximizing Oven Space
The ability to use three racks at once without worrying about hot spots is a game-changer for holiday cooking. In a regular oven, the bottom rack is often too hot and the top rack too cool. In convection mode, the entire oven becomes a usable zone. You can roast your vegetables on the bottom, your rolls in the middle, and a small ham on top, all at the same time.
Multi-Rack Perfect Chocolate Chip Cookies
Using parchment paper and rimless sheets, you can bake up to 36 cookies at once with this method.
Key Tip:In my experience, using a convection convert temperature of 325°F prevents the edges from burning while the centers stay soft.
Instructions:- Preheat oven to 325°F on Convection Bake.
- Line three rimless baking sheets with parchment paper.
- Space cookie dough balls 2 inches apart.
- Slide all three racks into the oven. No need to rotate!
- Bake for 8-10 minutes. The cookies are done when the edges are just barely golden.
Pro Tips for Mastering Your Convection Oven
After years of trial and error, I’ve found that the tools you use are just as important as the settings you choose.
Choosing the Right Bakeware
Airflow is the name of the game. If the air can't reach the food, the convection setting is useless. Use parchment paper instead of silicone mats for the best airflow, as silicone can sometimes act as an insulator, slowing down the heat transfer to the bottom of your bakes.
The Importance of Low-Sided Pans
This is a mistake I see often. If you put a chicken in a high-sided roasting pan, the sides of the pan block the fan-forced air from reaching the lower half of the bird. The result? Crispy skin on top, soggy skin on the bottom. Always use low-sided pans or, better yet, a rimless baking sheet for vegetables and cookies.
Don't Crowd the Oven
While you can use multiple racks, you shouldn't pack them so tightly that air can't circulate. Leave at least an inch of space between the pans and the oven walls. In my testing, when I crowded a rack with two large sheets that touched the sides, the "convection effect" was neutralized, and I ended up with uneven browning.
Using 'Convection Roast' vs. 'Convection Bake'
Many modern ovens have two convection settings.
- Convection Bake: Uses a lower fan speed. Ideal for cookies, pies, and biscuits.
- Convection Roast: Uses a higher fan speed and often cycles the broiler element. This is designed for large cuts of meat and hearty vegetables where maximum crisping is the goal.
Common Mistakes to Avoid
Avoid these pitfalls to ensure your convection experience is a success from day one.
Forgetting to Adjust the Temperature
This is the number one cause of "convection failure." If you see a recipe online, assume it is written for a conventional oven unless stated otherwise. Always subtract those 25 degrees!
Covering Food with Foil
If you cover a dish tightly with aluminum foil, you are effectively turning off the convection feature for that food. The foil blocks the air circulation and traps steam. If you must cover something to prevent over-browning, do it loosely, or wait until the very end of the cooking process.
Ignoring the Preheating Phase
Because the fan moves air around, some people think they can skip the preheating time. This is a myth. For the fan to do its job, the air it’s moving needs to be at the target temperature. Putting food in a cold convection oven often leads to poor texture, especially in baked goods that need a "kick" of heat to rise.
Frequently Asked Questions
A: Yes, but make sure it is weighted down by the food. The strong fan can sometimes blow the corners of the paper up and over the food, leading to uneven cooking or a messy situation.
A: Essentially, yes. An air fryer is a small, highly concentrated convection oven. The fan is much larger relative to the cavity size, which is why it cooks even faster than a full-sized convection oven.
A: This is likely due to the force of the convection fan. For light batters, the moving air can push the liquid before it sets. Stick to the regular setting for cakes.
Conclusion: The Path to Better Cooking
Mastering the convection vs regular oven debate is one of the simplest ways to level up your home cooking. By understanding that convection is about airflow and moisture removal, you can make informed decisions about every meal. Use the fan for that Sunday roast or a batch of crispy cookies, but give your delicate cheesecakes the "still" heat they deserve in a conventional setting. Remember the 25/25 rule, invest in low-sided pans, and always trust your internal temperature thermometer over the kitchen timer. Happy cooking!