Quick Answer
Your banana bread sinking usually comes down to a controllable kitchen variable such as heat, timing, moisture, measuring, or storage history. Start with the most visible clue, change one variable, and compare the next batch before changing the whole method.
CookBuddy Kitchen Note
For your banana bread sinking, the most useful home checks are temperature, measuring, resting time, and visible texture. Those details tell you more than guessing, especially before adding extra flour, liquid, heat, or leavening.
Decision table
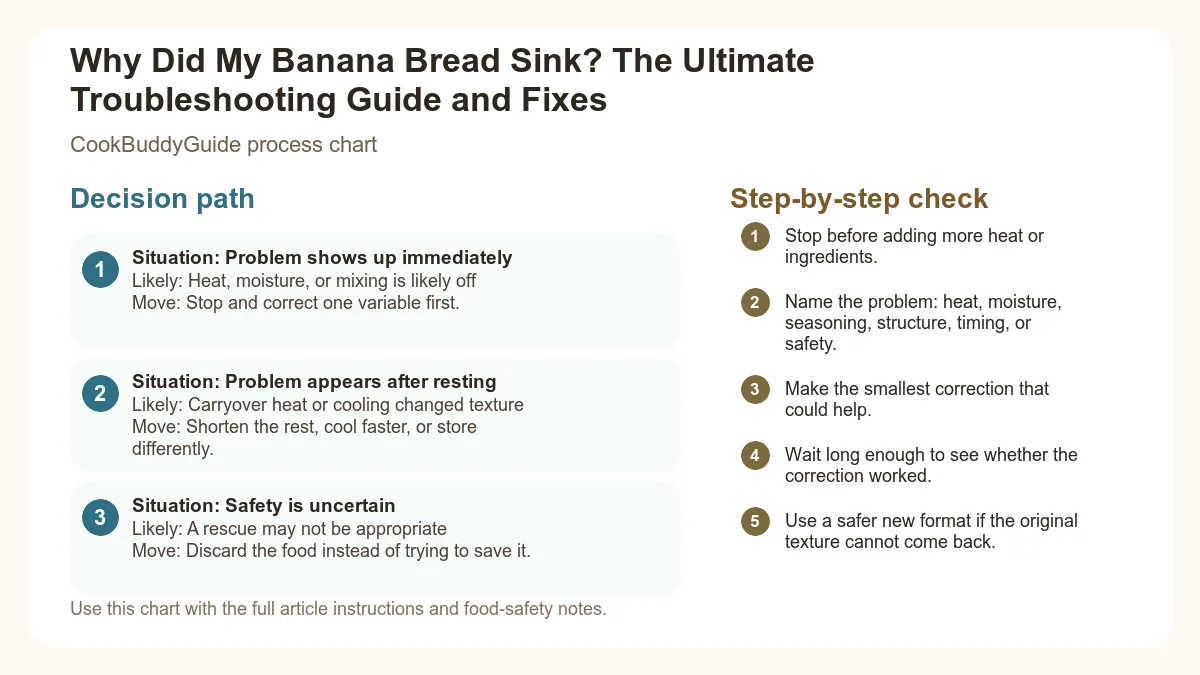
| Situation | Likely cause or meaning | Best move |
|---|---|---|
| Problem shows up immediately | Heat, moisture, or mixing is likely off | Stop and correct one variable first. |
| Problem appears after resting | Carryover heat or cooling changed texture | Shorten the rest, cool faster, or store differently. |
| Safety is uncertain | A rescue may not be appropriate | Discard the food instead of trying to save it. |
Step-by-step fix
- Stop before adding more heat or ingredients.
- Name the problem: heat, moisture, seasoning, structure, timing, or safety.
- Make the smallest correction that could help.
- Wait long enough to see whether the correction worked.
- Use a safer new format if the original texture cannot come back.
Common mistakes
- Adding several fixes at once and losing track of what helped.
- Using high heat to rush a texture problem.
- Trying to rescue food when safety is uncertain.
- Repeating the recipe without writing down the likely cause.
Useful next reads
Helpful tools for this guide
- digital kitchen scale
- instant-read thermometer
- rimmed sheet pan
- silicone spatula
Related topic hubs
Table of Contents
- The Heartbreak of the Sunken Loaf: Why It Happens
- Cause #1: Underbaking (The Most Common Culprit)
- Cause #2: Too Much Banana (The Moisture Trap)
- Cause #3: Overmixing the Batter
- Cause #4: Expired or Incorrect Leavening Agents
- Cause #5: Oven Temperature and Door Peeking
- The Banana Bread Sinking in Middle Fix: Step-by-Step Prevention
- How to Salvage a Sunken Banana Bread
- The Ultimate Foolproof Banana Bread Recipe
The Heartbreak of the Sunken Loaf: Why It Happens
To understand why a loaf collapses, we have to look at the science of quick bread structure. When you slide your loaf pan into the oven, a series of rapid-fire chemical reactions begins. First, the heat causes the leavening agents (baking soda or baking powder) to release carbon dioxide gas. These gas bubbles expand, pushing against the batter to create "lift." Simultaneously, the heat triggers starch gelatinization and protein coagulation. This is the process where the flour and eggs transform from a liquid state into a solid, stable structure. If the gas bubbles expand faster than the structure can set, or if the structure is too weak to hold those bubbles up once the steam escapes, the bread will collapse.Why the Middle is the Most Vulnerable Spot
The center of the loaf is the furthest point from the heat source. Heat must travel through the loaf pan size walls, then through the outer layers of the batter, to reach the core. While the edges are busy undergoing the Maillard reaction (the browning process that creates that delicious crust), the middle is still essentially a liquid. If you pull the bread out before the internal structure at the very center has reached its setting point, gravity will win every time.Cause #1: Underbaking (The Most Common Culprit)
In my experience, 90% of the time a reader asks me "why did my banana bread sink?", the answer is simply that it wasn't in the oven long enough. This is frustrating because banana bread often *looks* done long before it actually is.The Illusion of the Golden Crust
Because banana bread is high in sugar (from both the added sugar and the natural fructose in overripe bananas), it undergoes the Maillard reaction and caramelization very quickly. The exterior can look dark, mahogany, and perfectly crisp while the interior is still raw batter. This is especially true if your oven is running too hot.Why the Toothpick Test Can Fail You
We’ve all been taught the toothpick test: insert a skewer into the center, and if it comes out clean, the bread is done. However, with banana bread, this is notoriously unreliable. A toothpick can pass through a pocket of melted sugar or a piece of mashed banana and come out looking "clean" or "moist but not wet," even if the internal temperature hasn't reached the point of starch gelatinization. The Fix: Stop guessing and start measuring. I discovered years ago that the only way to guarantee success is to use a digital food thermometer. For a perfectly set quick bread that won't sink, you are looking for an internal temperature of quick breads between 200°F and 205°F (93°C–96°C). At this temperature, the proteins and starches have fully bonded, creating a skeleton strong enough to support the weight of the fruit.Cause #2: Too Much Banana (The Moisture Trap)
It’s tempting to throw in that fourth or fifth black banana sitting on your counter. You think, "The more banana, the better the flavor, right?" Unfortunately, this is a recipe for a gummy middle.Why "3 Large Bananas" is a Dangerous Instruction
Bananas are not a standardized unit of measurement. One "large" banana might yield 1/2 cup of mash, while another yields 3/4 cup. When you add too much fruit, you are introducing excess water and sugar without increasing the structural components (flour and eggs). This managing moisture in banana bread is critical because excess weight from the fruit will literally crush the air bubbles created by your baking soda.The Ratio of Wet to Dry Ingredients
A balanced batter needs enough flour to "soak up" the moisture from the bananas. If the ratio is off, the bread will rise beautifully in the oven due to steam, but because there isn't enough starch to hold that height, it will crater as soon as it hits the cooling rack. The Fix: Always measure your mashed bananas by volume or, preferably, by weight. After making this 20+ times in a single week for a bake sale, I found the "sweet spot" is exactly 1 cup (approx. 225g) of mashed banana for every 1.5 to 2 cups of flour. If you have extra bananas, freeze them for smoothies instead of forcing them into the loaf.Cause #3: Overmixing the Batter
This is the mistake I made most often when I first started my culinary journey. You want the batter to be smooth, so you keep whisking. But banana bread isn't a cake; it’s a quick bread.Gluten Development in Quick Breads
The moment liquid touches flour, gluten development begins. Some gluten is necessary for structure, but overworking the batter creates a web of gluten that is too strong and elastic. When this happens, the bread traps too much air and expands aggressively in the oven. However, because the structure is "tough" rather than "sturdy," it eventually loses its elasticity and snaps, leading to a massive collapse in the center.The "Tough and Heavy" Result
Overmixed banana bread often has large, tunnel-like holes (called tunneling) and a dense texture. To prevent this, you must avoid overmixing the batter by using the "muffin method." The Fix: Mix your wet and dry ingredients separately. When you combine them, use a large spatula and fold the mixture until you see no more streaks of dry flour. A few lumps are perfectly fine! Stop the moment the flour disappears.Cause #4: Expired or Incorrect Leavening Agents
If your bread didn't rise much at all and then slumped, the issue is likely chemical. Baking soda vs. baking powder is a common point of confusion for home cooks.The Chemical Lift
Most banana bread recipes use baking soda because bananas are acidic. The soda reacts with the acid to create immediate lift. If you use too much baking soda, the bread will rise too fast, the bubbles will merge into one giant bubble, and the whole thing will pop and sink. If your baking soda is old, it won't produce enough gas to lift the heavy batter at all.How to Test Your Leaveners for Potency
Don't trust the "best by" date on the box. Humidity can kill the potency of leaveners long before the date arrives. You should test your baking soda's potency regularly. The Fix: To test baking soda, drop a spoonful into some vinegar; it should fizz violently. For baking powder, drop it into hot water. If the reaction is sluggish, toss it. Also, ensure you are using a level measuring spoon—precision matters here.Cause #5: Oven Temperature and Door Peeking
Your oven might be your own worst enemy. Most home ovens are notoriously inaccurate, often fluctuating by 25°F or more from the set temperature.The Danger of the Early Oven Opening
I know it’s tempting to peek, but opening the oven door in the first 30 minutes of baking is a cardinal sin. This causes a sudden drop in temperature and a literal "wind" of cool air that can shock the rising loaf. This is a major reason why cakes sink in the middle, and quick breads are even more susceptible.Inaccurate Oven Calibration
If your oven is too cool, the bread will take too long to rise, and the leaveners will "tire out" before the structure sets. If it’s too hot, the outside will burn before the middle is cooked. The Fix: Buy an independent oven thermometer that sits on the rack. It’s a $10 investment that will save you hundreds of dollars in wasted ingredients. And remember: use the oven light to check on your progress, not the door!The Banana Bread Sinking in Middle Fix: Step-by-Step Prevention
Beyond the main causes, these professional tips will ensure your banana bread is a staple of your easy breakfast meal prep without any sinking drama.Proper Pan Selection and Preparation
The material of your pan matters. Dark-colored metal pans absorb heat faster, which can lead to burnt edges and a raw middle. I prefer light-colored aluminum pans for even heat distribution. If you only have a dark pan, reduce your oven temperature by 25°F.The Importance of Room Temperature Ingredients
This is a step many busy cooks skip. Using cold eggs or cold milk can cause the melted butter or fat in your recipe to seize up, creating an uneven emulsion. Room temperature ingredients bond more easily, creating a smooth, stable batter that holds air better.The Aluminum Foil Tent Technique
If your bread is browning too deeply but the internal temperature hasn't reached 200°F, don't pull it out! Instead, loosely drape a piece of aluminum foil tent over the top of the pan. This reflects the direct heat, allowing the center to continue cooking without the top burning.How to Salvage a Sunken Banana Bread
If you’re reading this and your loaf has already collapsed, don't throw it away! Even a "failed" loaf is delicious. It’s actually one of my favorite toddler friendly meal ideas because the texture is soft and easy to chew.- Banana Bread French Toast: Slice the bread, dip it in an egg/milk mixture, and fry it. The frying process "finishes" the cooking of any slightly gummy spots and adds a wonderful crust.
- Banana Bread Pudding: Cube the loaf and bake it in a custard. The extra bake time fixes the texture issues.
- Banana Bread Truffles: If the middle is truly too gummy to eat, scoop out the cooked edges, crumble them, mix with a little cream cheese, and roll into balls dipped in chocolate.
The Ultimate Foolproof Banana Bread Recipe
This recipe is the result of years of refinement. It uses a specific ratio designed to provide maximum structural integrity to prevent sinking.The CookBuddyGuide "No-Sink" Banana Bread
- 1.5 cups (190g) All-purpose flour (spooned and leveled)
- 1 teaspoon Baking soda (fresh!)
- 1/2 teaspoon Salt
- 1/2 teaspoon Cinnamon
- 1 cup (225g) Mashed overripe bananas (about 2-3 medium bananas)
- 1/2 cup (115g) Unsalted butter, melted and cooled
- 3/4 cup (150g) Brown sugar, packed
- 1 Large egg, room temperature
- 1 teaspoon Vanilla extract
- 2 tablespoons Sour cream or Greek yogurt (the secret for moisture without weight)
- Preheat oven to 350°F (175°C). Grease an 8.5 x 4.5-inch loaf pan.
- In a medium bowl, whisk together flour, baking soda, salt, and cinnamon.
- In a large bowl, combine mashed bananas, melted butter, brown sugar, egg, vanilla, and sour cream. Whisk until smooth.
- Gently fold the dry ingredients into the wet ingredients using a spatula. Stop as soon as no flour streaks remain.
- Pour into the prepared pan. Bake for 60 to 70 minutes.
- The Critical Step: At 50 minutes, check the color. If dark, tent with foil. At 60 minutes, use a digital food thermometer to check the center. Pull the loaf when it hits 202°F.
- Let cool in the pan for 10 minutes, then transfer to a cooling rack to cool completely before slicing.
Frequently Asked Questions
A: Unfortunately, no. Once the bread has cooled and the structure has collapsed, putting it back in the oven will only dry out the edges without fixing the dense center. It's better to use one of the salvage methods mentioned above.
A: This is usually due to over-mashing the bananas into a liquid or using too much fruit. Try leaving the bananas slightly chunky next time to provide "pockets" of moisture rather than a saturated batter.
A: Yes! If you put batter meant for a 9x5 pan into an 8x4 pan, it will be too deep. The center will never reach the proper temperature before the outside burns, leading to an inevitable sink.